When you are rebuilding a boat floor, you reach a point where you have to stop patching and start cutting. On the Bayliner 175 project, it was finally time to address the gaping hole in the center of the deck and install the ski locker.
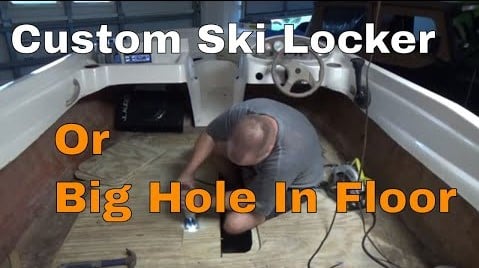
If you are tackling a similar marine flooring project, here is the forensic breakdown of how we reinforced the deck, handled the fiberglass resin, and managed the “peanut butter” filler to get a solid, walkable surface.
The Investigation: Structural Weakness
I initially tried to bridge the ski locker gap with thin support strips, but as a 230-pound guy, the floor just wouldn’t hold my weight. It flexed far too much to be safe.
- The Constraint: I didn’t have a router on hand, so I had to make do with a jigsaw and a wood blade.
- The Lesson: If you use a jigsaw on marine plywood, use a fine-tooth blade to prevent splintering. I used a standard wood blade and paid the price in heavy sanding later.
The Project: Installing the Ski Locker Floor
- Measurement & Cutting: We needed a 43-inch by 24-inch section of marine-grade plywood. I measured it out in 12-inch increments to ensure the fit was exact before dropping it into the “buoyancy pockets.”
- Reinforcement: To prevent the edges from flexing where the new floor meets the old, I installed wooden lips under the seams. This provides a solid shelf for the new plywood to sit on.
- The Resin System: I used a 5-to-1 epoxy resin system.
- Pro Tip: Wet the wood with straight resin first. Marine plywood is treated, but it can still “starve” your fiberglass if it absorbs the resin before it cures.
- The “Peanut Butter” Mix: To fill the gaps and holes, I mixed resin with a thickener (fiberglass dust) to create a “peanut butter” consistency. This creates a structural filler that you can sand smooth once it cures.
The Logistics: Finishing and Cleanup
- Sanding: I used 180-grit sandpaper for the initial pass to take down the rough resin ridges. I also rigged up a “sander on a stick” connected to my shop vac to keep the dust down—fiberglass dust is no joke, so always wear a mask.
- Oxidation: Danielle has been hard at work on the window frames. Bare aluminum oxidizes fast in the Florida humidity, so we are focused on getting those cleaned and sealed as quickly as possible.
Looking Ahead
Now that the structural floor is in, we have a few big steps left for the deck:
- Two-Part Expanding Foam: We’ll be filling the buoyancy pockets with 2-pound flotation foam.
- Anti-Slip Coating: Instead of traditional carpet, we are going with a more budget-friendly deck paint mixed with anti-slip grit (like a diving board texture).
- Navigation: We picked up a Garmin unit with North American coastal maps so we can actually navigate once this boat hits the water.
Watch the full floor install and see the “peanut butter” filler in action here: Boat Ski Locker Installation
Rebuilding a boat is hungry work. If you’re looking for a solid meal after a day of sanding, check out Danielle’s latest recipes over at www.dininginwithdanielle.com. She’s focusing on high-flavor, low-salt dishes that are perfect for keeping you fueled up for the next project.
Y’all please take care.