Installing the SeaWater Pro Water Maker: A Basic Guide
When it comes to boating and sailing, having access to fresh water is crucial. That’s where the SeaWater Pro water maker comes into play. This guide will take you through the basics of the installation process, from start to finish. We used the video guides from SeaWater Pro for the details of the install on YouTube.


Unboxing and Initial Setup
The first step in the installation process is to unbox the SeaWater Pro. Inside, you’ll find the main components including the pump, tubes, and various fittings. It’s important to familiarize yourself with each part before starting the installation.

After digging through the box, I decided on a location for the pump based on my wife’s suggestion. Initially, I considered several spots but ultimately settled on placing it under the couch. This location allows for ample ventilation, which is crucial for preventing any overheating of the pump, especially since it’s an expensive piece of equipment.
Components Overview
Before diving into the installation, let’s take a look at the various components included:
- Low-pressure boost pump
- Control panel
- High-pressure pump
- Filters (carbon, 20-micron, and 5-micron)
- Hoses and wiring for connections
- Quality monitor for water testing
- Pickling solution for membranes

Each component plays a vital role in ensuring that the water maker functions correctly, so understanding their purpose will help during installation.
Installation of Low and High Pressure Systems
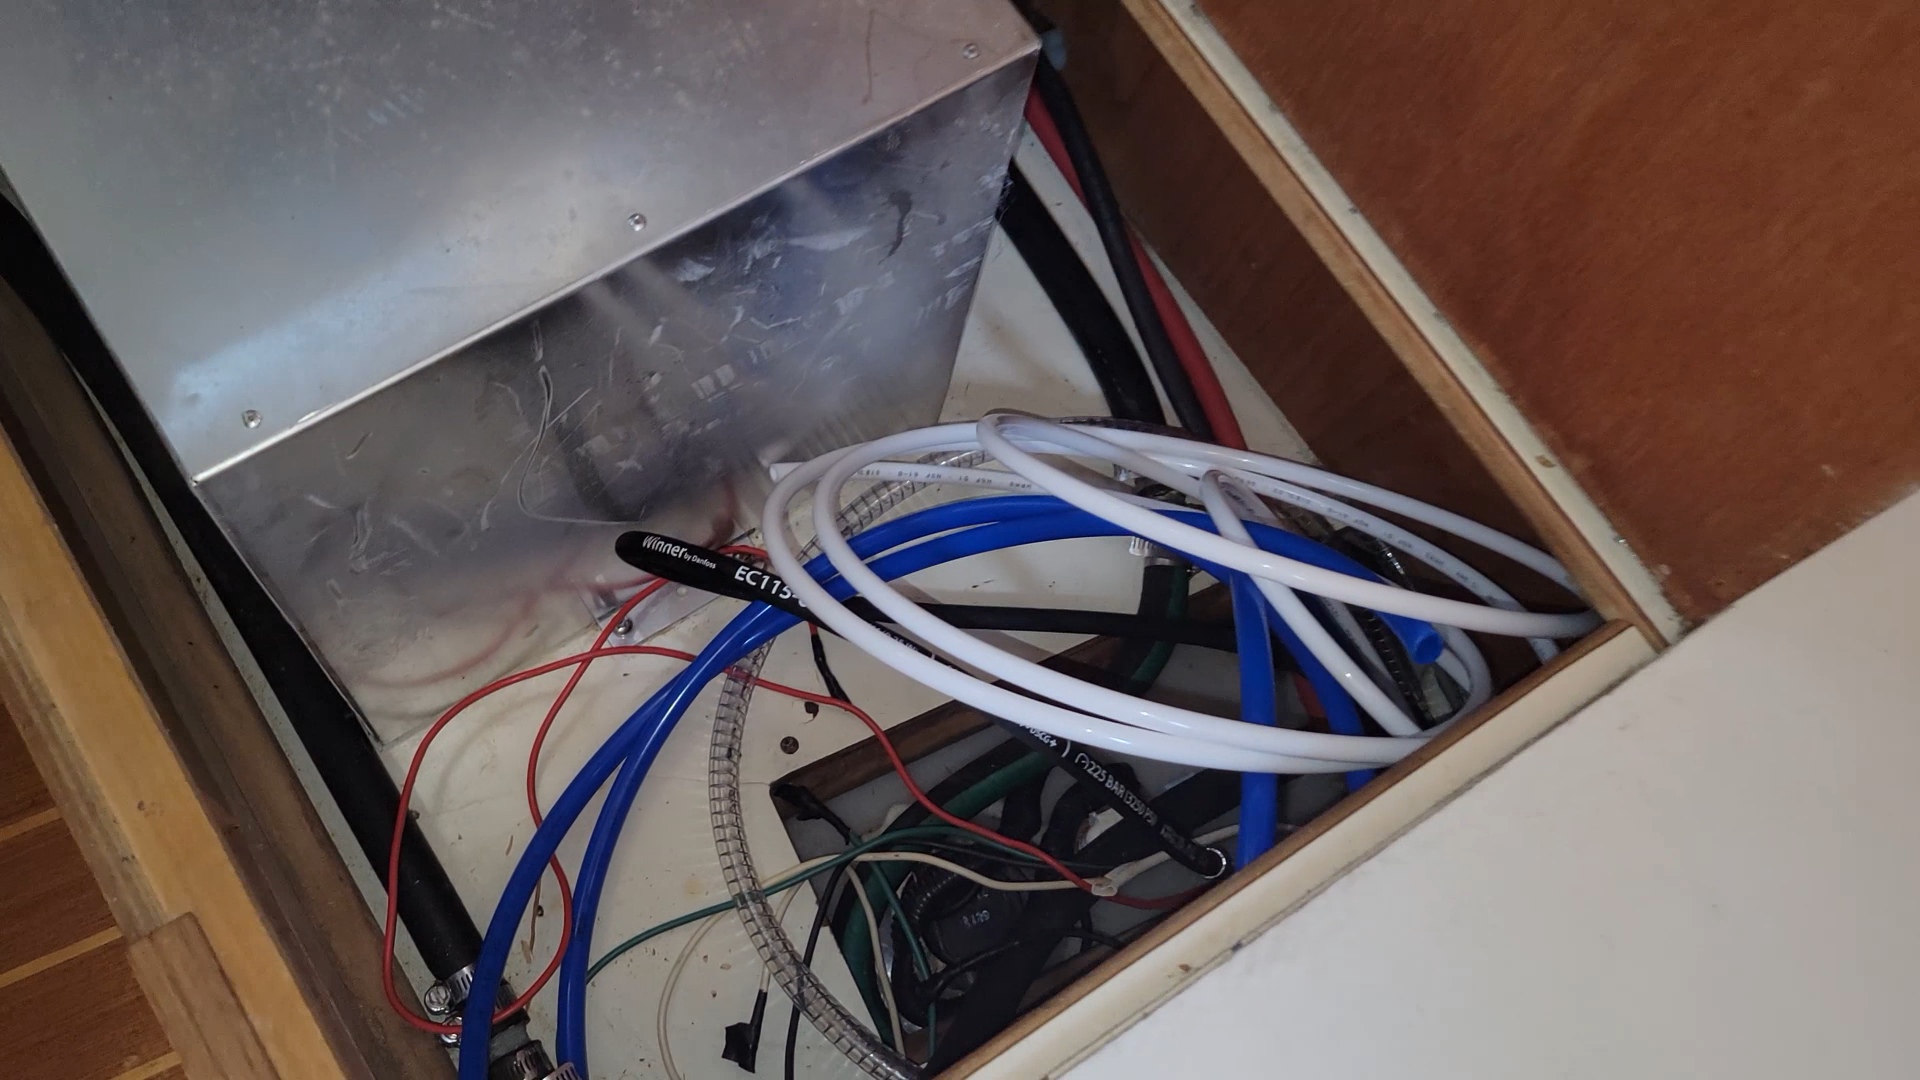
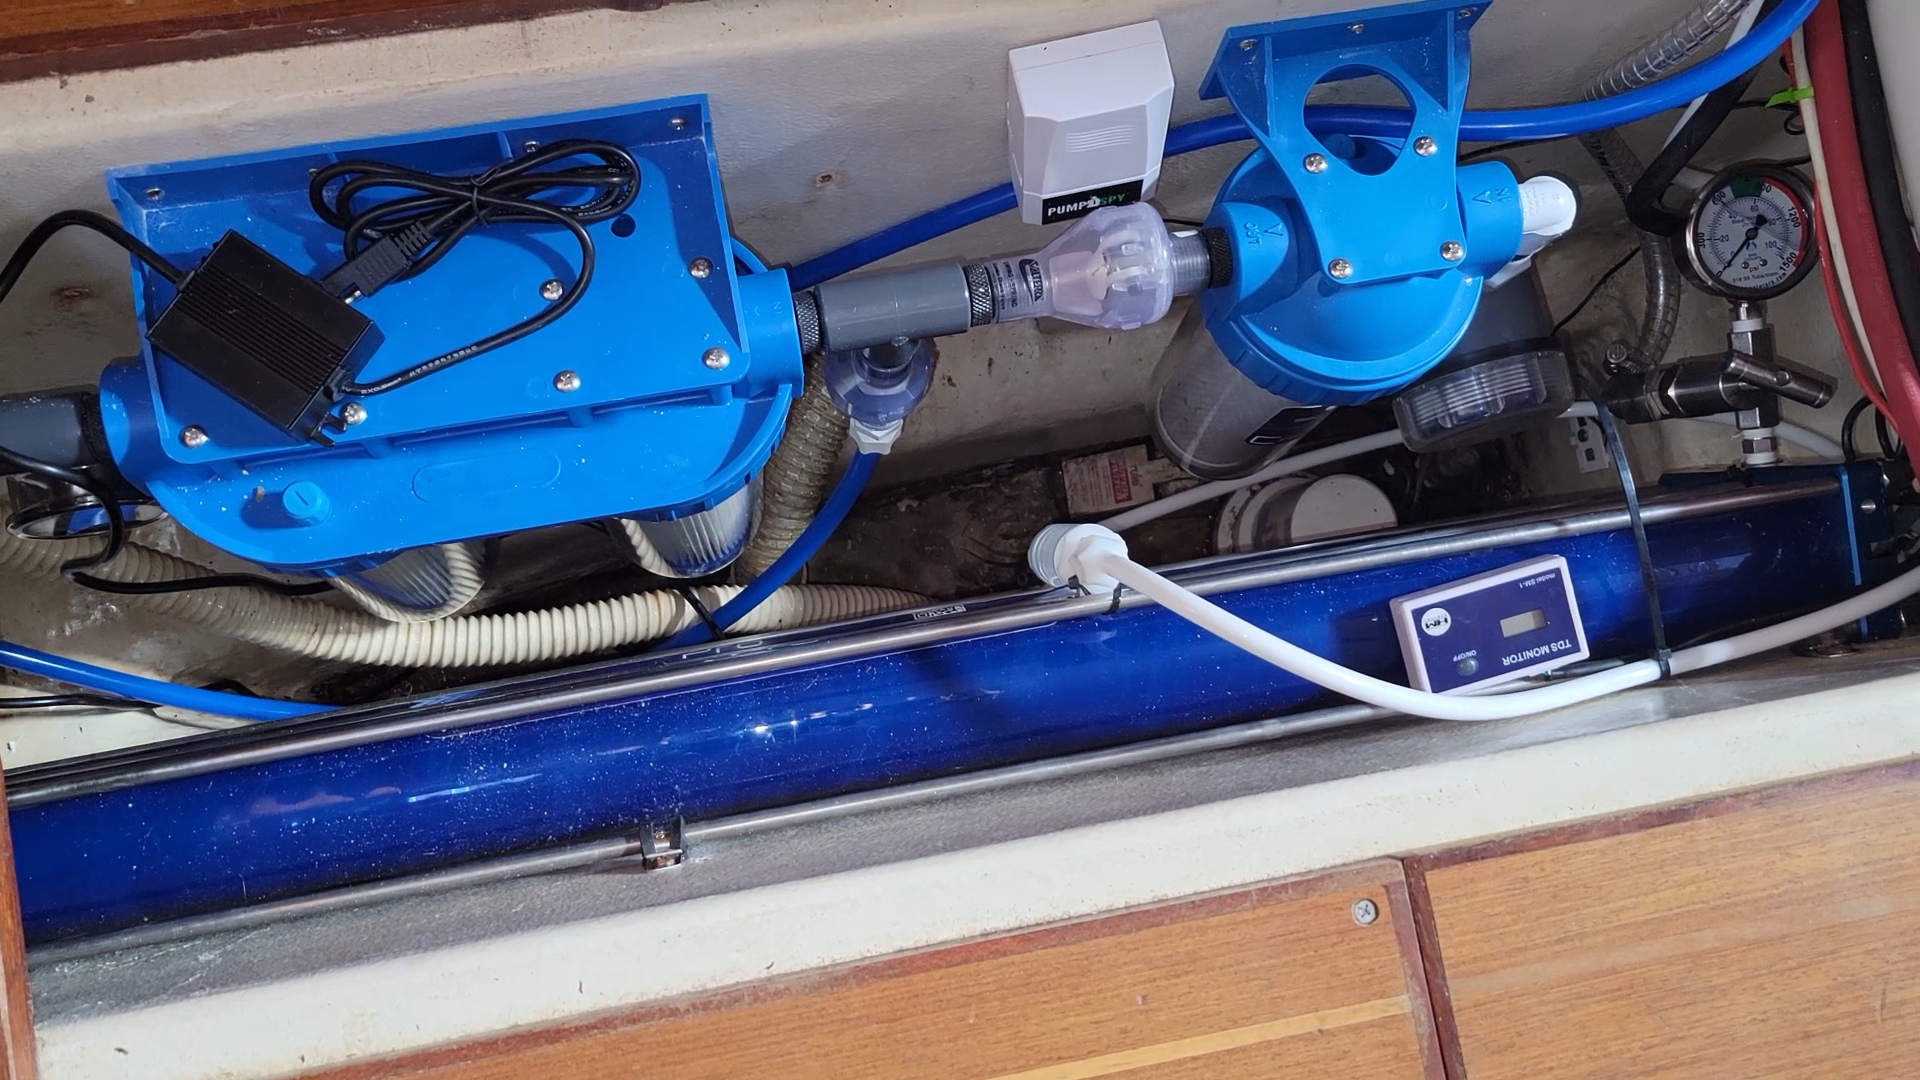
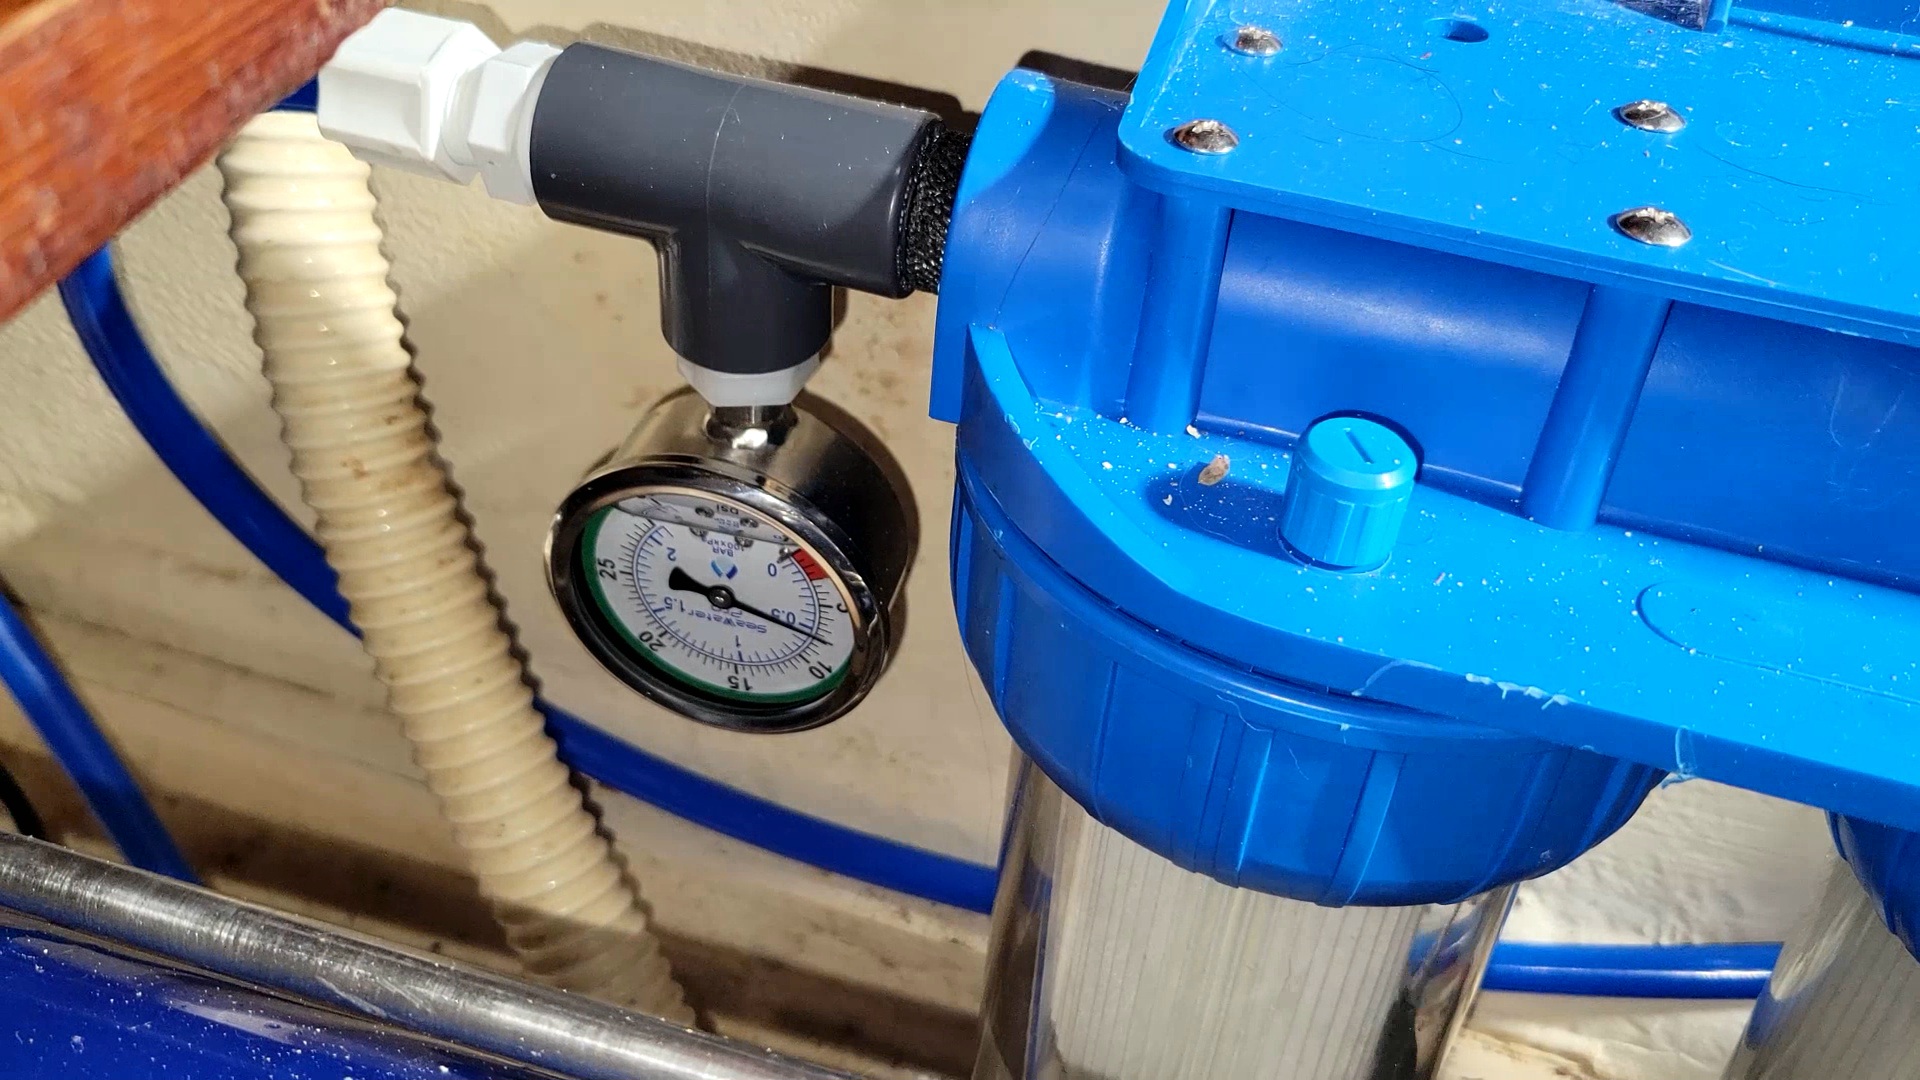
The installation begins with assembling both the low and high-pressure sides of the system. I opted to mount the filters and pre-filters above the keel in the bilge because the walls provided enough space for the membranes and other components. The installation instructions provided by SeaWater Pro were thorough, making it easier to understand how to connect everything.

As I set up the low-pressure side, I made sure that the flow direction was correct. The water flows from the freshwater side through the filters and then to the pump. This is crucial for ensuring that the system operates efficiently and extends lifespan.

Mounting and Connecting Components
Once the filters were in place, I moved on to mounting the high-pressure pump. This part required some careful maneuvering, as space was tight. I had to ensure that all lines were routed correctly and that the gauges were accessible for future monitoring.
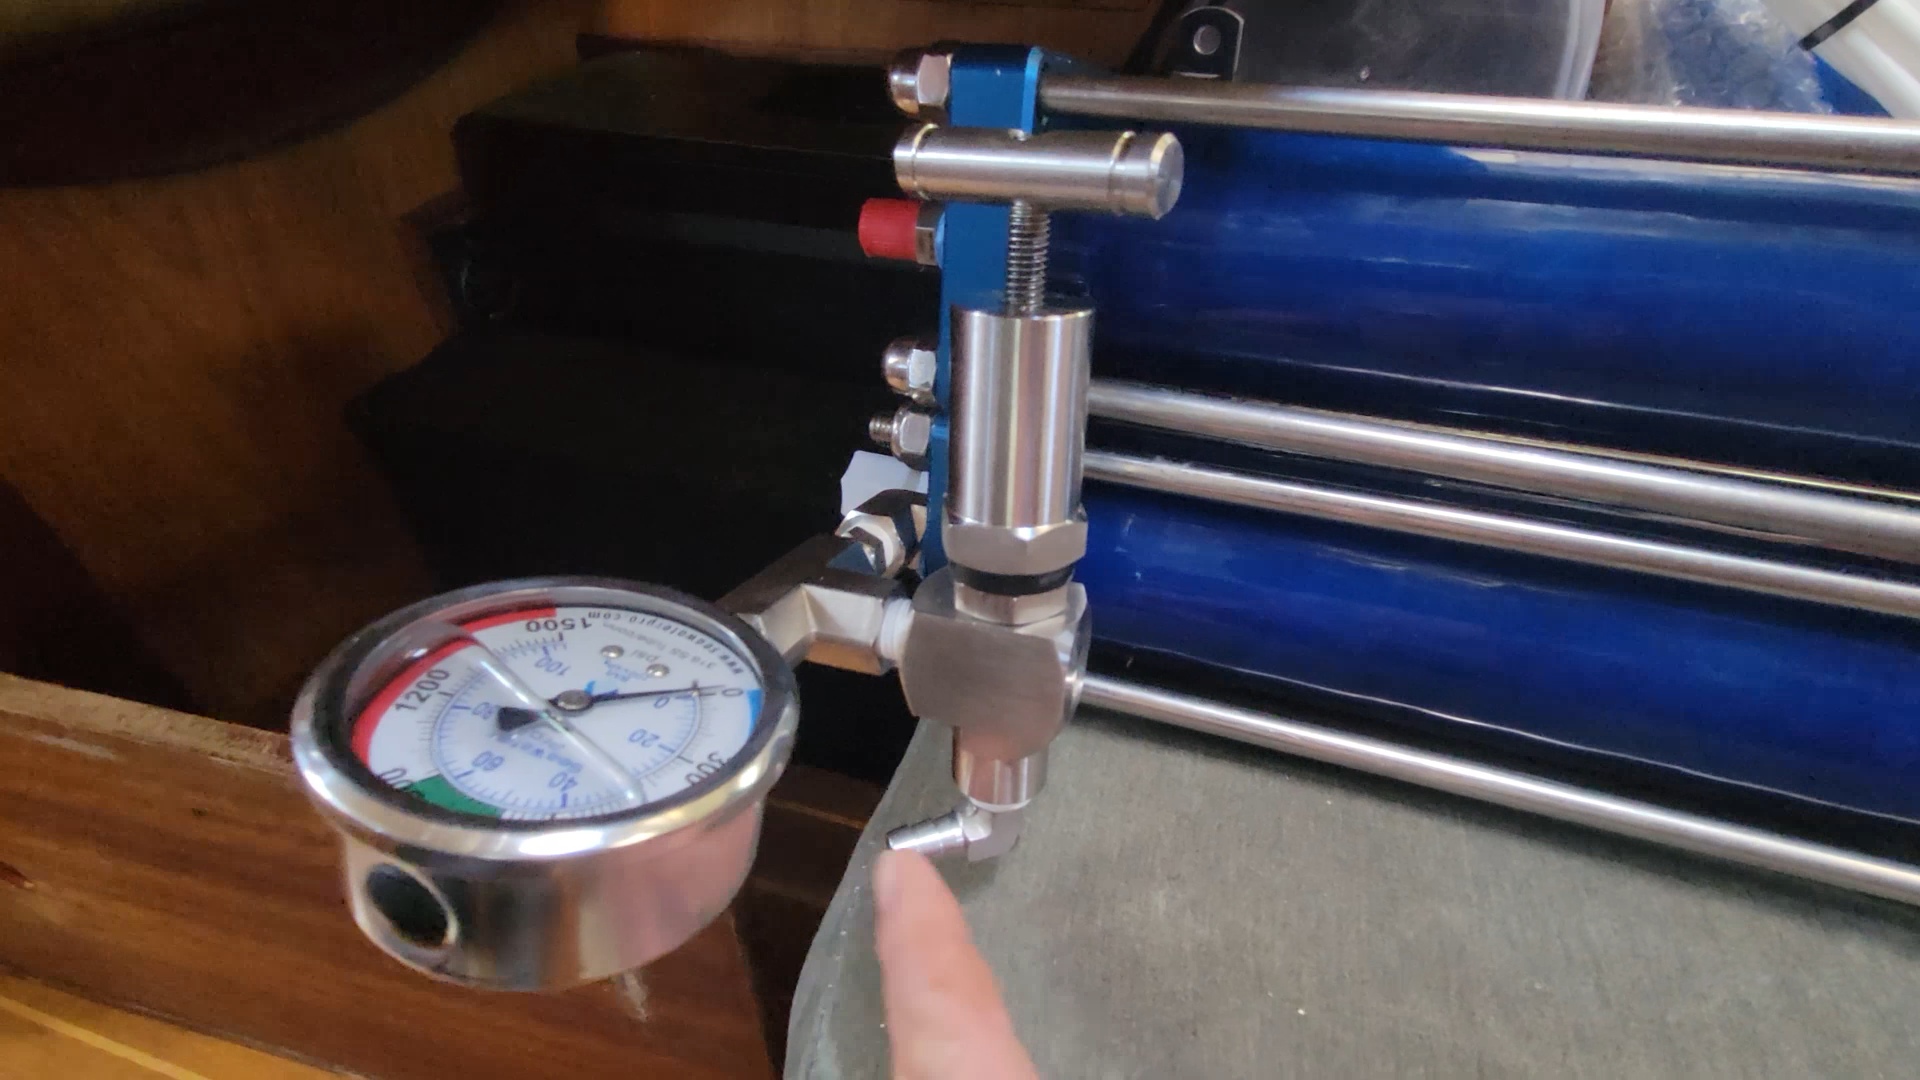
After successfully mounting the high-pressure pump, I connected the necessary lines to the gauges. I made sure everything was compact and organized to avoid any confusion later. It’s essential to keep everything neat, especially in confined spaces like a boat.
Testing the System
With everything installed, it was time to test the system. I turned on the boost pump and monitored the pressure gauge. Initially, the pressure was around eight pounds, which is a good starting point. I made adjustments as needed and continued to monitor for any leaks.
After tightening a few connections, I found that the pressure stabilized around ten pounds, indicating that the system was functioning correctly. However, I had to dive down to clean the seacock, which is an important step in ensuring optimal performance.
Making Fresh Water
After confirming that everything was in order, I began the process of making fresh water. I turned on the system and watched as it started producing water. The quality monitor indicated the water was at 200 parts per million, which is acceptable for initial production.
I decided to taste the water to ensure it was good. It didn’t taste chlorinated, which we like, I was still cautious and decided to wait before drinking it regularly. After running the system for 30 minutes, the water tds was at 140.
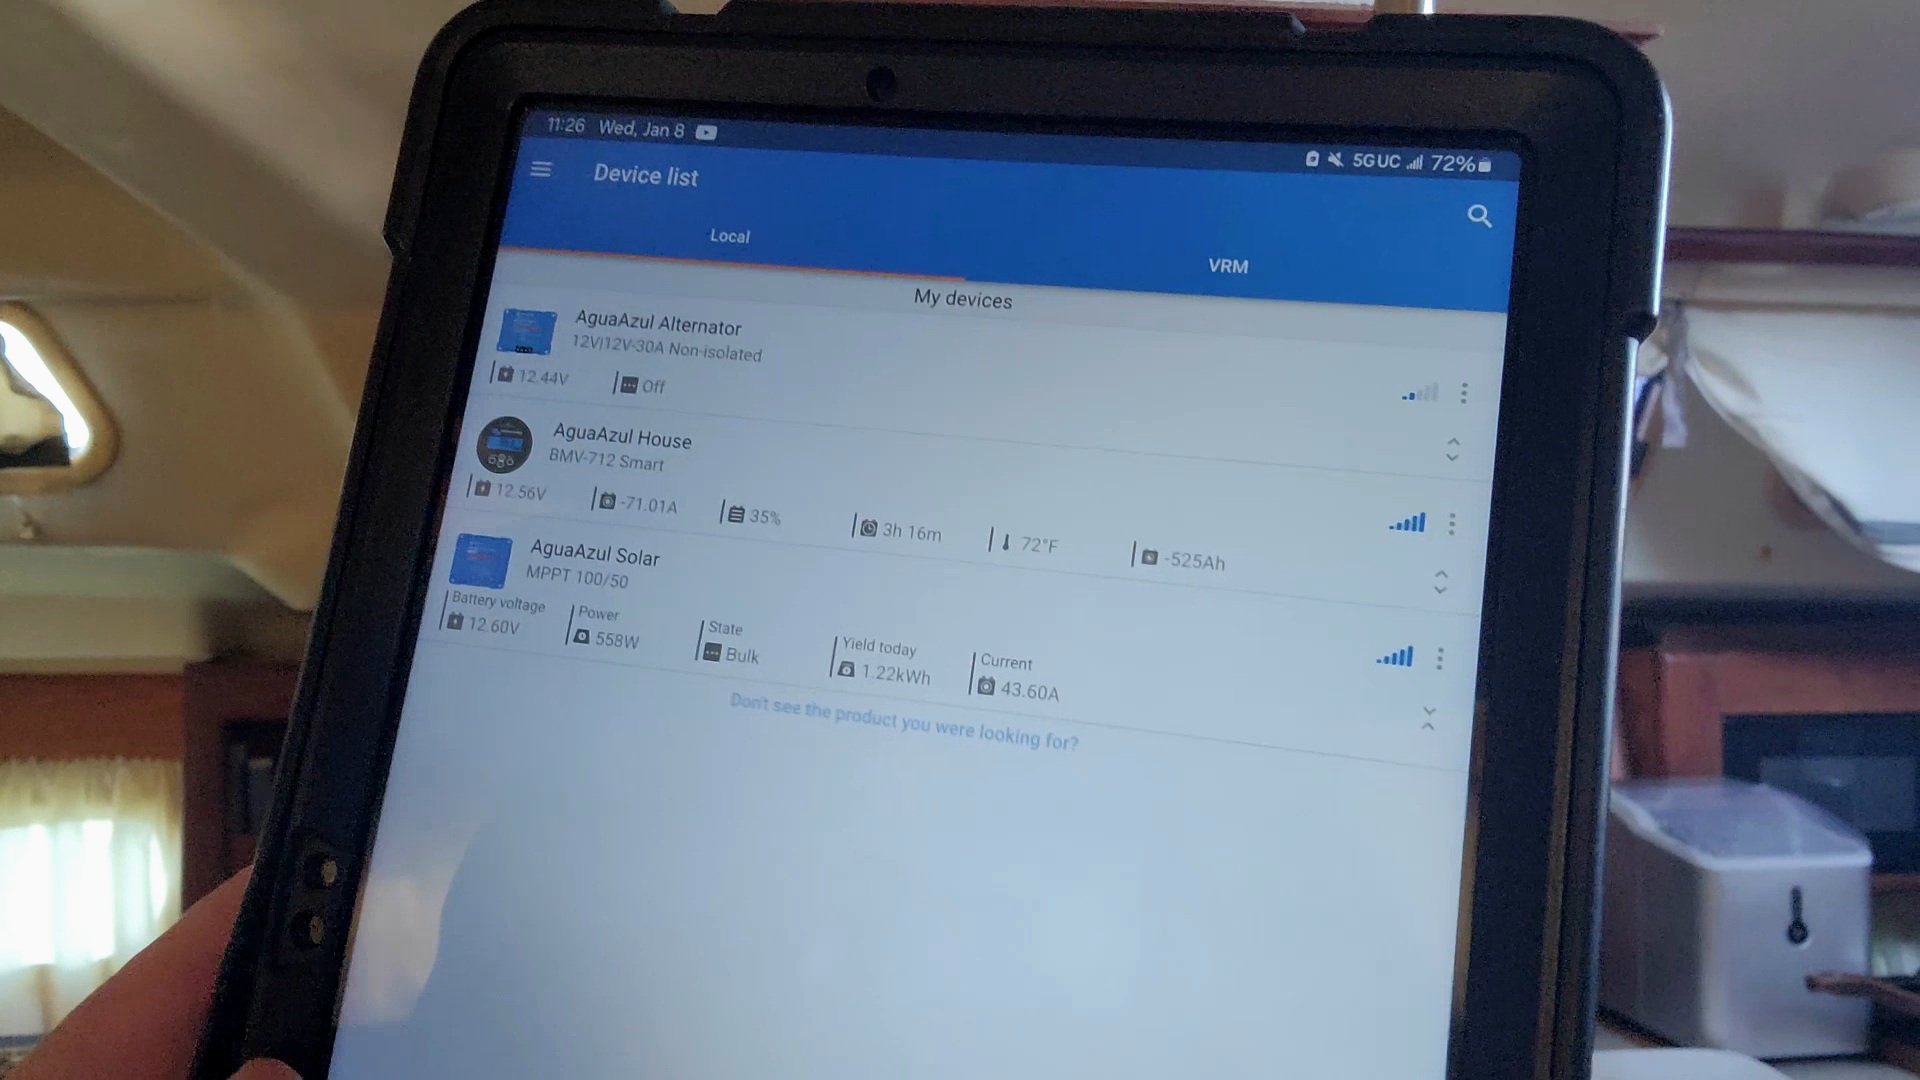
Solar Power Integration
One of the best features of the SeaWater Pro is its ability to run on solar power. I monitored the system’s energy consumption and found that we were using slightly more power than we were generating. However, with about 70 amps going out and 43 coming in from the solar panels, we were still able to produce fresh water efficiently. The pump looks to use around 100 amps while running, our generator would more than cover this.
Final Thoughts on the Installation Process
Overall, the installation of the SeaWater Pro was a rewarding experience. Despite a few challenges, such as tight spaces and monitoring the pressure, the process was straightforward thanks to clear instructions and a well-organized kit.
Now that the water maker is operational, we can enjoy fresh water while out on the water, making our boating experience much more enjoyable. If you’re considering installing a water maker on your boat, I highly recommend the SeaWater Pro for its efficiency and ease of use.
Conclusion
Installing the SeaWater Pro water maker not only enhances your boating experience but also provides a vital resource while out at sea. With the right tools and a bit of patience, you can set up your own system and enjoy the benefits of fresh water whenever you need it.
Feel free to share your installation experiences or ask questions in the comments below!
Tools I Love:
- 🛠 Milwaukee 18-Volt Drill and Impact Driver Kit https://amzn.to/366BwxM
- 🛠 Husky Mechanics Tool Set https://amzn.to/3kuGUzD
- 🛠 iCrimp Ratcheting Crimping Tool https://amzn.to/3uv7u6i
- 🛠 Heat Shrink Connectors https://amzn.to/3HMB4r9
What We Us In The Kitchen:
- Empava IDC12B2 Horizontal Electric Stove Induction Cooktop https://amzn.to/47DD3bz
- Beelicious 32QT Extra Large Air Fryer https://amzn.to/48NfQUY
💎 Have a Website? Increase Your Revenue With Ezoic: https://ezoic.com/?tap_a=6182-5778c2&tap_s=1472908-dc0848
💲 Support us by shopping through our Affiliate Links! Amazon: https://amzn.to/351krTR
🎈 You Can Also Follow Us On:
- https://www.facebook.com/ChrisDoesWhat/
- https://www.instagram.com/chrisdoeswhat/
- https://www.instagram.com/dininginwithdanielle/
- https://www.pinterest.com/ChrisDanielleRedding/