

Install Mercruiser 3.0 Engine Wiring Harness
Video at the bottom if you’re like me and don’t like to read. LOL

If you messed it you can see how we cleaned up the wiring here, or go to the entire list of boat blogs here.
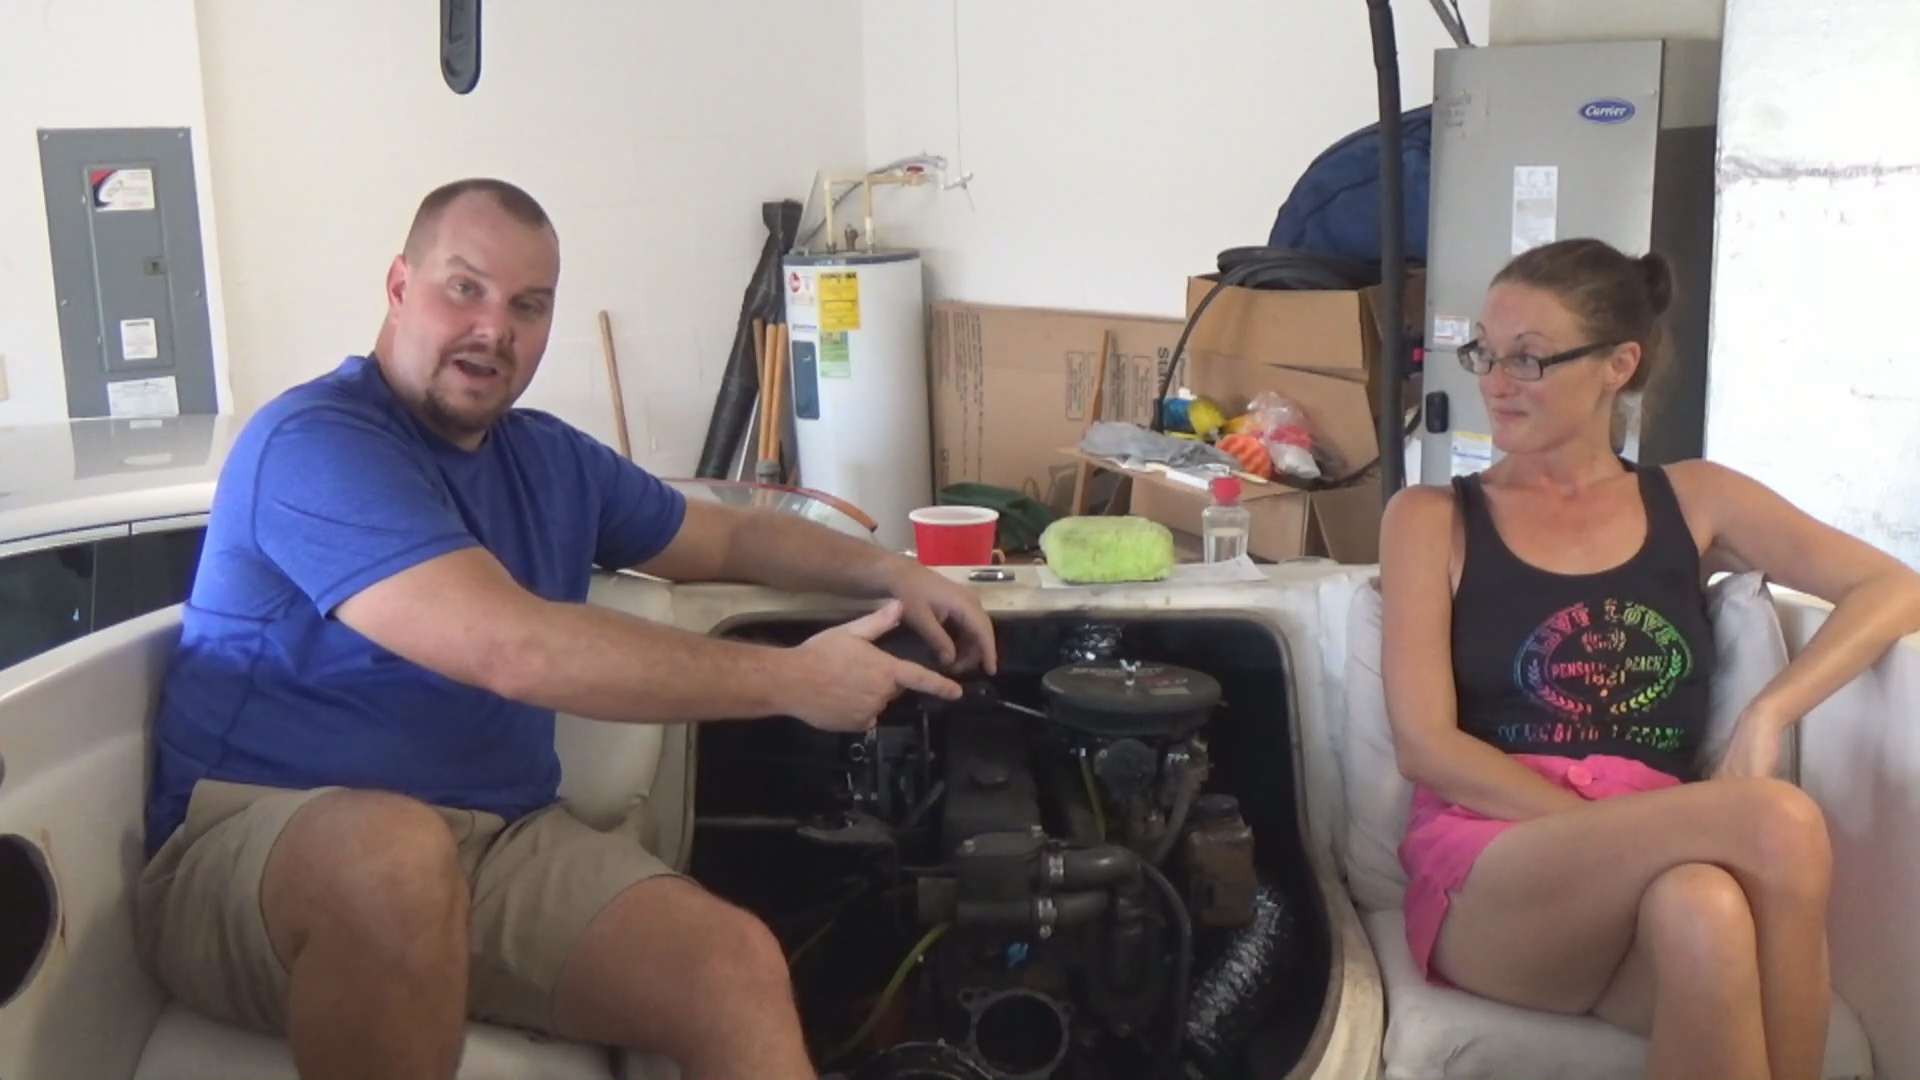
Yes, I’m pointing at the engine cause the wiring is in and it took looks great! I actually enjoy wiring, the challenge of routing the wires, and the look of the project when done. When I was a teen, automotive stereo wiring was a hobby of mine, then in the Army, it was computer networks. Still today, I help my boys now and their friends with stereo wiring, making them do most of the work “LOL”. Now that our boat wiring is done we get tunes and that makes all the rest of the task we have more fun!
Below we have also included a wiring harness diagram if you have a similar engine wiring. Plus if you lack the tools and supplies, we have the ones we use listed below as well. If you want to chat about what was done to this boat, leave comments, we do respond.
Why Wiring Loom And Not Tape
When we got the boat back from the mechanic the entire wiring harness was routed badly, wrapped with tape, and smoked when we tried to apply power to it. Instead of doing proper repairs to the wiring harness, the mechanic we paid, took a lot of shortcuts. There were bare wires in the harness and a positive with negative wire was taped together. Unlike a car, boats run a negitive and positive wire for most things since there is no frame to ground to.
Now, why you don’t excessively tape the wires.
- You want to easily be able to get to the wire for repairs.
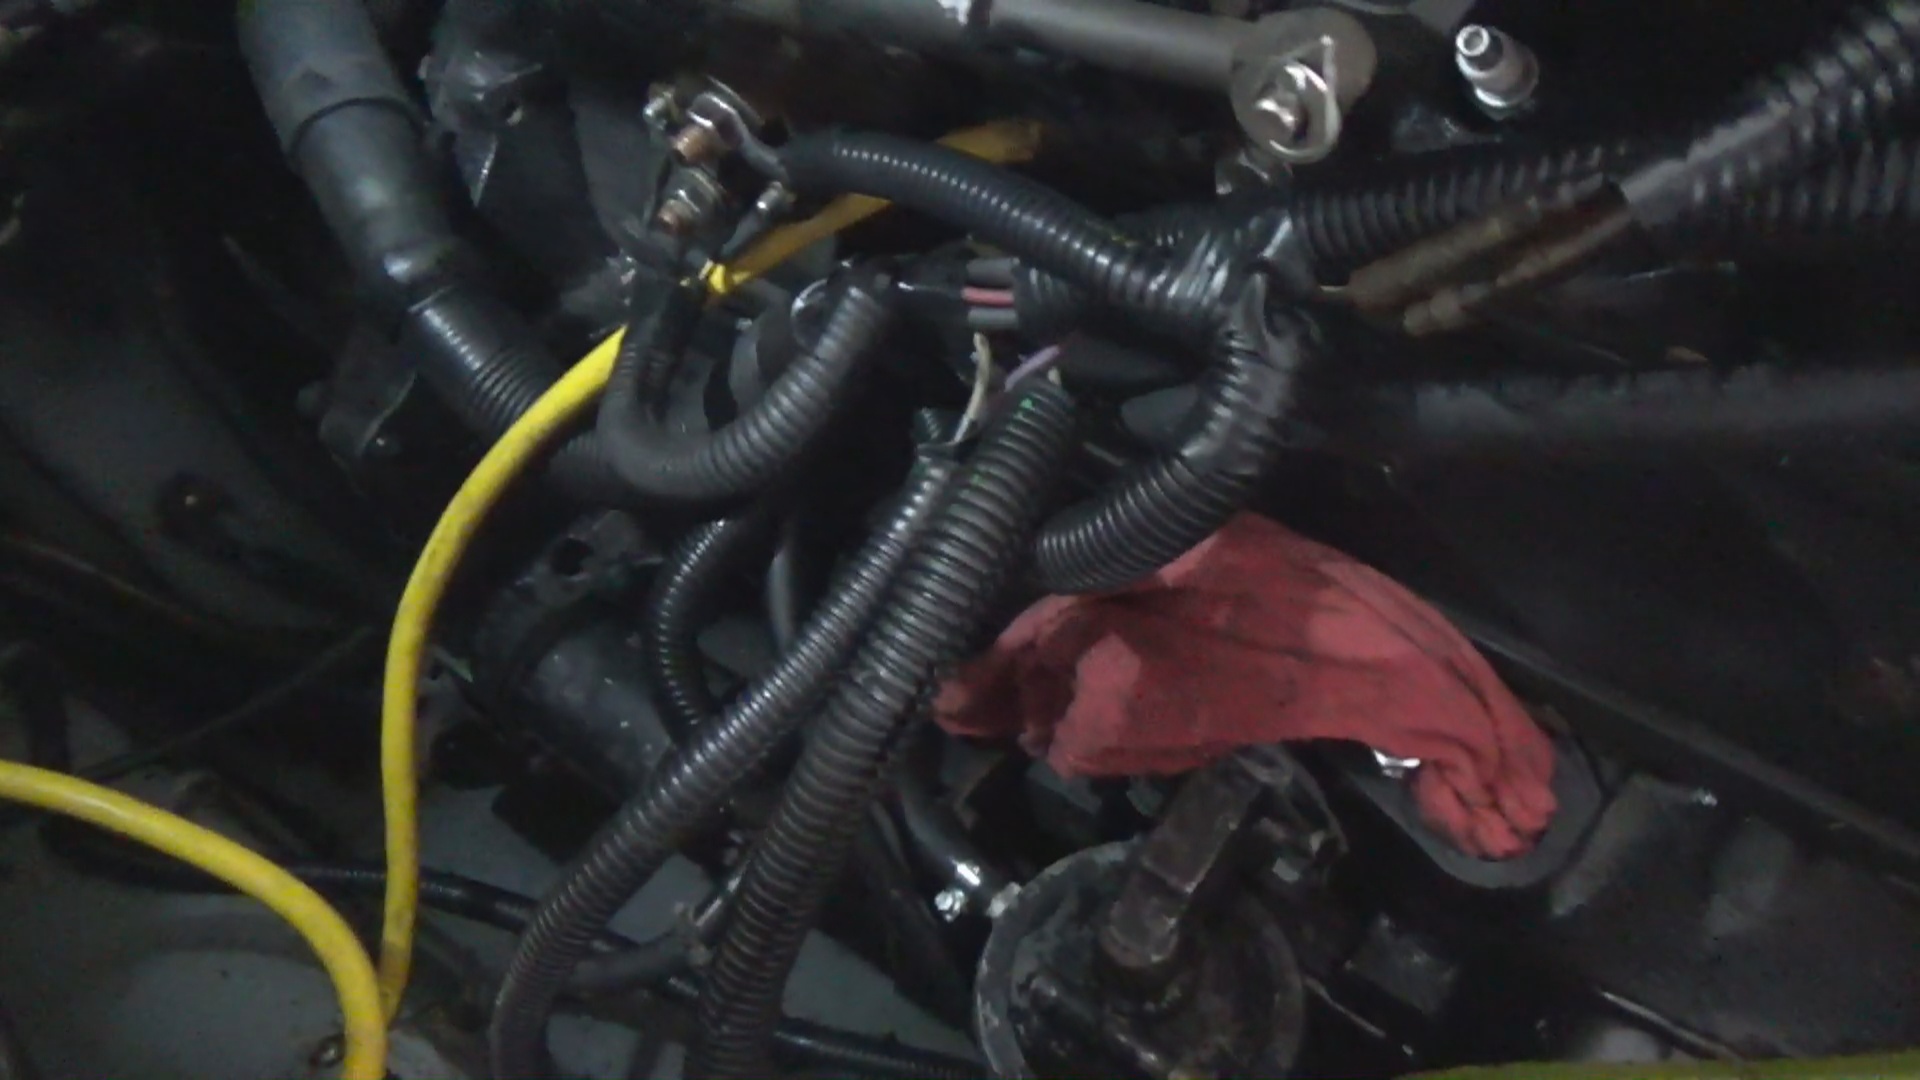
- Wiring loom will offer more protection to the wires from rubbing and heat than tape.
- Wire loom will let the water drain, unlike tape.
- When you tape your wires that get all stick.
We are not saying tape is off limits, it should just be used sparingly. We like to use it ends of the wiring loom, and then about every foot on the wire loom. This will help hold the wire loom from sliding, keep the wire inside the loom while still being easy to remove.
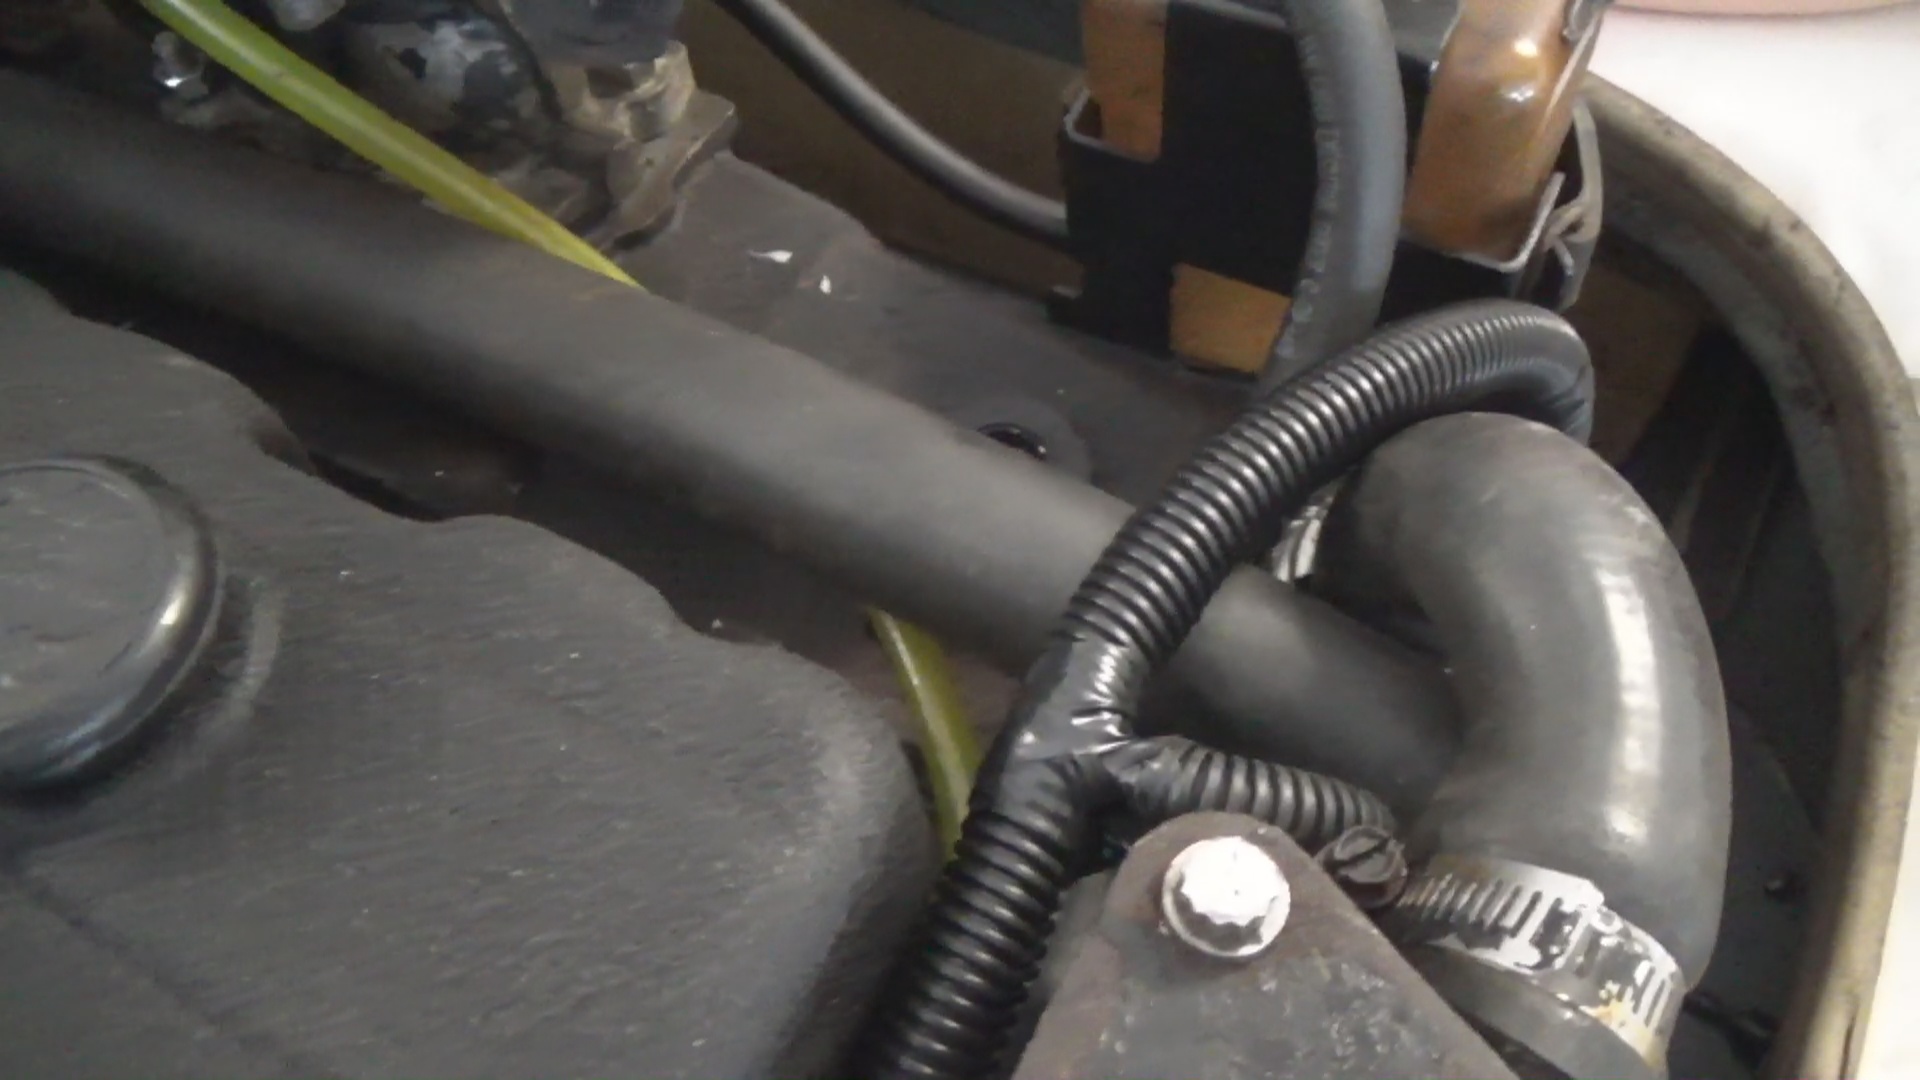
If you are fitting new wires, you may not want to put all the loom on and here’s why. When routing the wire the loom may not fit correcting if pre-ran. There are things that we did put the loom on before installing, like the large loom to the wiring harness plug, but for most, we installed the loom after routing.
If this was helpful or you have feedback, leave that down below. Also below I have listed out things that are left, and as soon as we complete this restore we will include a budget.
Below we have included the wiring diagram we use along with the tools and supplies we used for wiring.

Tools & Supplies Used:
Heat gun: https://amzn.to/2ykUqzq
Crimping Tool Kits: https://amzn.to/2ym6a4V
Butt connectors: https://amzn.to/2C3lhUk
Heat Shrink: https://amzn.to/2pFWiit
Wiring Loom: https://amzn.to/2ykwtII
Multimeter: https://amzn.to/2COY2hX
What’s Left From this Entry
- Boat Bumper Trim
- Ski Locker
- Windows
- Paint
- Start Engine
- Navigation
- Seats
- Rear Speakers
- Things I forgot
Boat Restoration Blogs
https://www.chrisdoeswhat.com/category/diy/boat-restoration/
Commonsense provided by my love Danielle Redding.

