How To Defrost And Reduce Frosting Of A Fridge
Got to hate when your fridge freezes over and you can’t cool your food. We notice we had an issue when the fan in the fridge was making a lot of noise. When the fan suddenly stopped making noise we thought it fixed its self, well we were wrong. The fan actually stopped moving causing the temperature in the fridge to rise up to 70F.
Now we go over how to defrost your fridge and how to prevent the fridge from freezing up in the future. The refrigerator we are defrosting is a Samsung. While the steps would be the same for most refrigerator, the forced defrost and the disassembly will not.
You can continue to read, our just watch the YouTube video indexed below.
Tools You Need To Defrost A Fridge
You really only need a few simple tools to defrost a fridge. You will need a Philips Head Screwdriver, we used an impact driver. Also need a small Flat Head Screwdriver, but anything flat can be used to pry off a small screw cover will work. Lastly you will need a Hair Dryer or Heat Gun, if your are using a Heat Gun watch out that you don’t damage your fridge.
Use our Amazon link if you would like to help us out! https://amzn.to/3ig36SV
Force Samsung Fridge In Defrost Mode
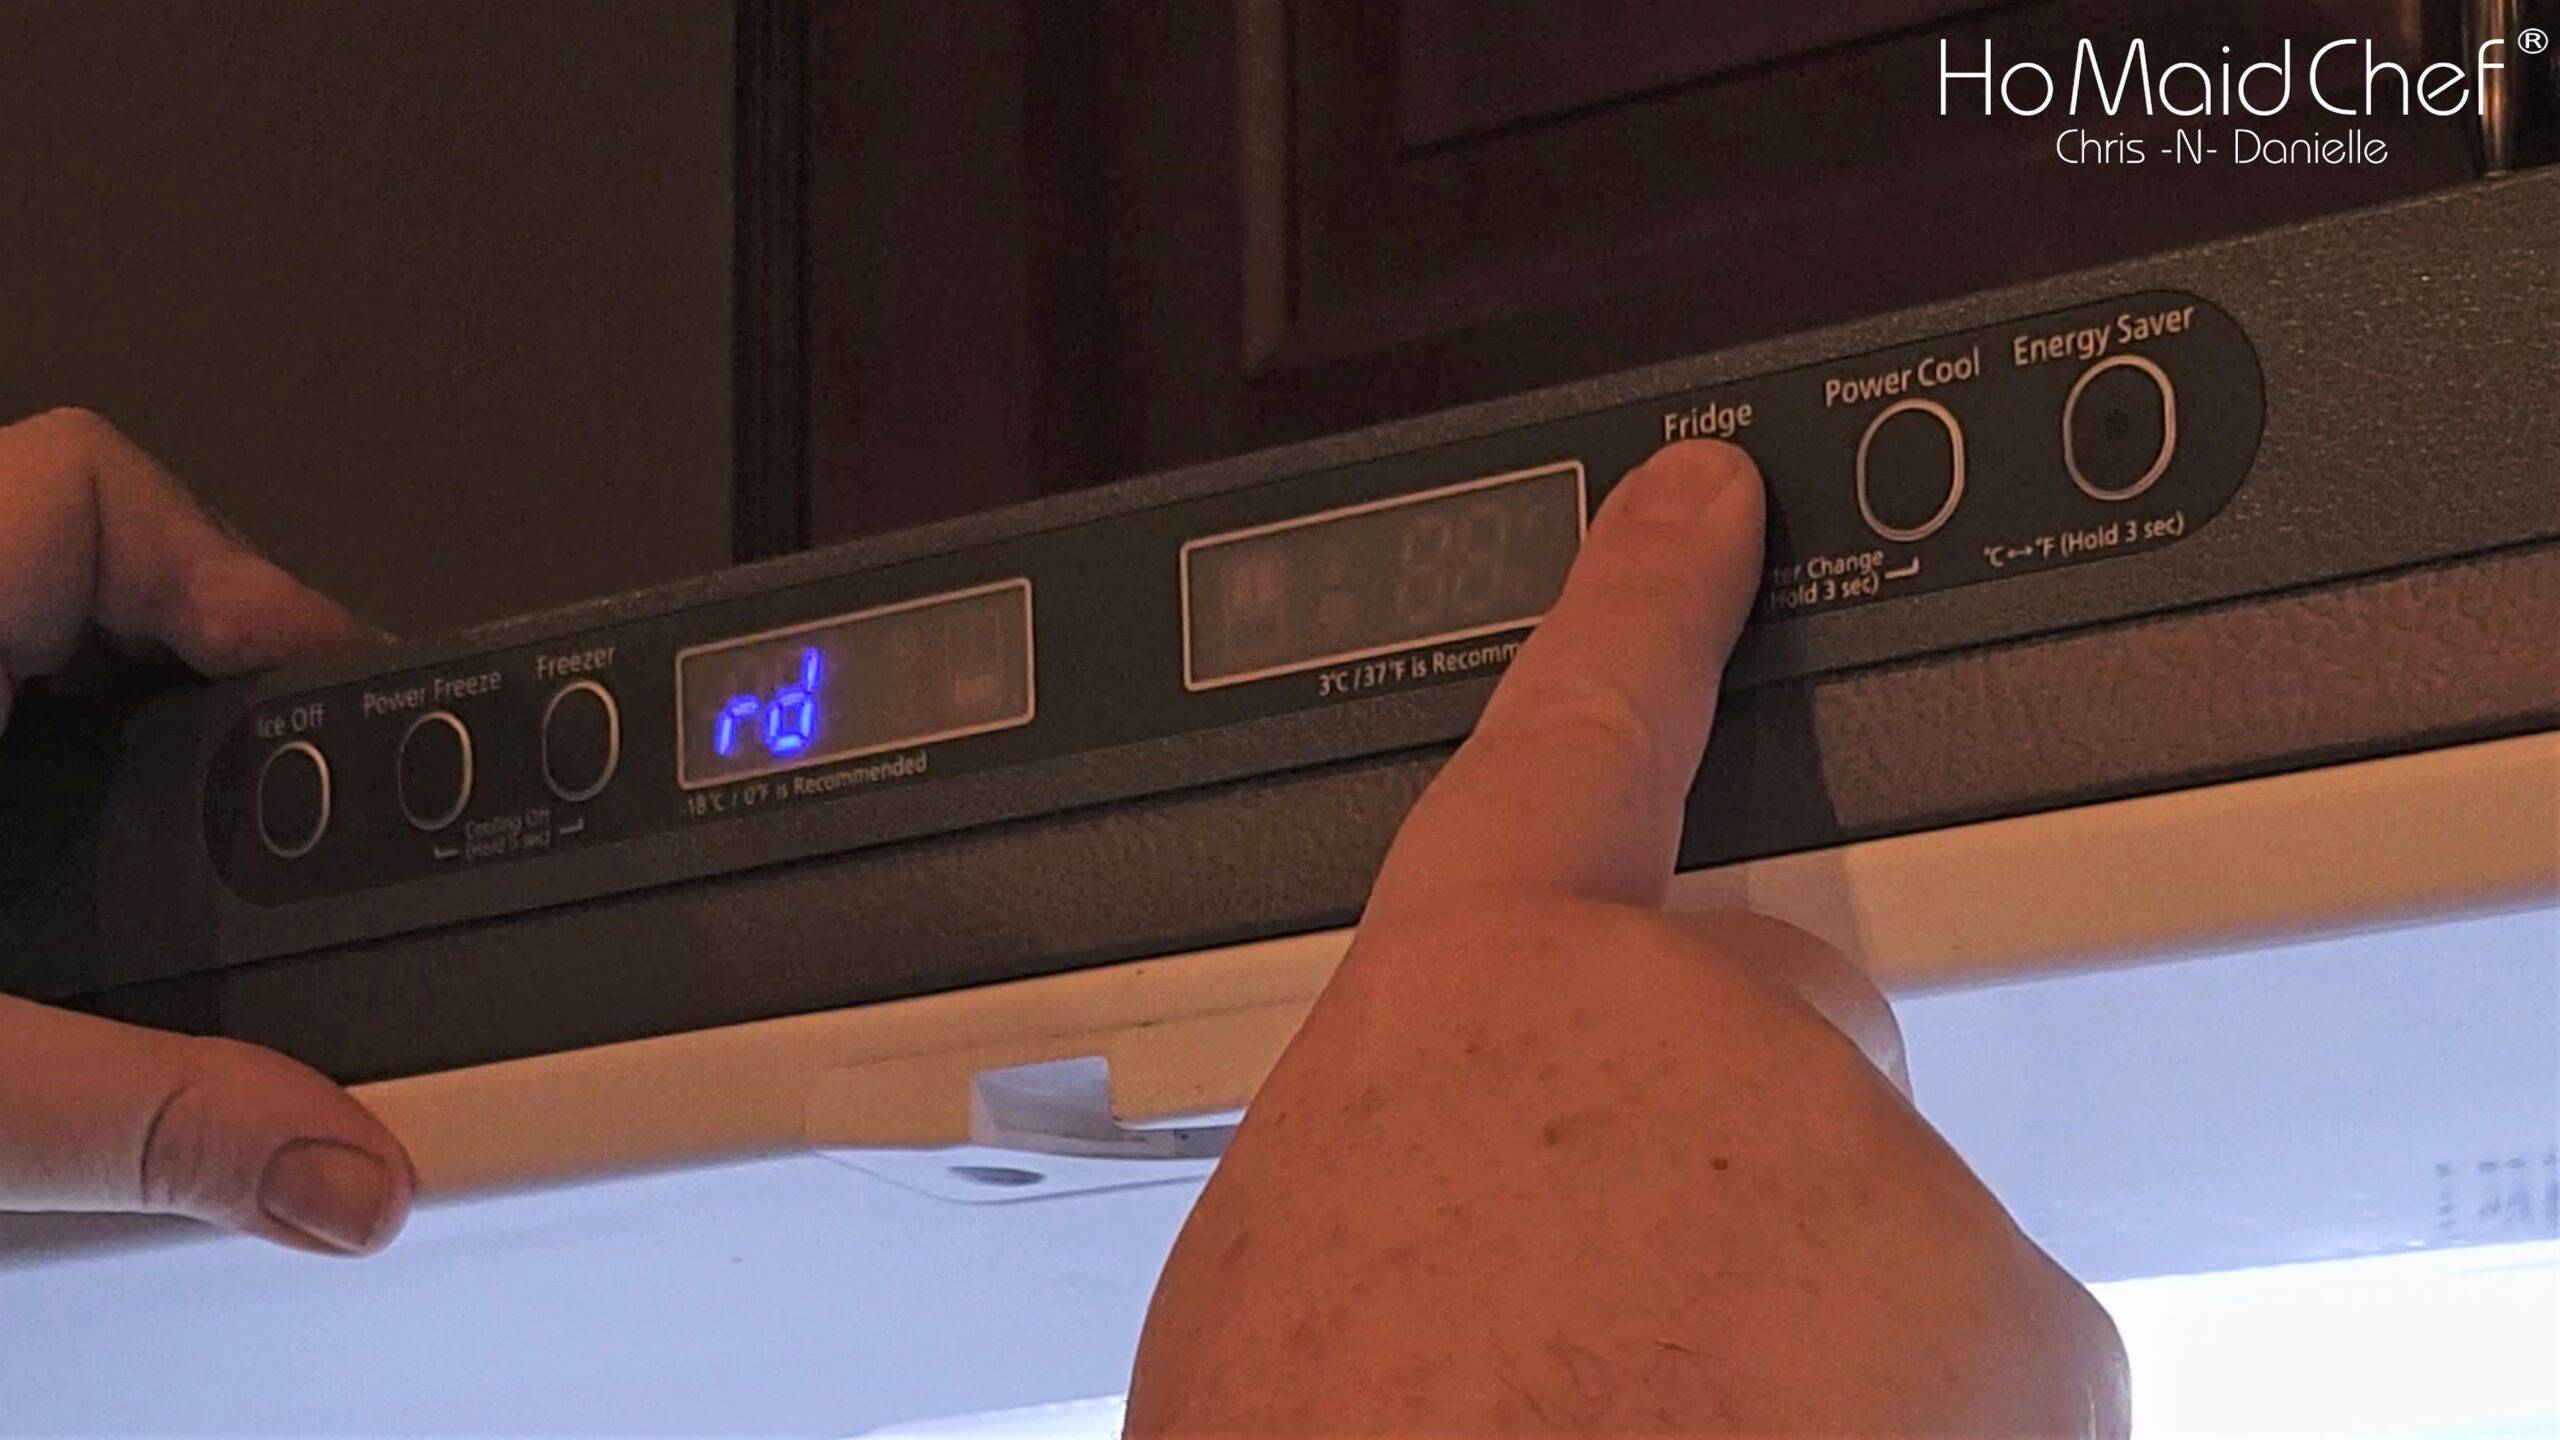
For a Samsung Fridge with no ice maker you simple hold the Power Freeze and Fridge button together for about 10 minutes till the screen goes blank. If you have a display on the door you would hold the freezer and light button. Once in the diagnostic mode use the fridge button to make the selection of rd. If you want to defrost the freezer as well you would select Fd.
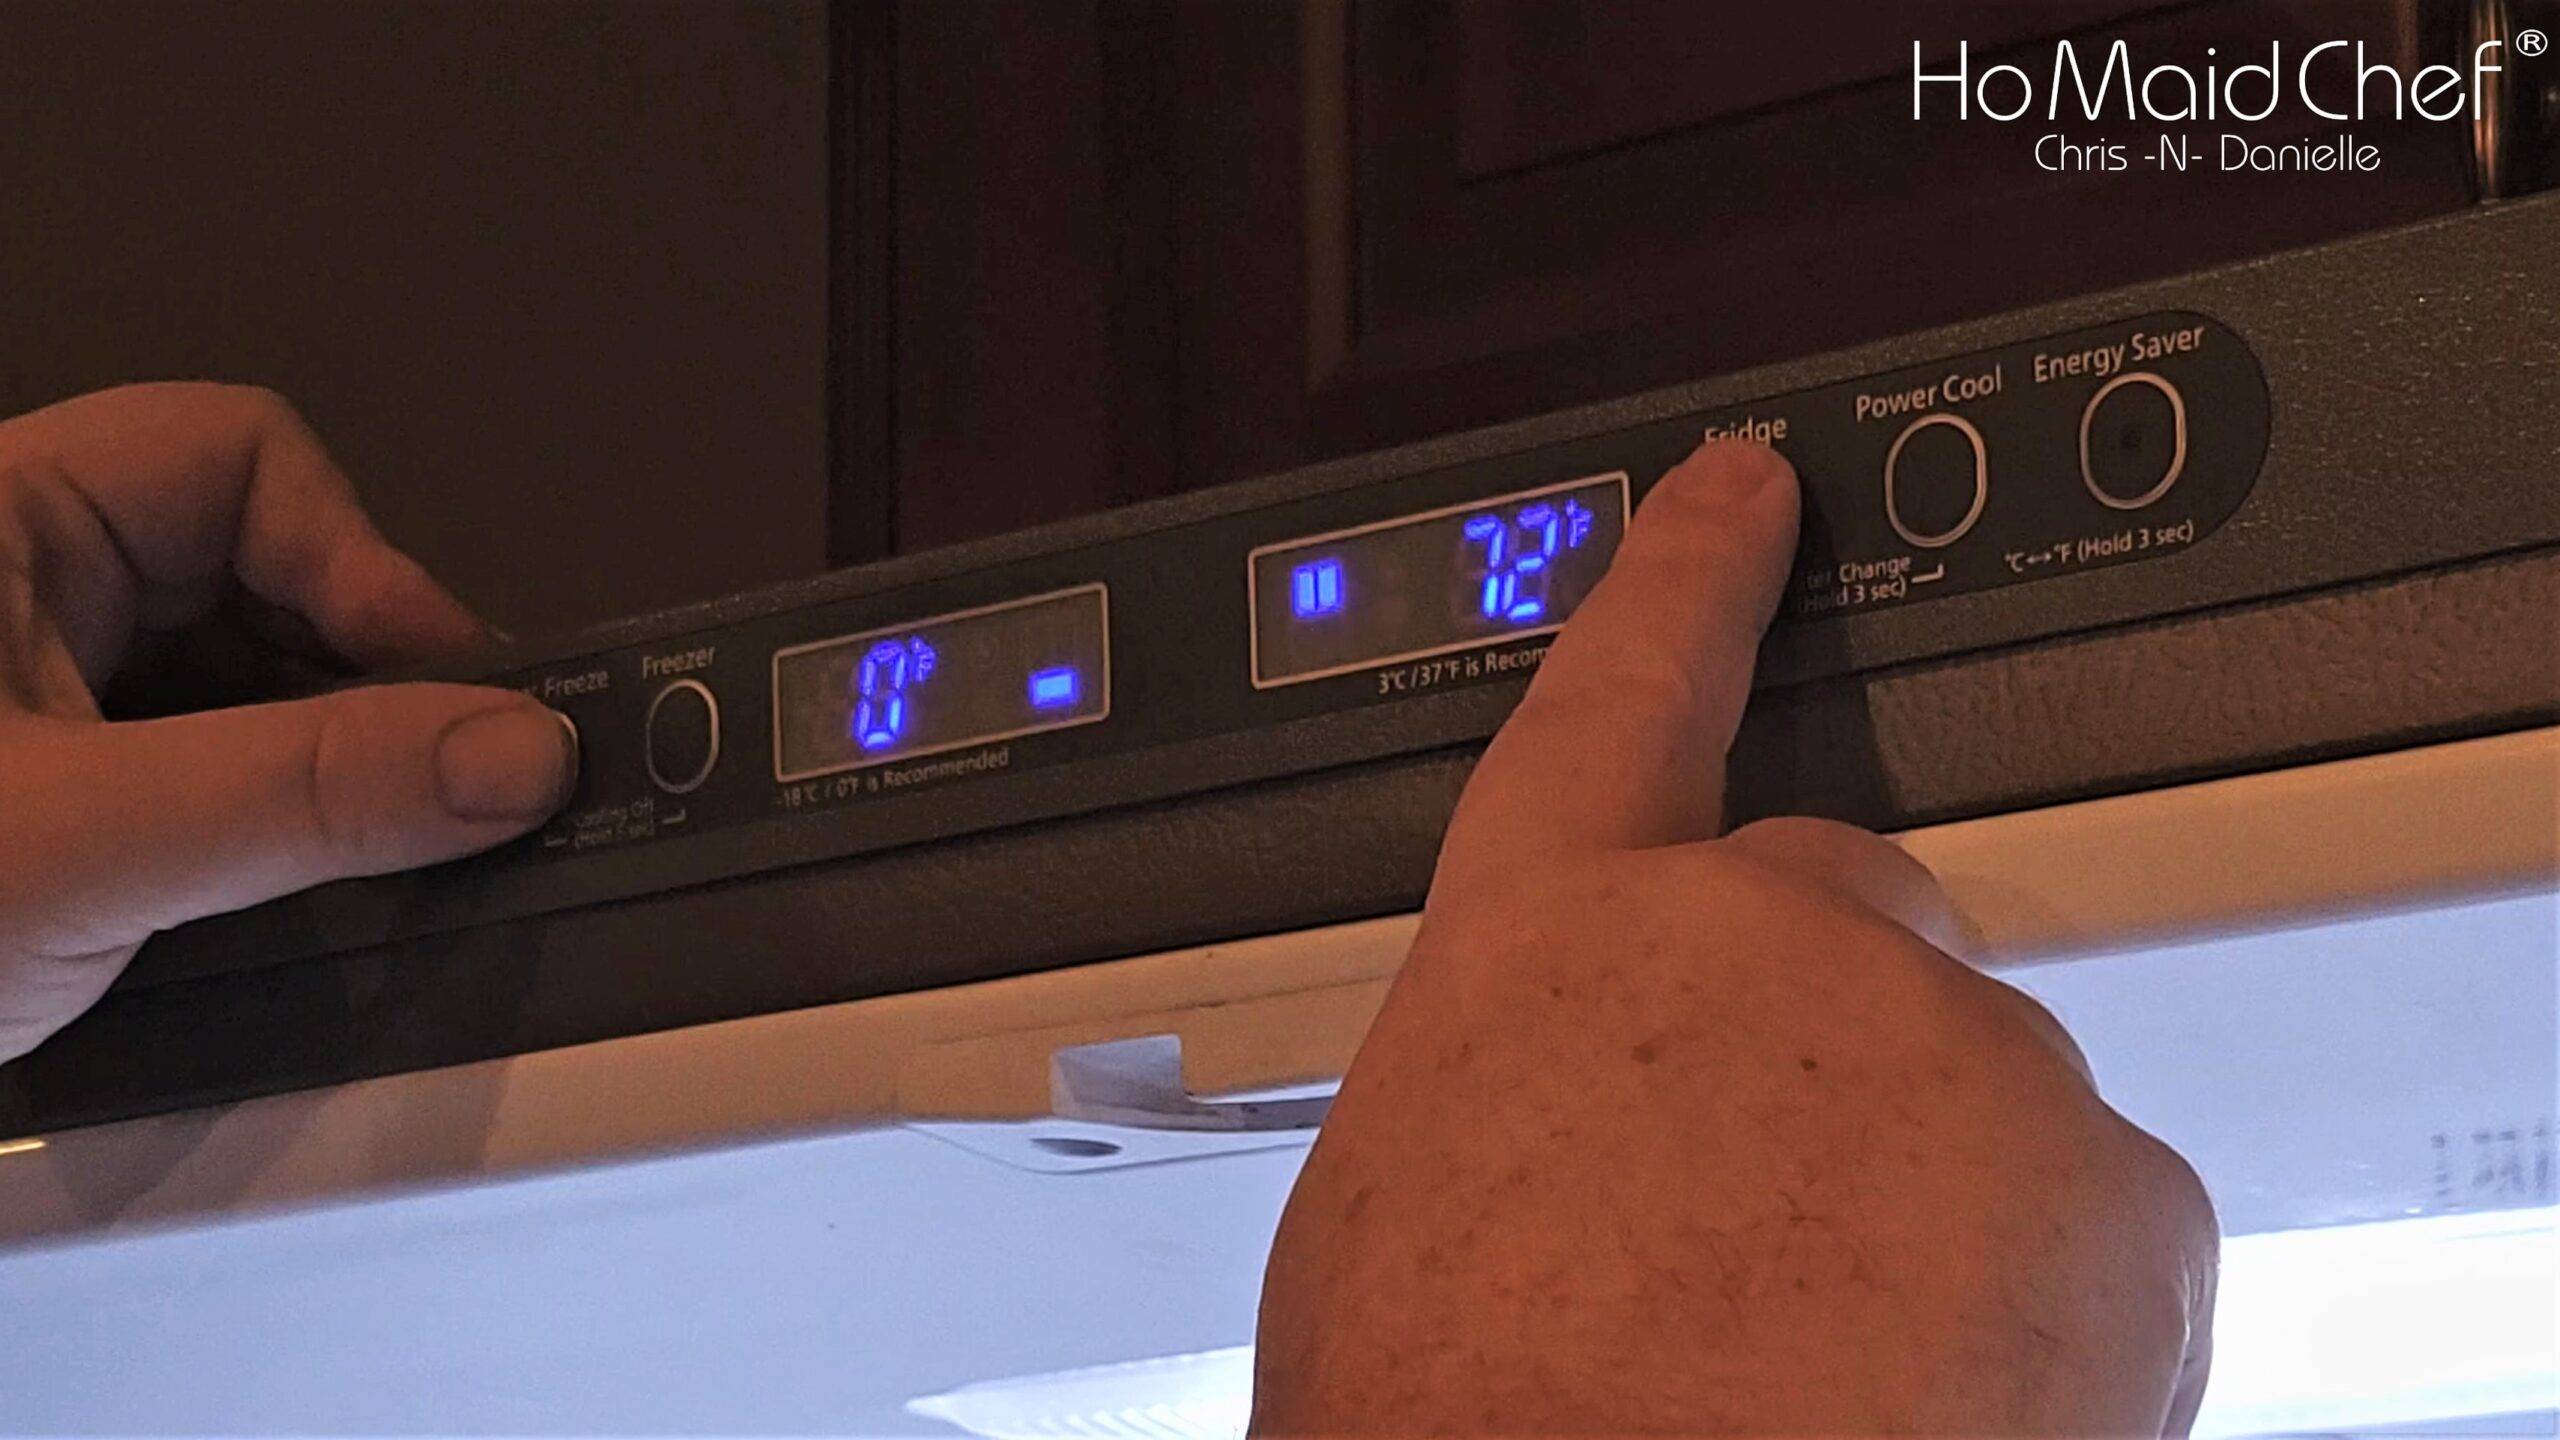
While in diagnostic mode the Samsung refrigerator will beep the whole time. If you wish to turn off defrost mode you have to go back into diagnostics mode and scroll to the blank screen, then let it timeout. Be aware that defrosting some of the ice is critical to allow the back evaporator panel to come off.
Accessing Refrigerator Evaporator “Cooling Coils”
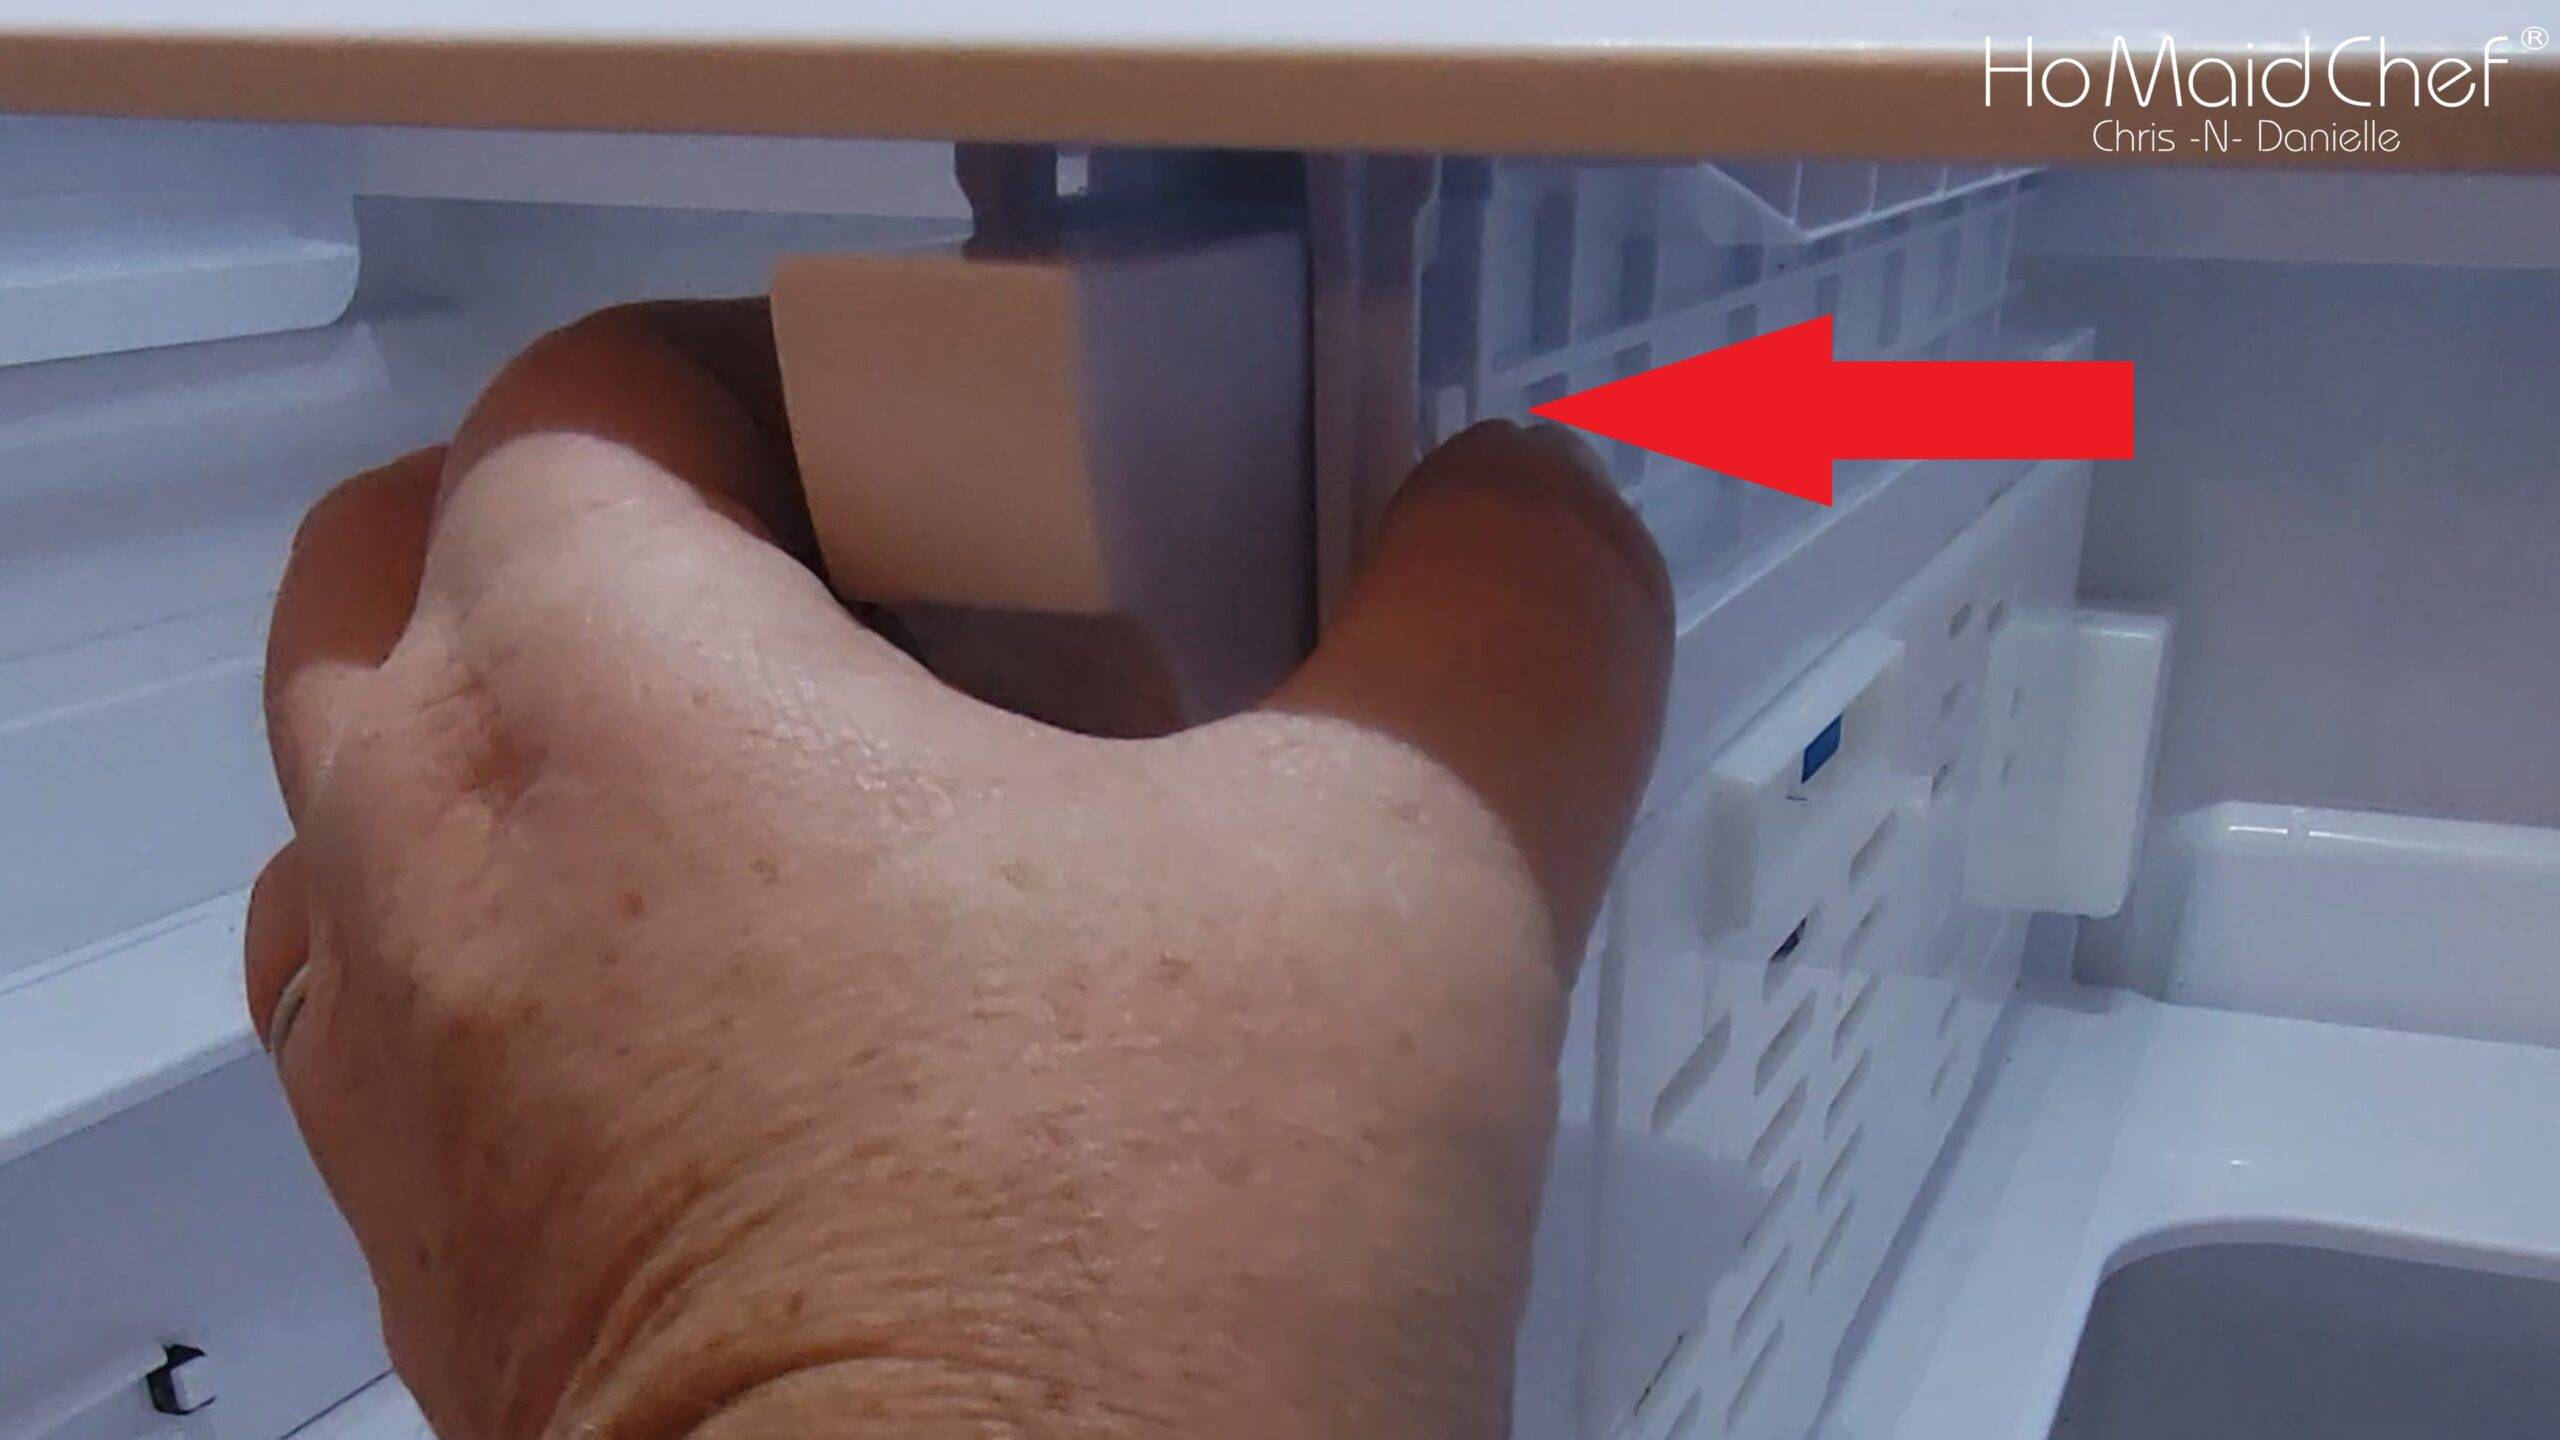
For most refrigerators the evaporator “Cooling Coils” are in the back wall. To gain access all the fridge shelves must be removed. For the adjustable shelves this is easy, but for fixed humidity control bin, it don’t just lift out. For the Samsung Fridge there are two buttons right above the filter that press-in and allow the Bin shelve to be removed.
Once the humidity control bin shelve is out there are 4 screws to take the back cover off, one has a cove that must be removed. To remove the cover we used a flat head screw driver, but a butter knife will probable work as well. Just be careful not to damage the fridge.
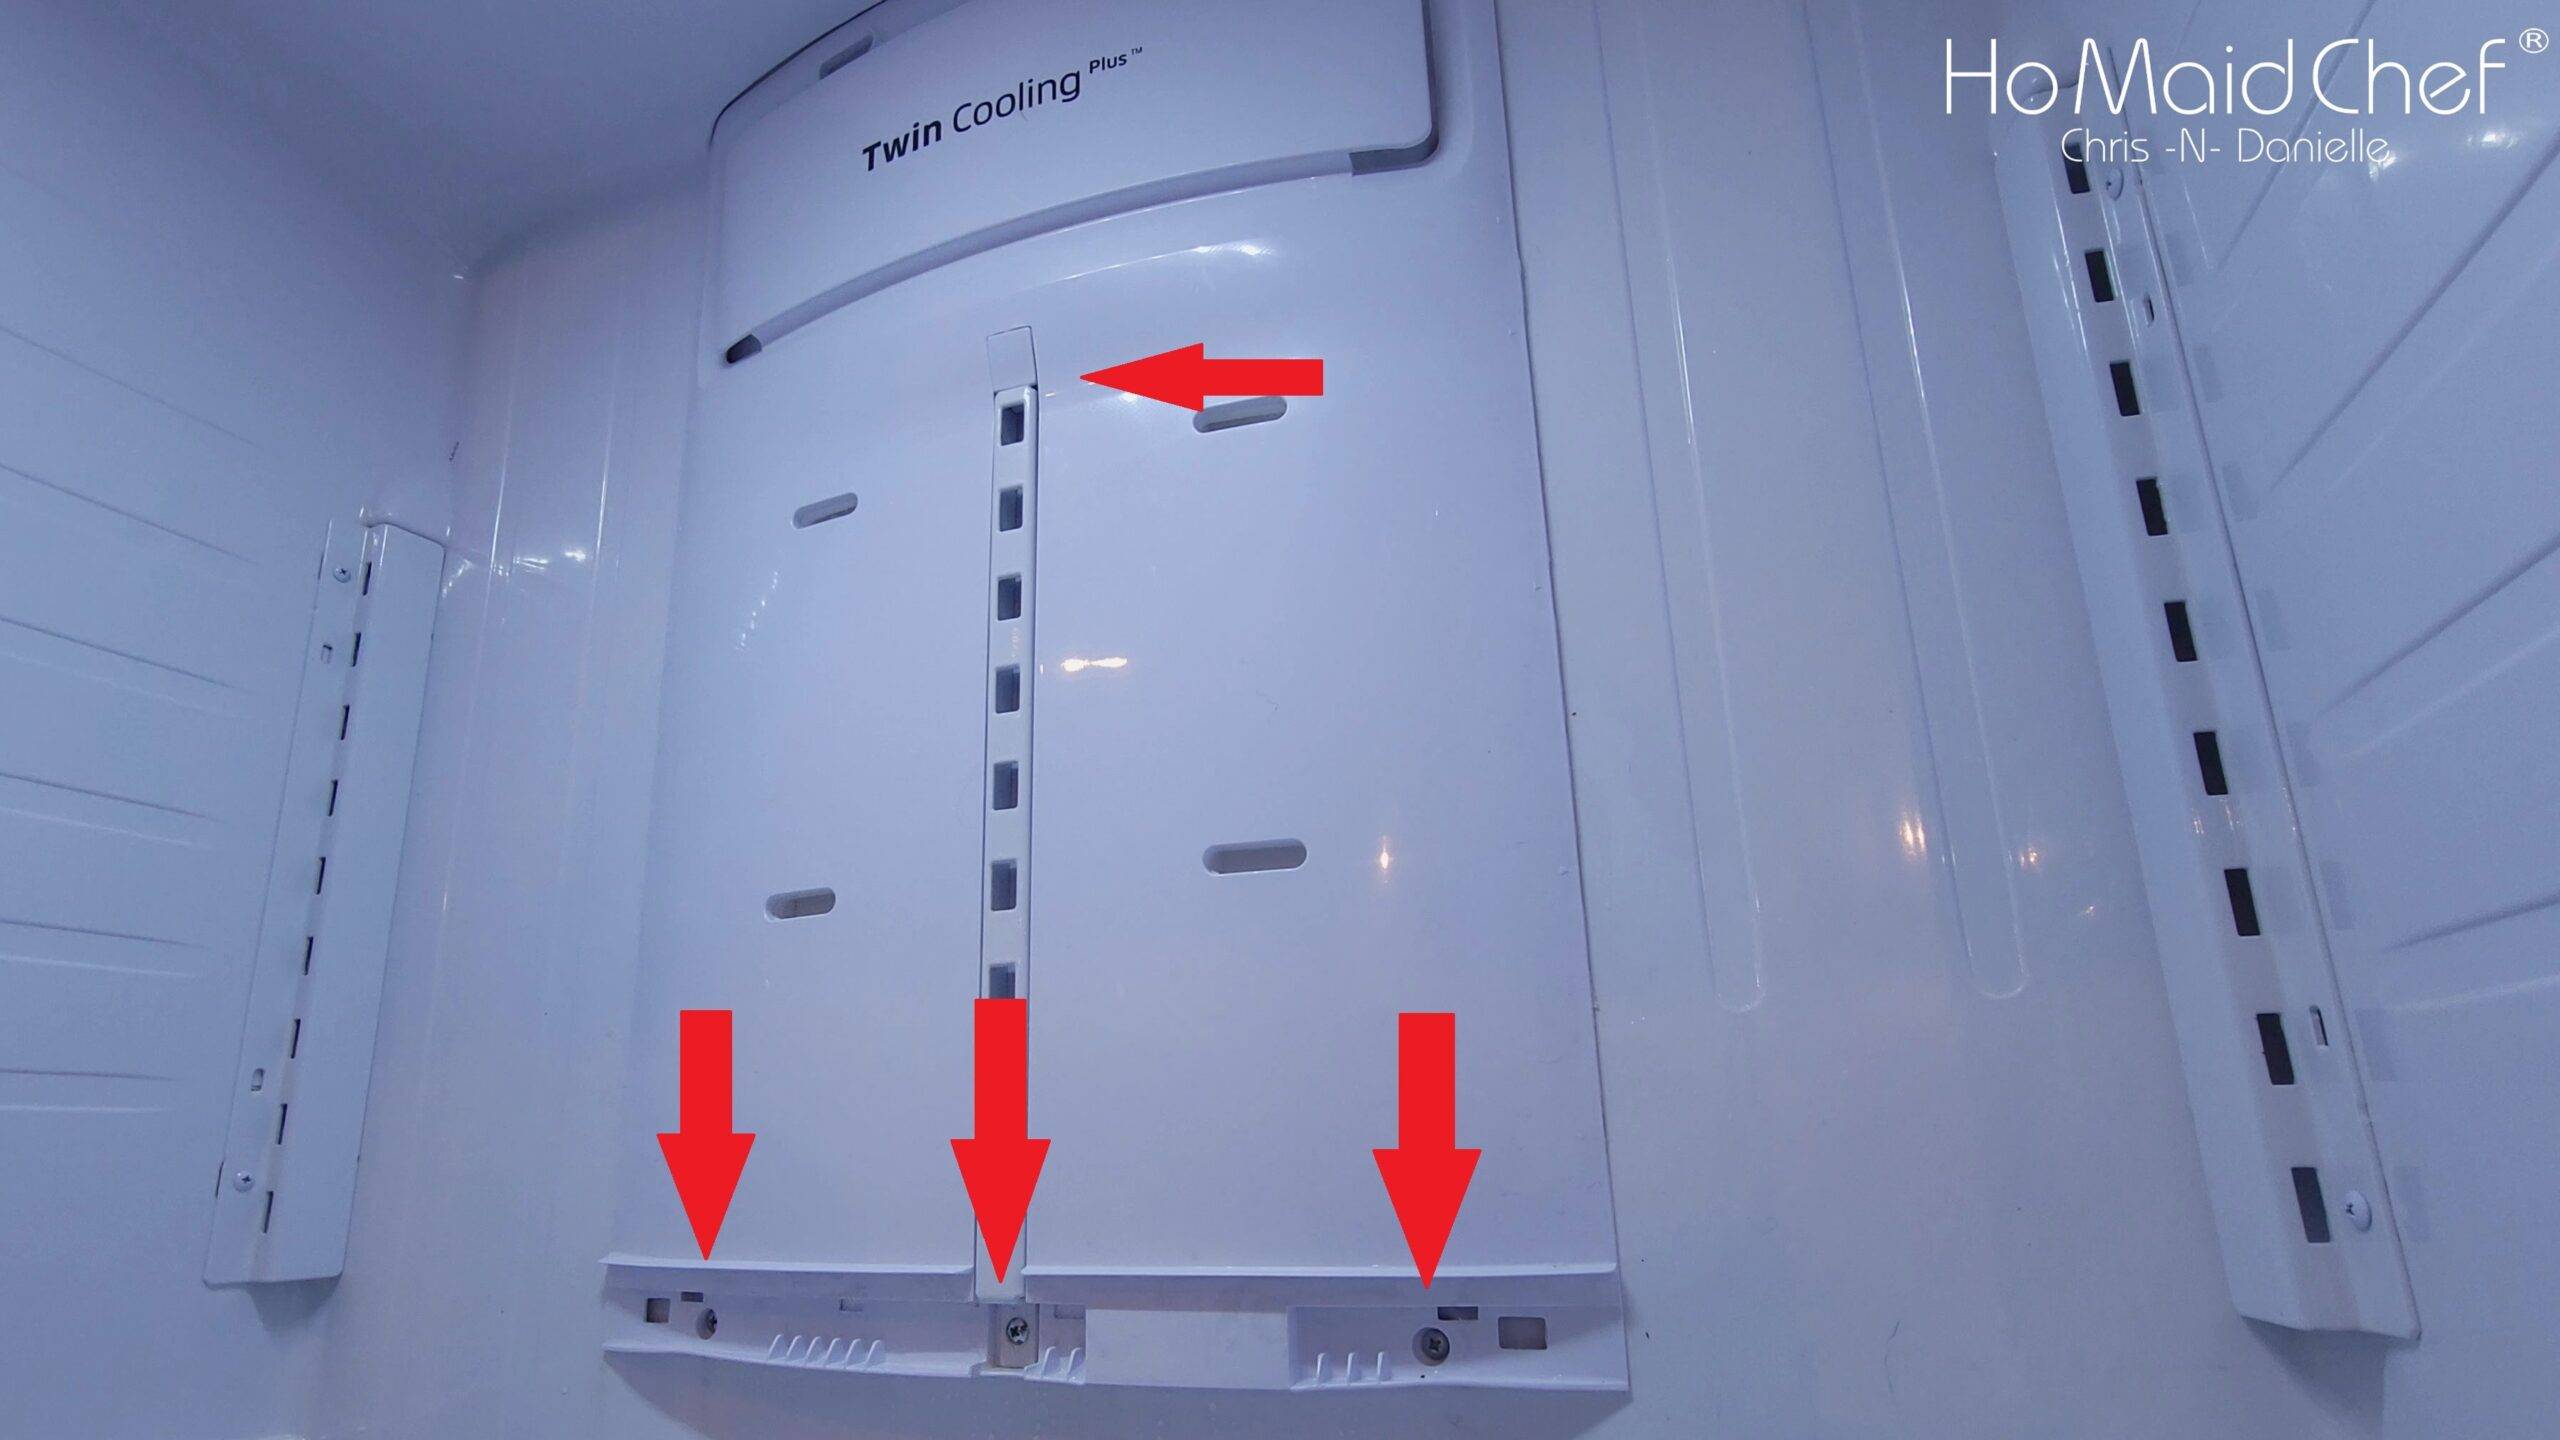
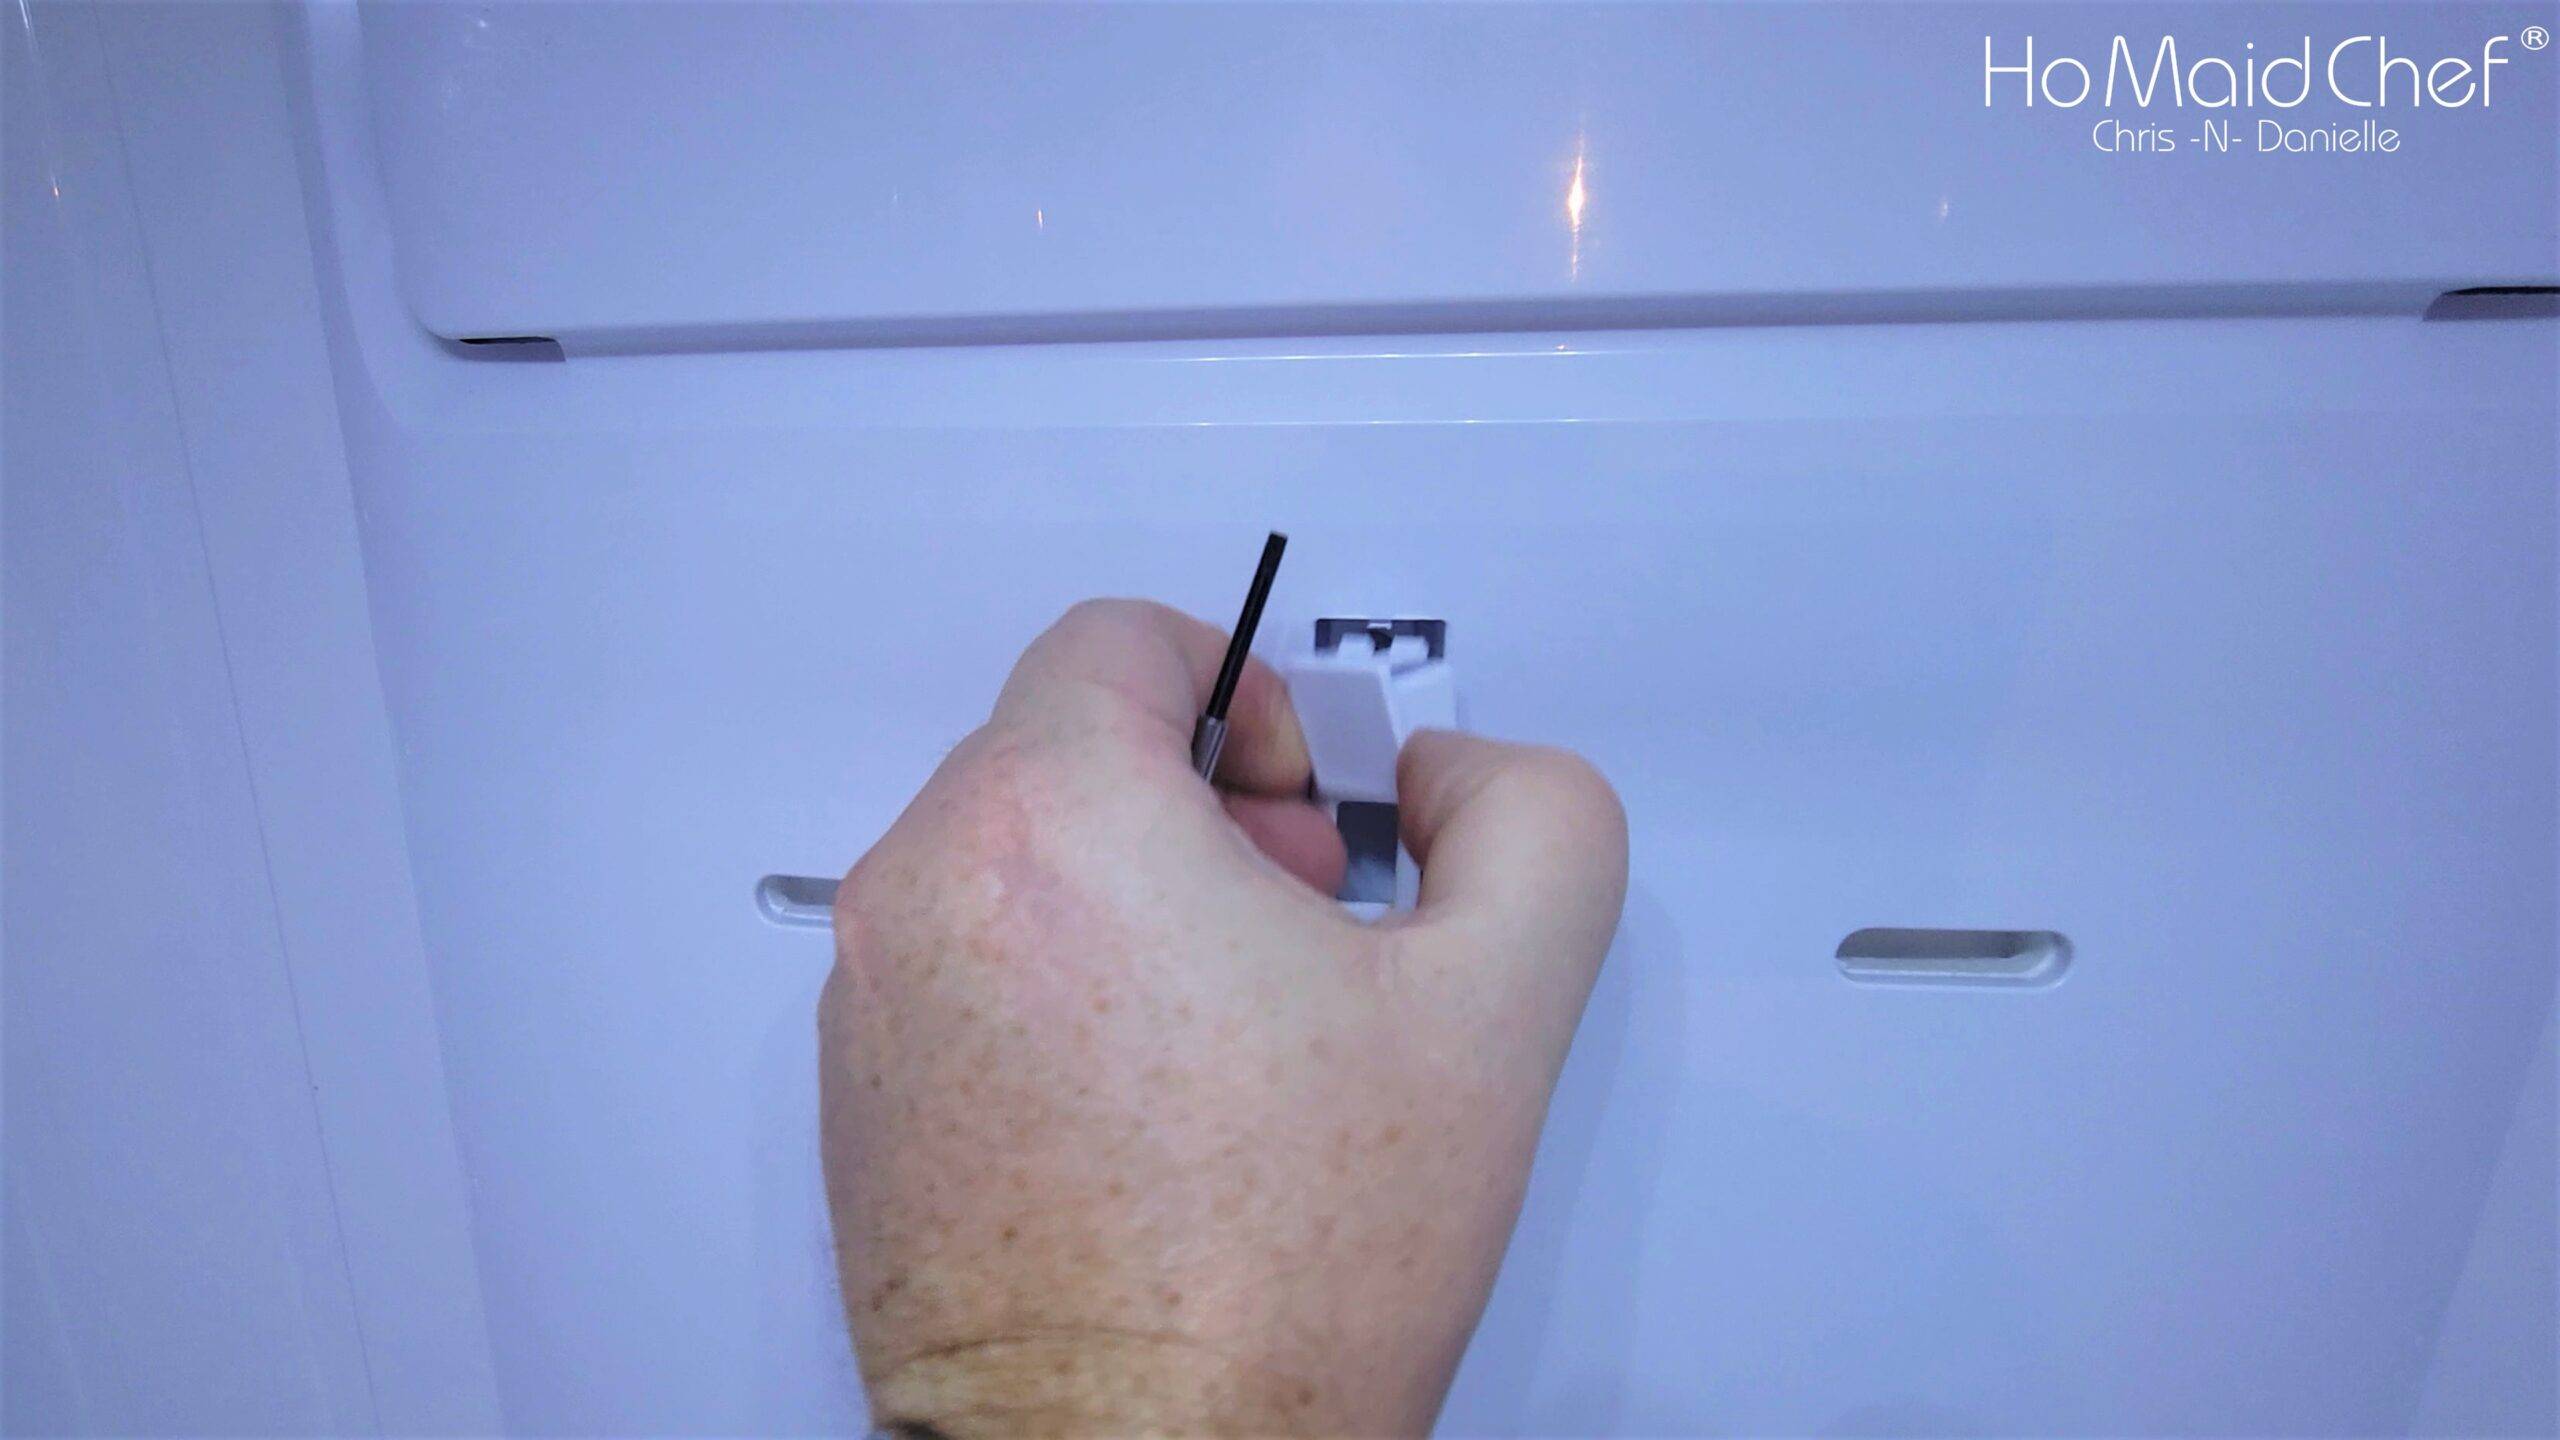
Once we have all the screws are out there are little clips built on the sides of the evaporator panel cover. To remove the panel you want to push in on the sides as you pull. Don’t force the panel, if there is still ice behind it you can break the foam insulation.
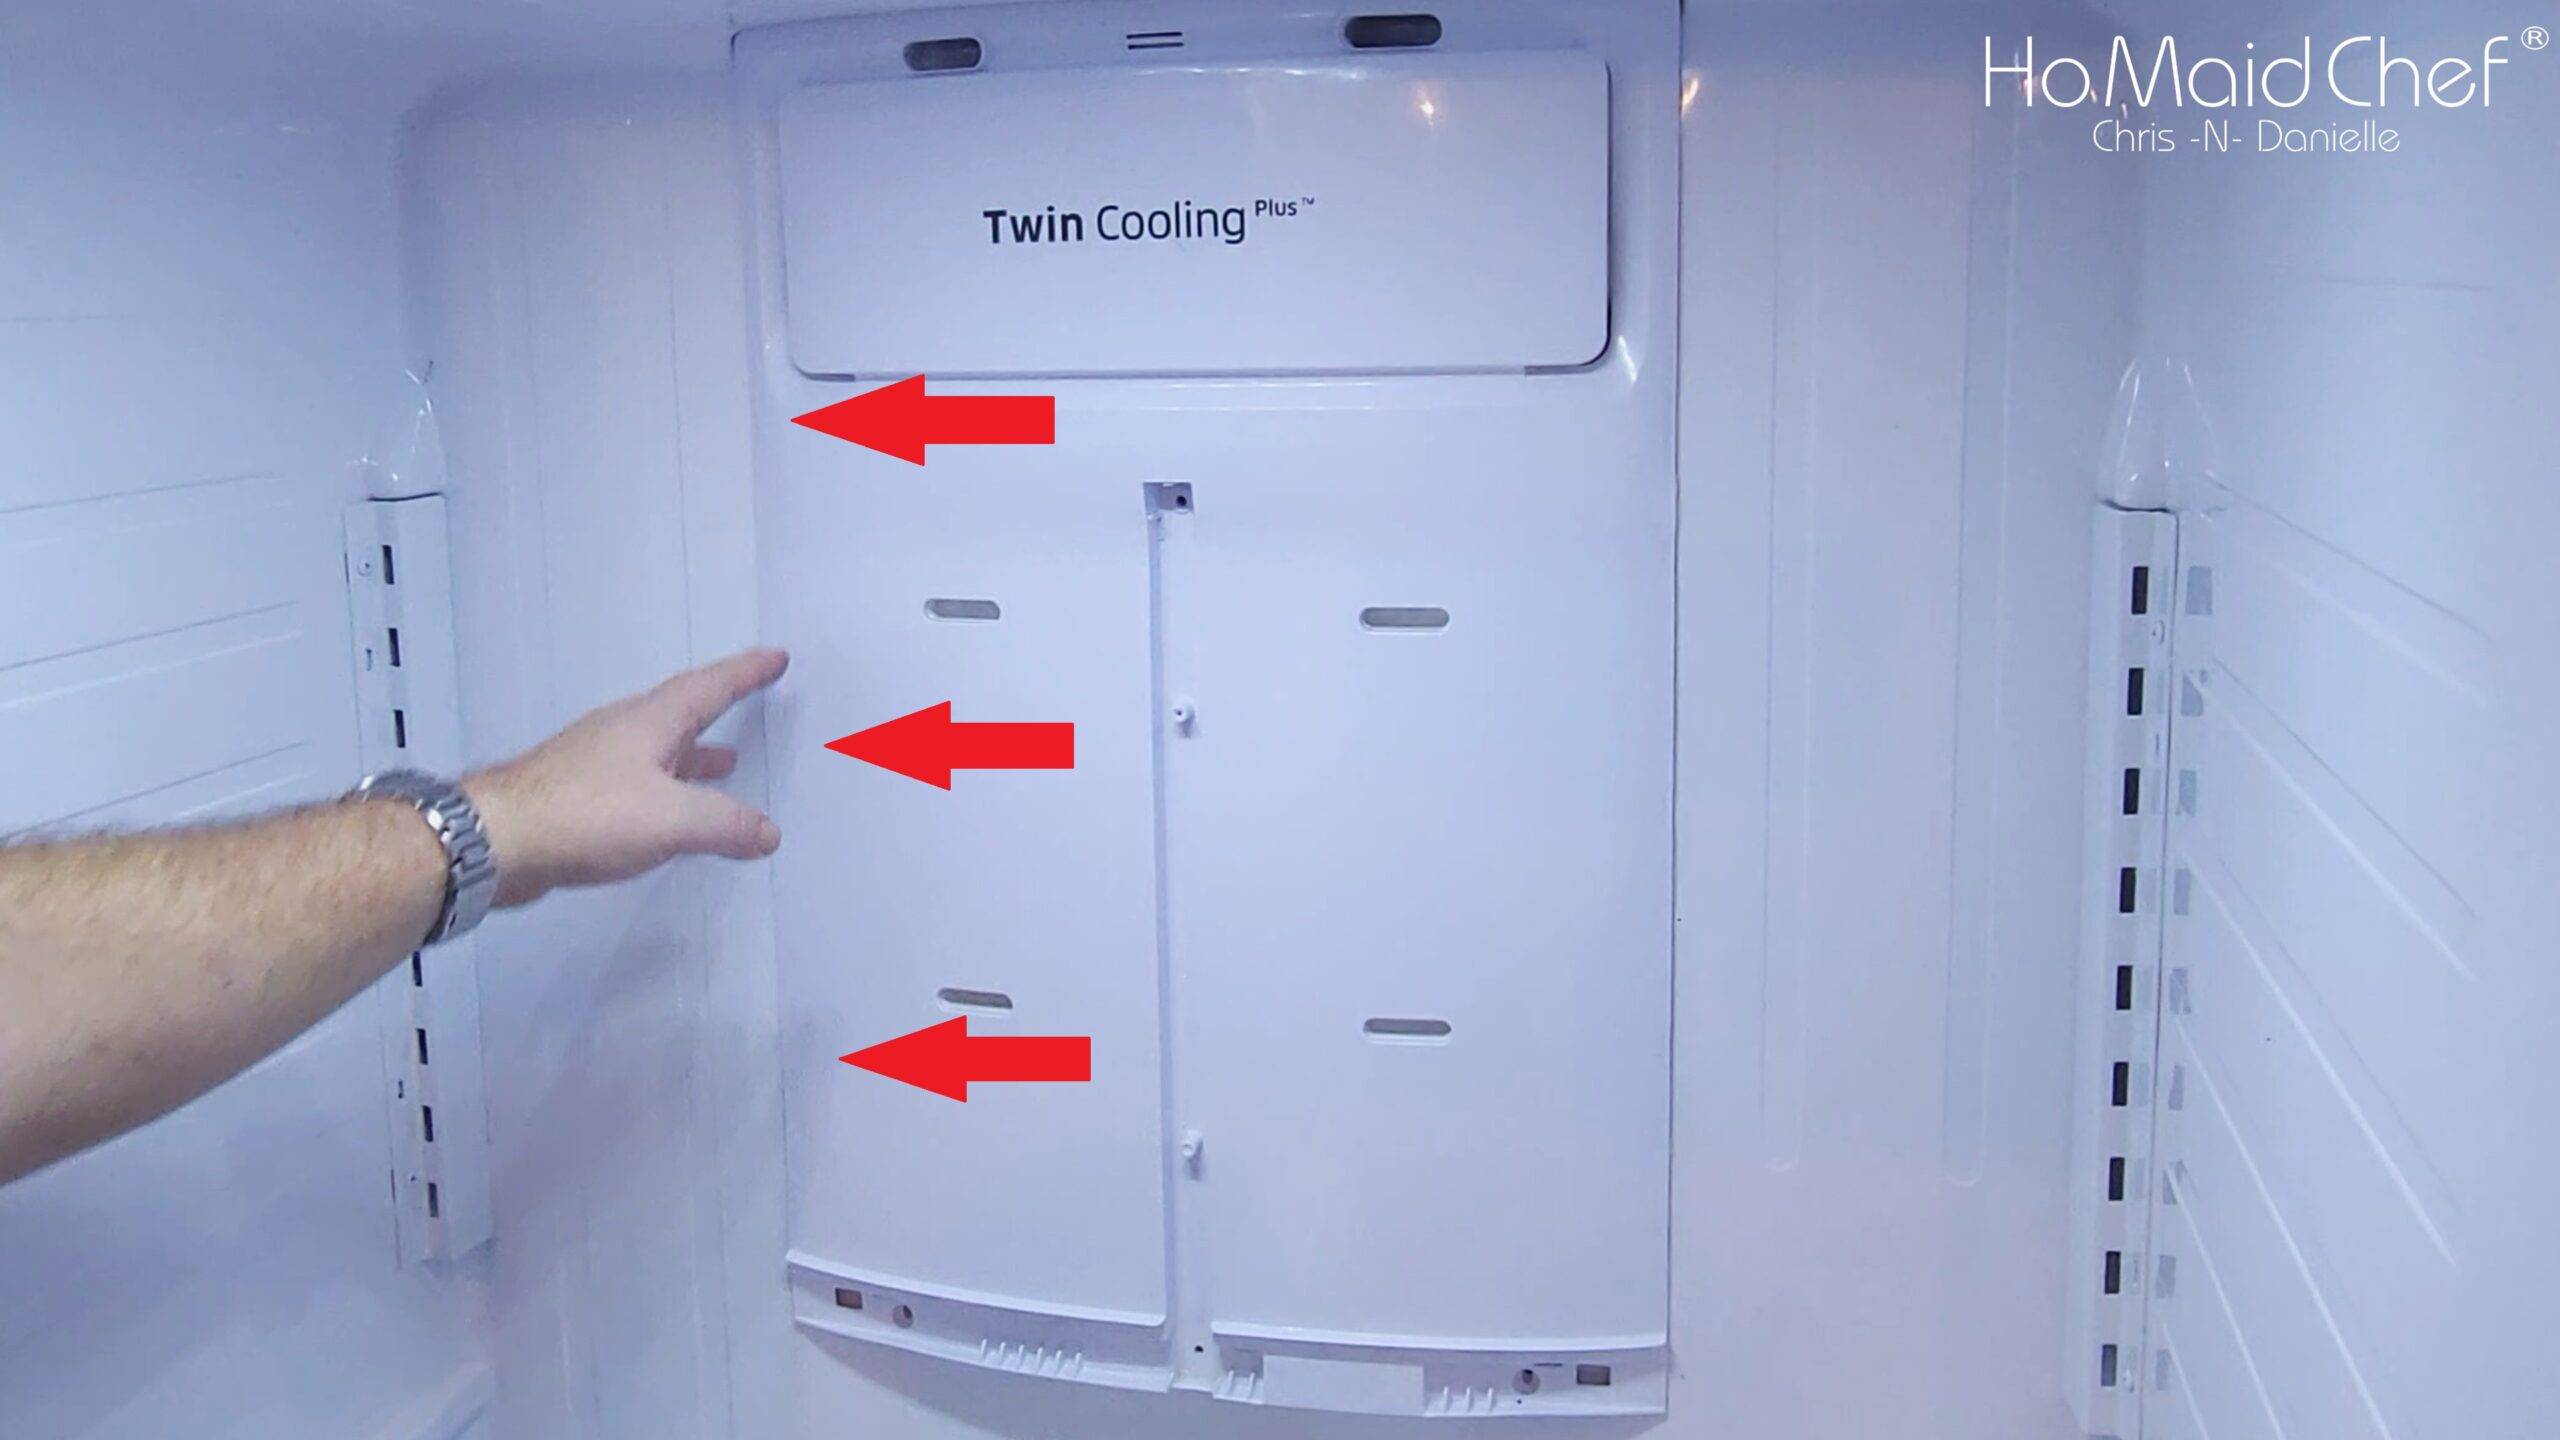
Be wary of the wires connected to the evaporator panel, don’t want to break them pulling to hard. To defrost the fridge you don’t need to pull the panel out all the way, just make room to see the ice buildup. Also we aren’t turning the fridge off because there is further testing we can to do below after the ice is gone.
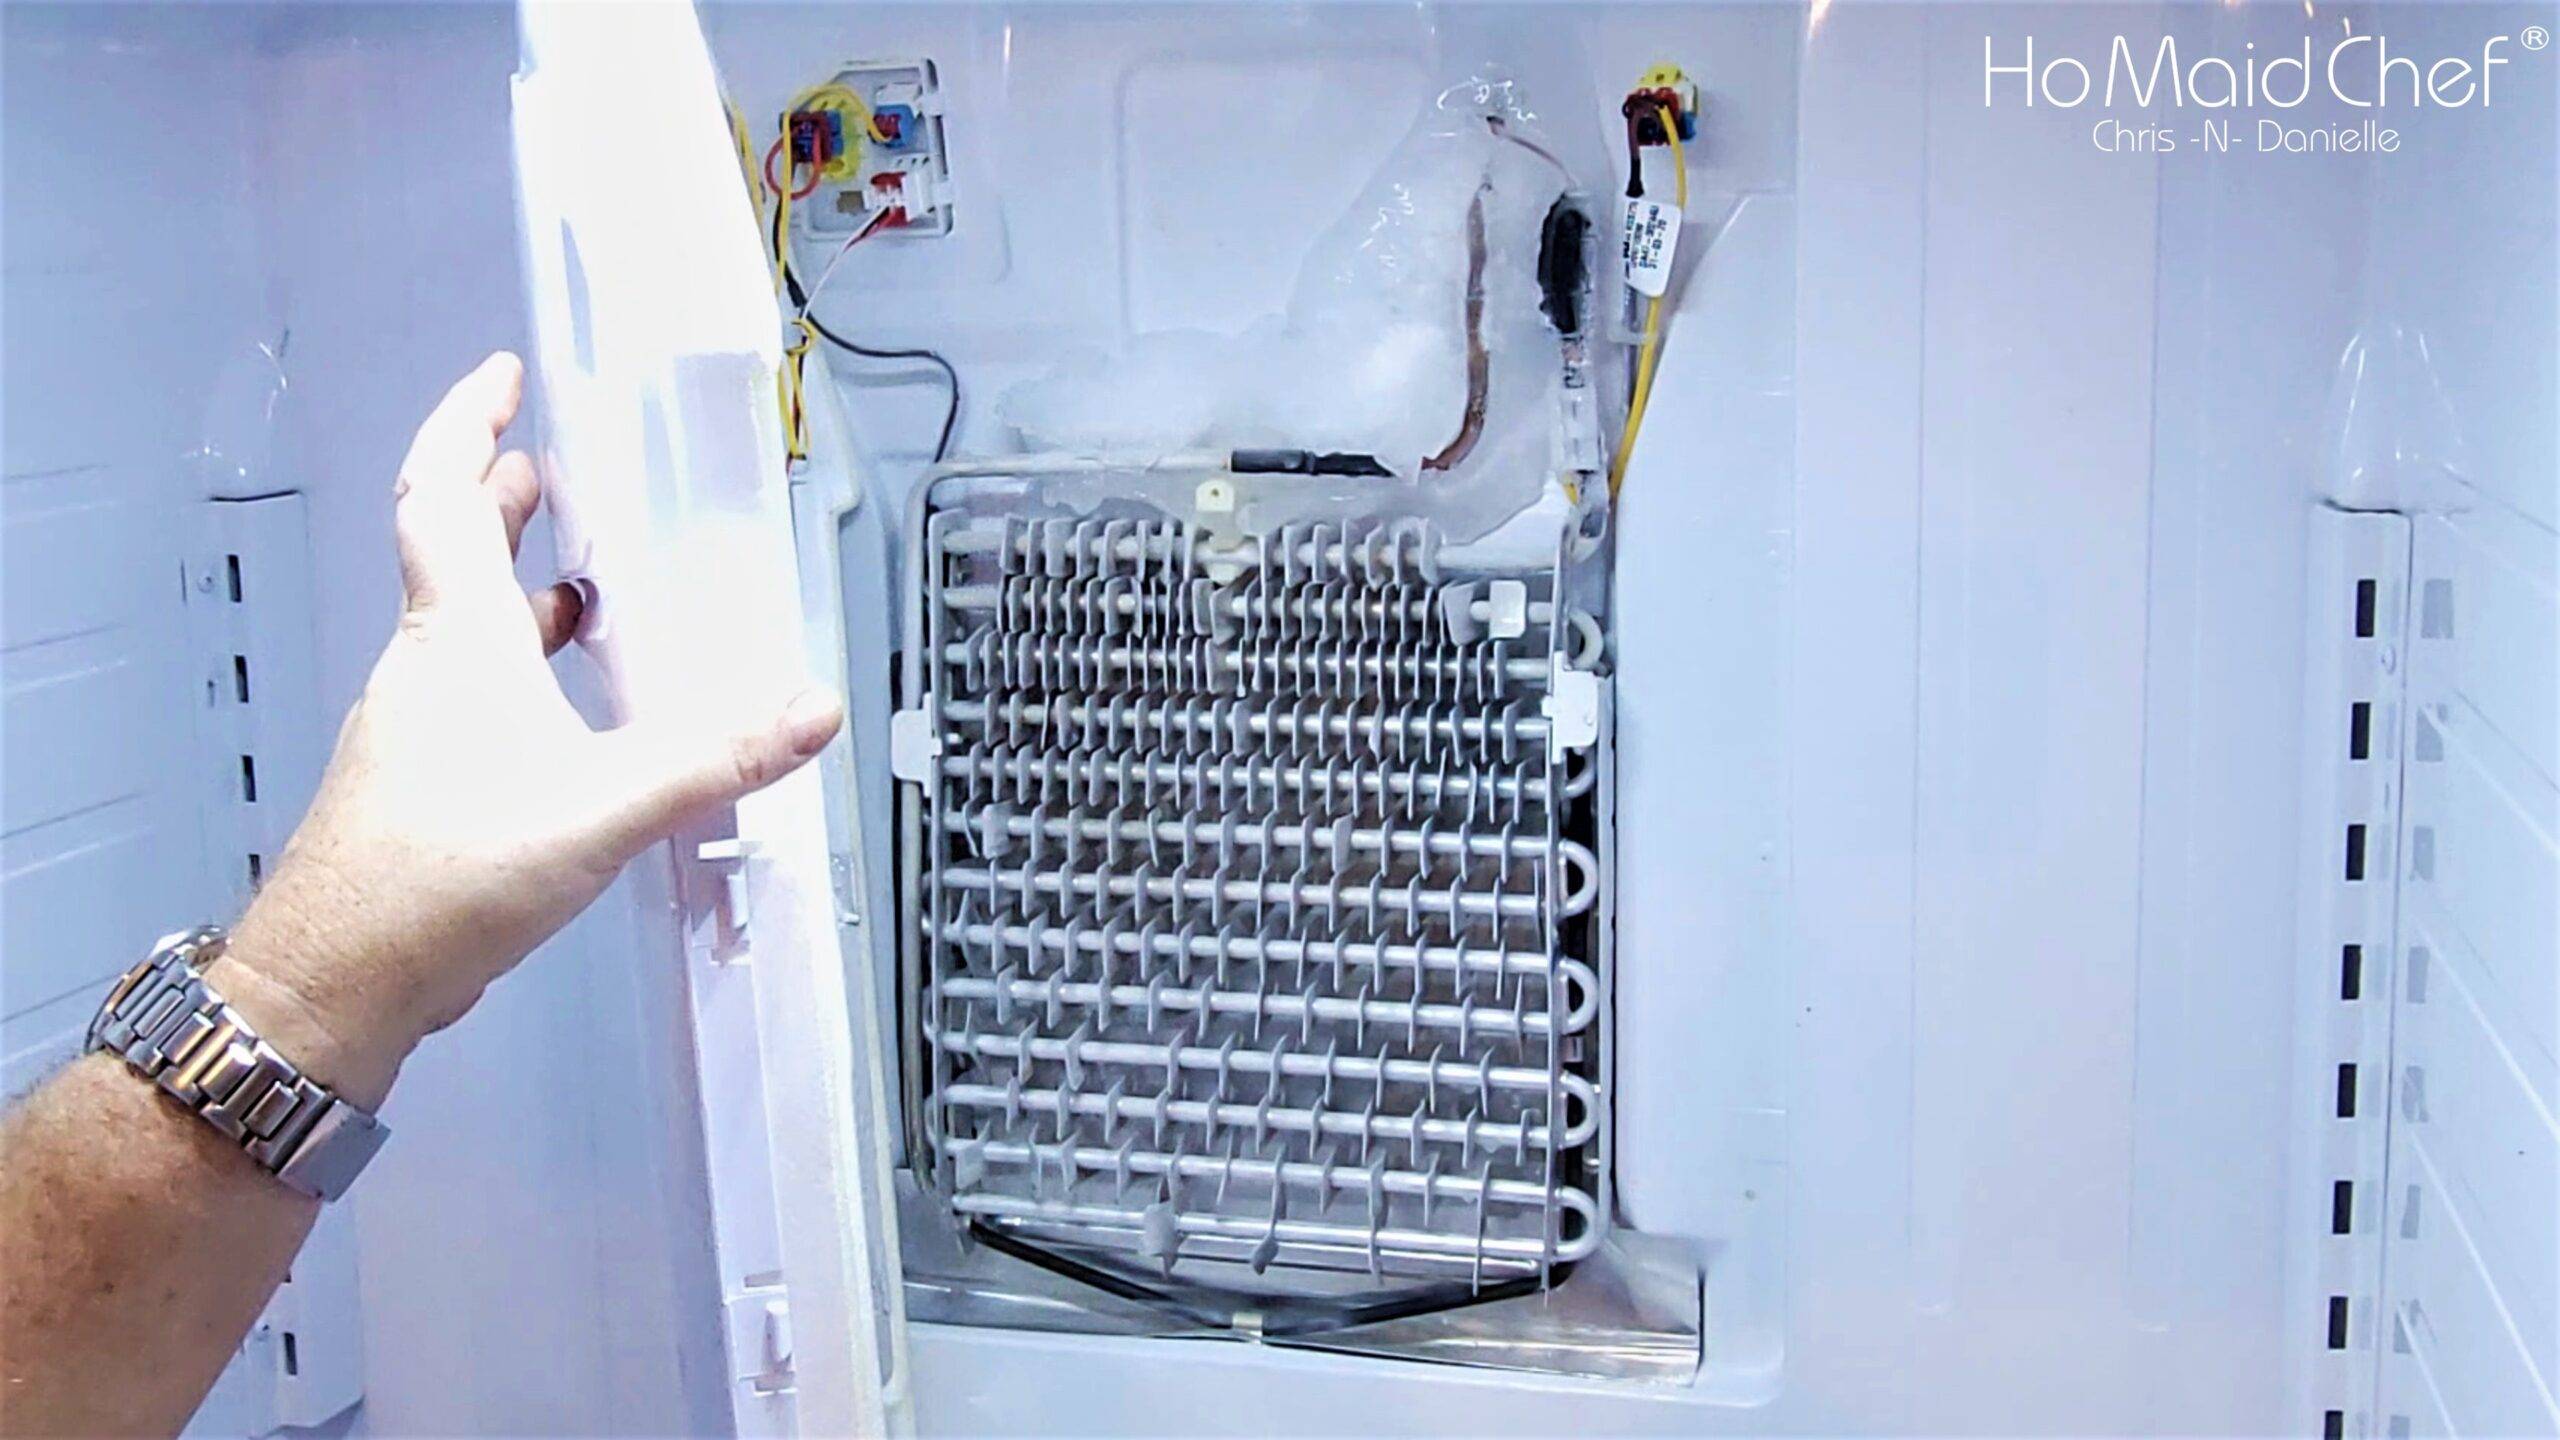
How To Defrost A Fridge Evaporator And Test After
On our fridge we used a heat gun on low to melt the ice built up above our evaporator that was blocking the fan. If using a heat gun to melt the ice, be careful not to melt anything else, they are very hot. If you don’t have a heat gun a hair dry will work fine.
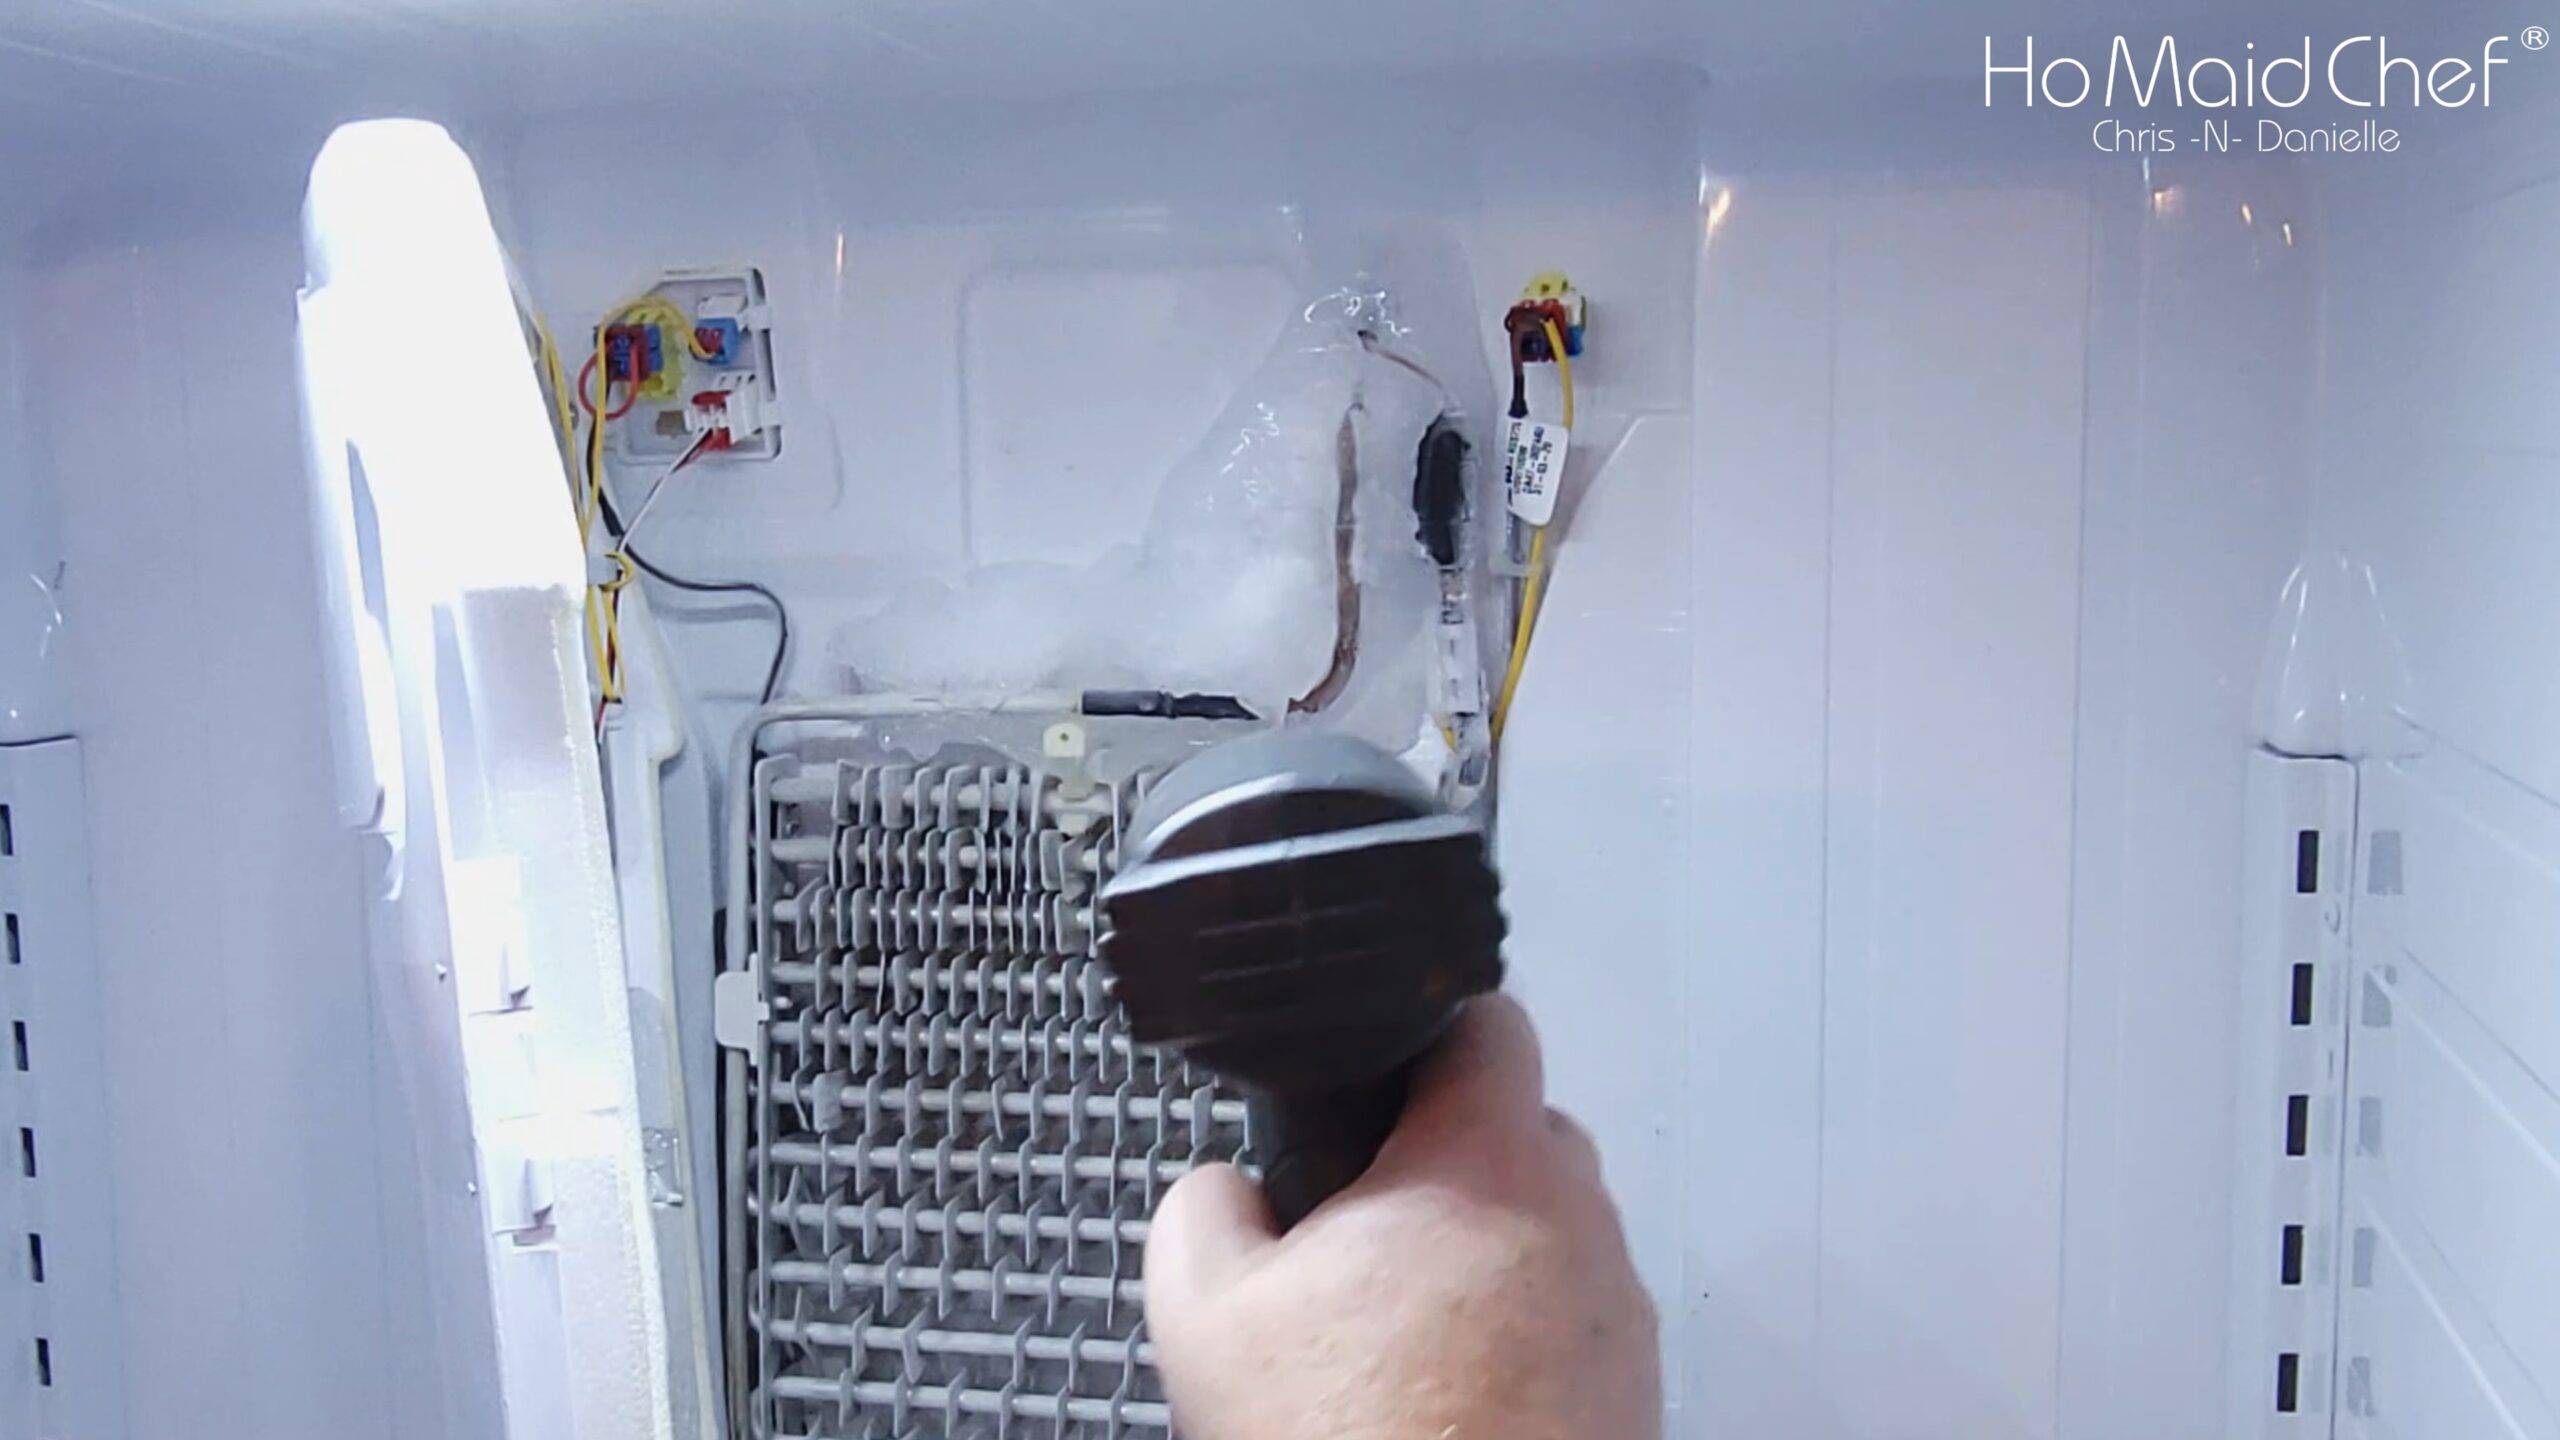
Once all the Ice is gone you may want to test the fan, our fan was completely stopped from the ice. To do this you will need a magnet, I borrowed one from the one of my wife’s magnetic curtain hangers. Then at the top of the fridge with the door open, side the magnet across until the light turns off. You should hear the fan turn on and compressor start in a short amount of time.
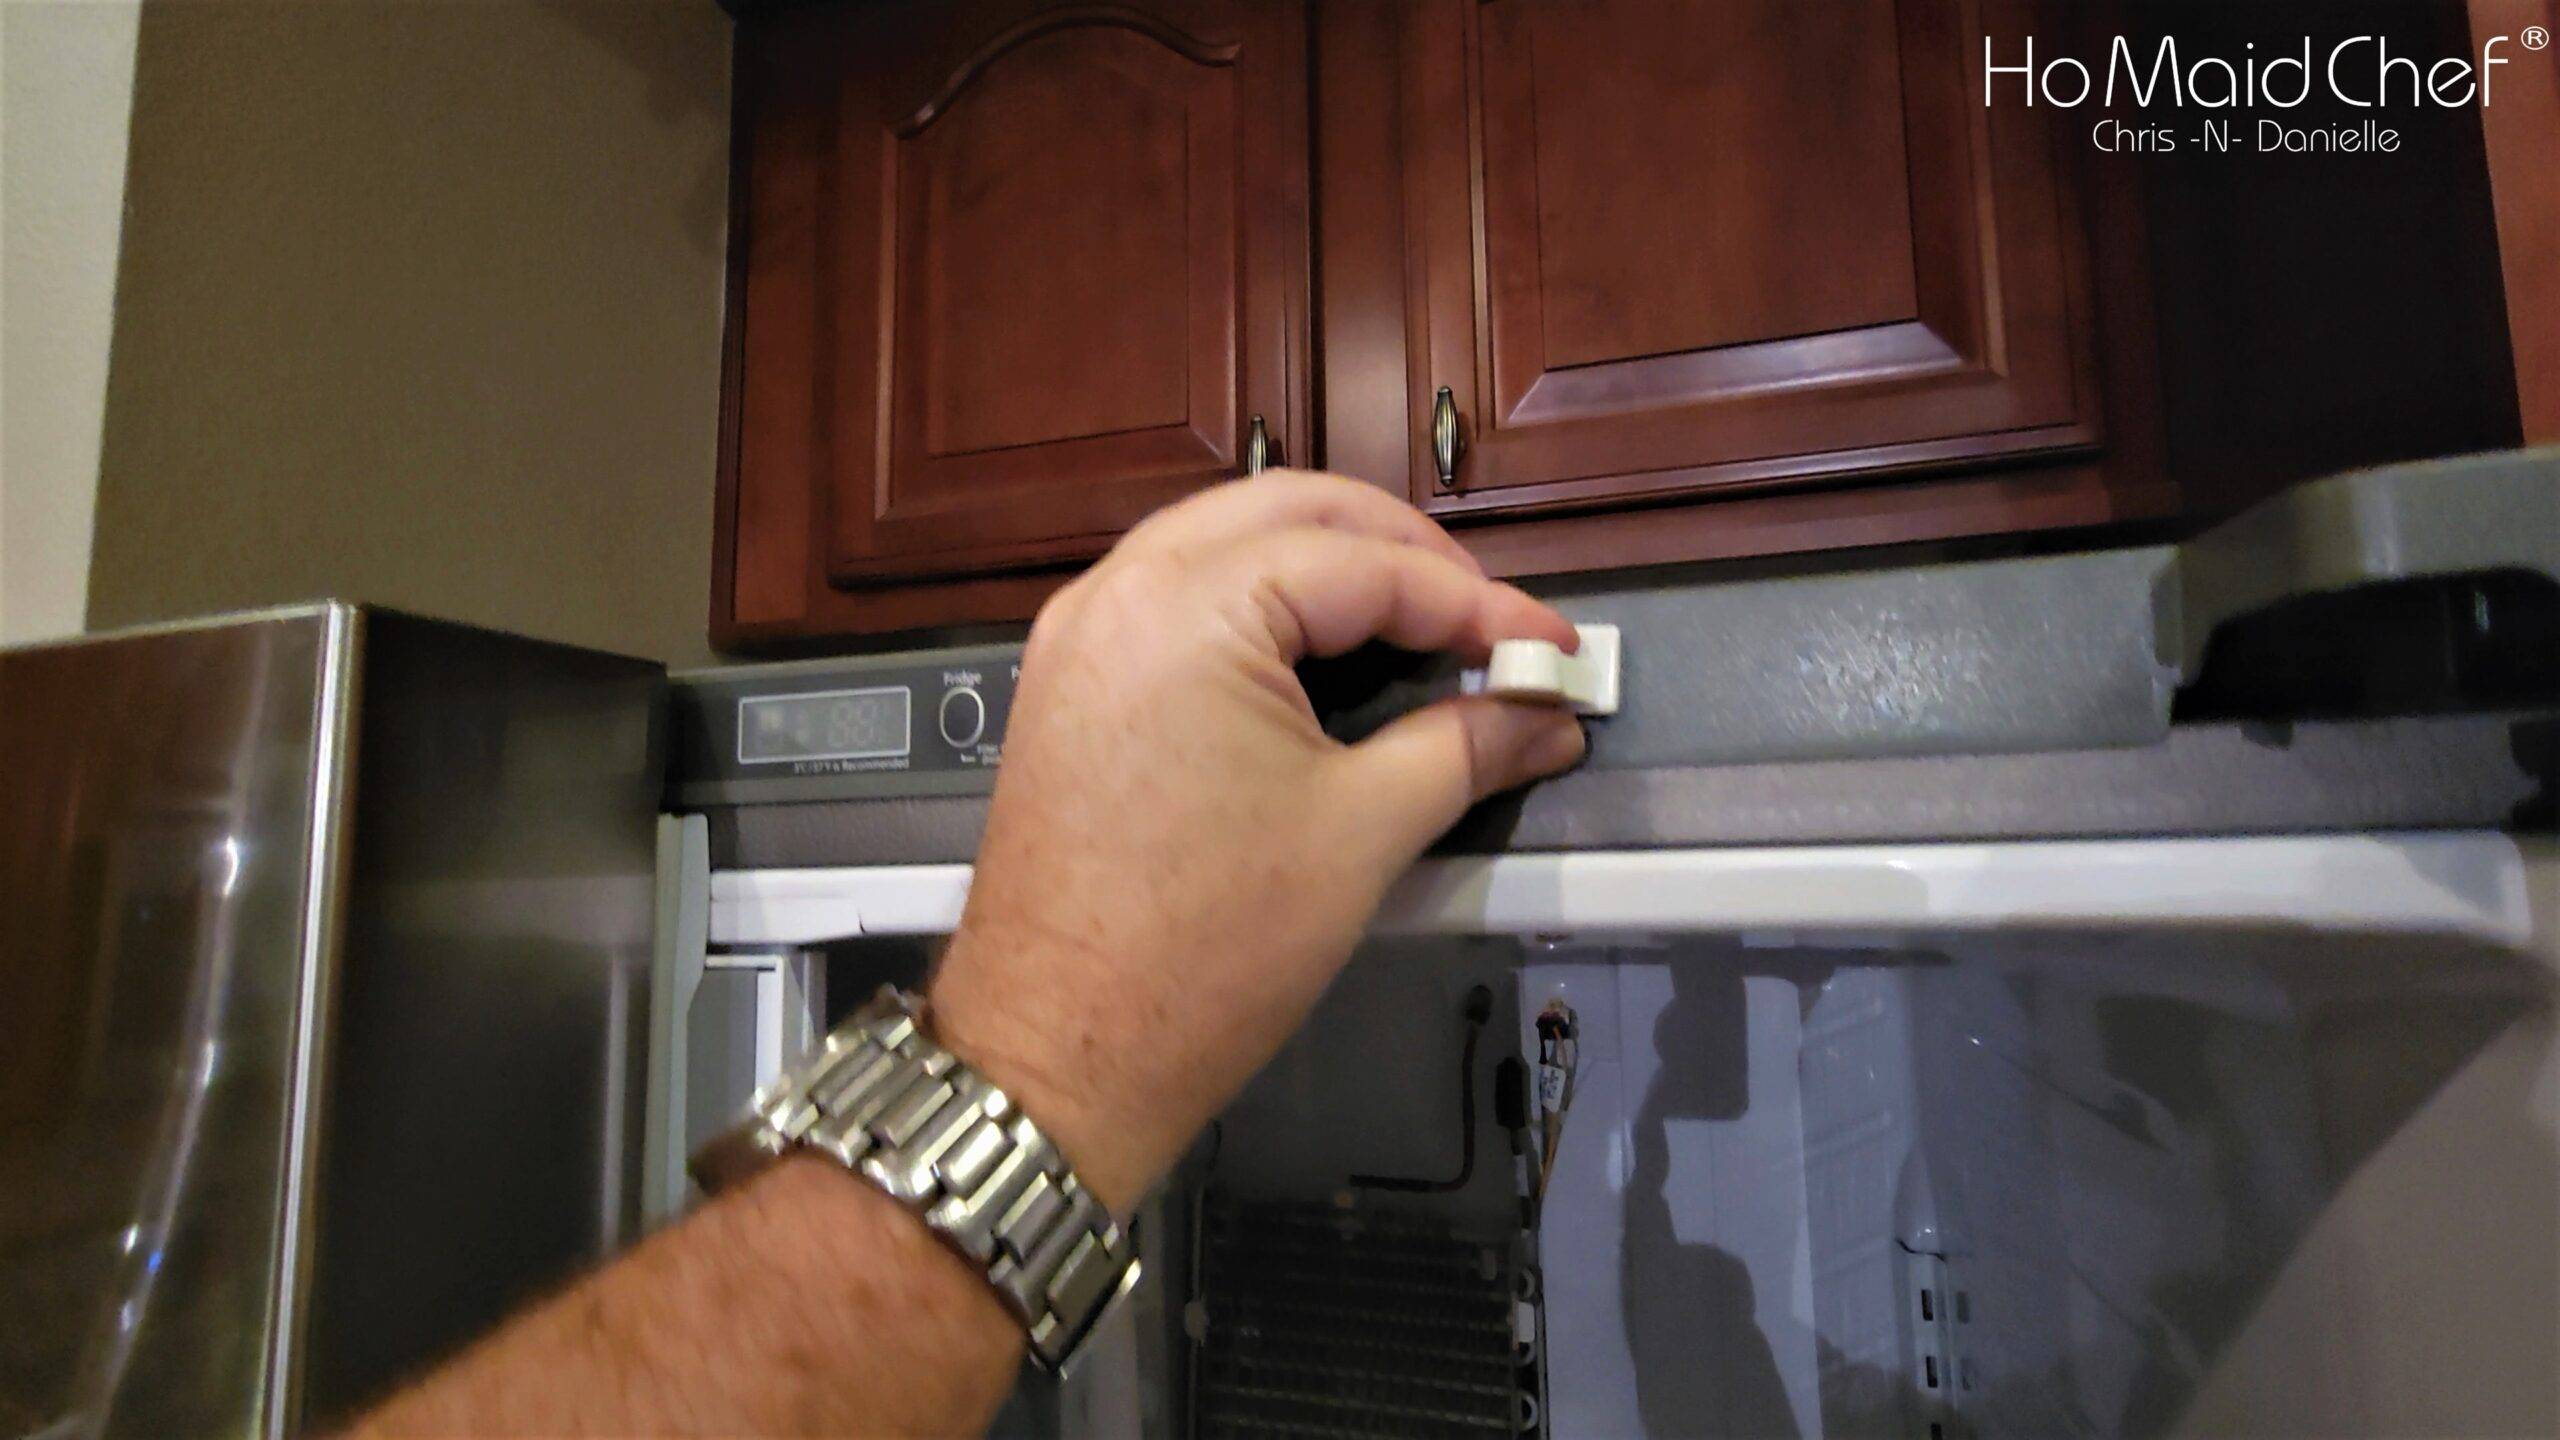
Now that everything is working correctly, time for the fun stuff, putting it all back together. Before putting the shelves in I cleaned the inside of the fridge and all the shelves, guys, your lady will love that.
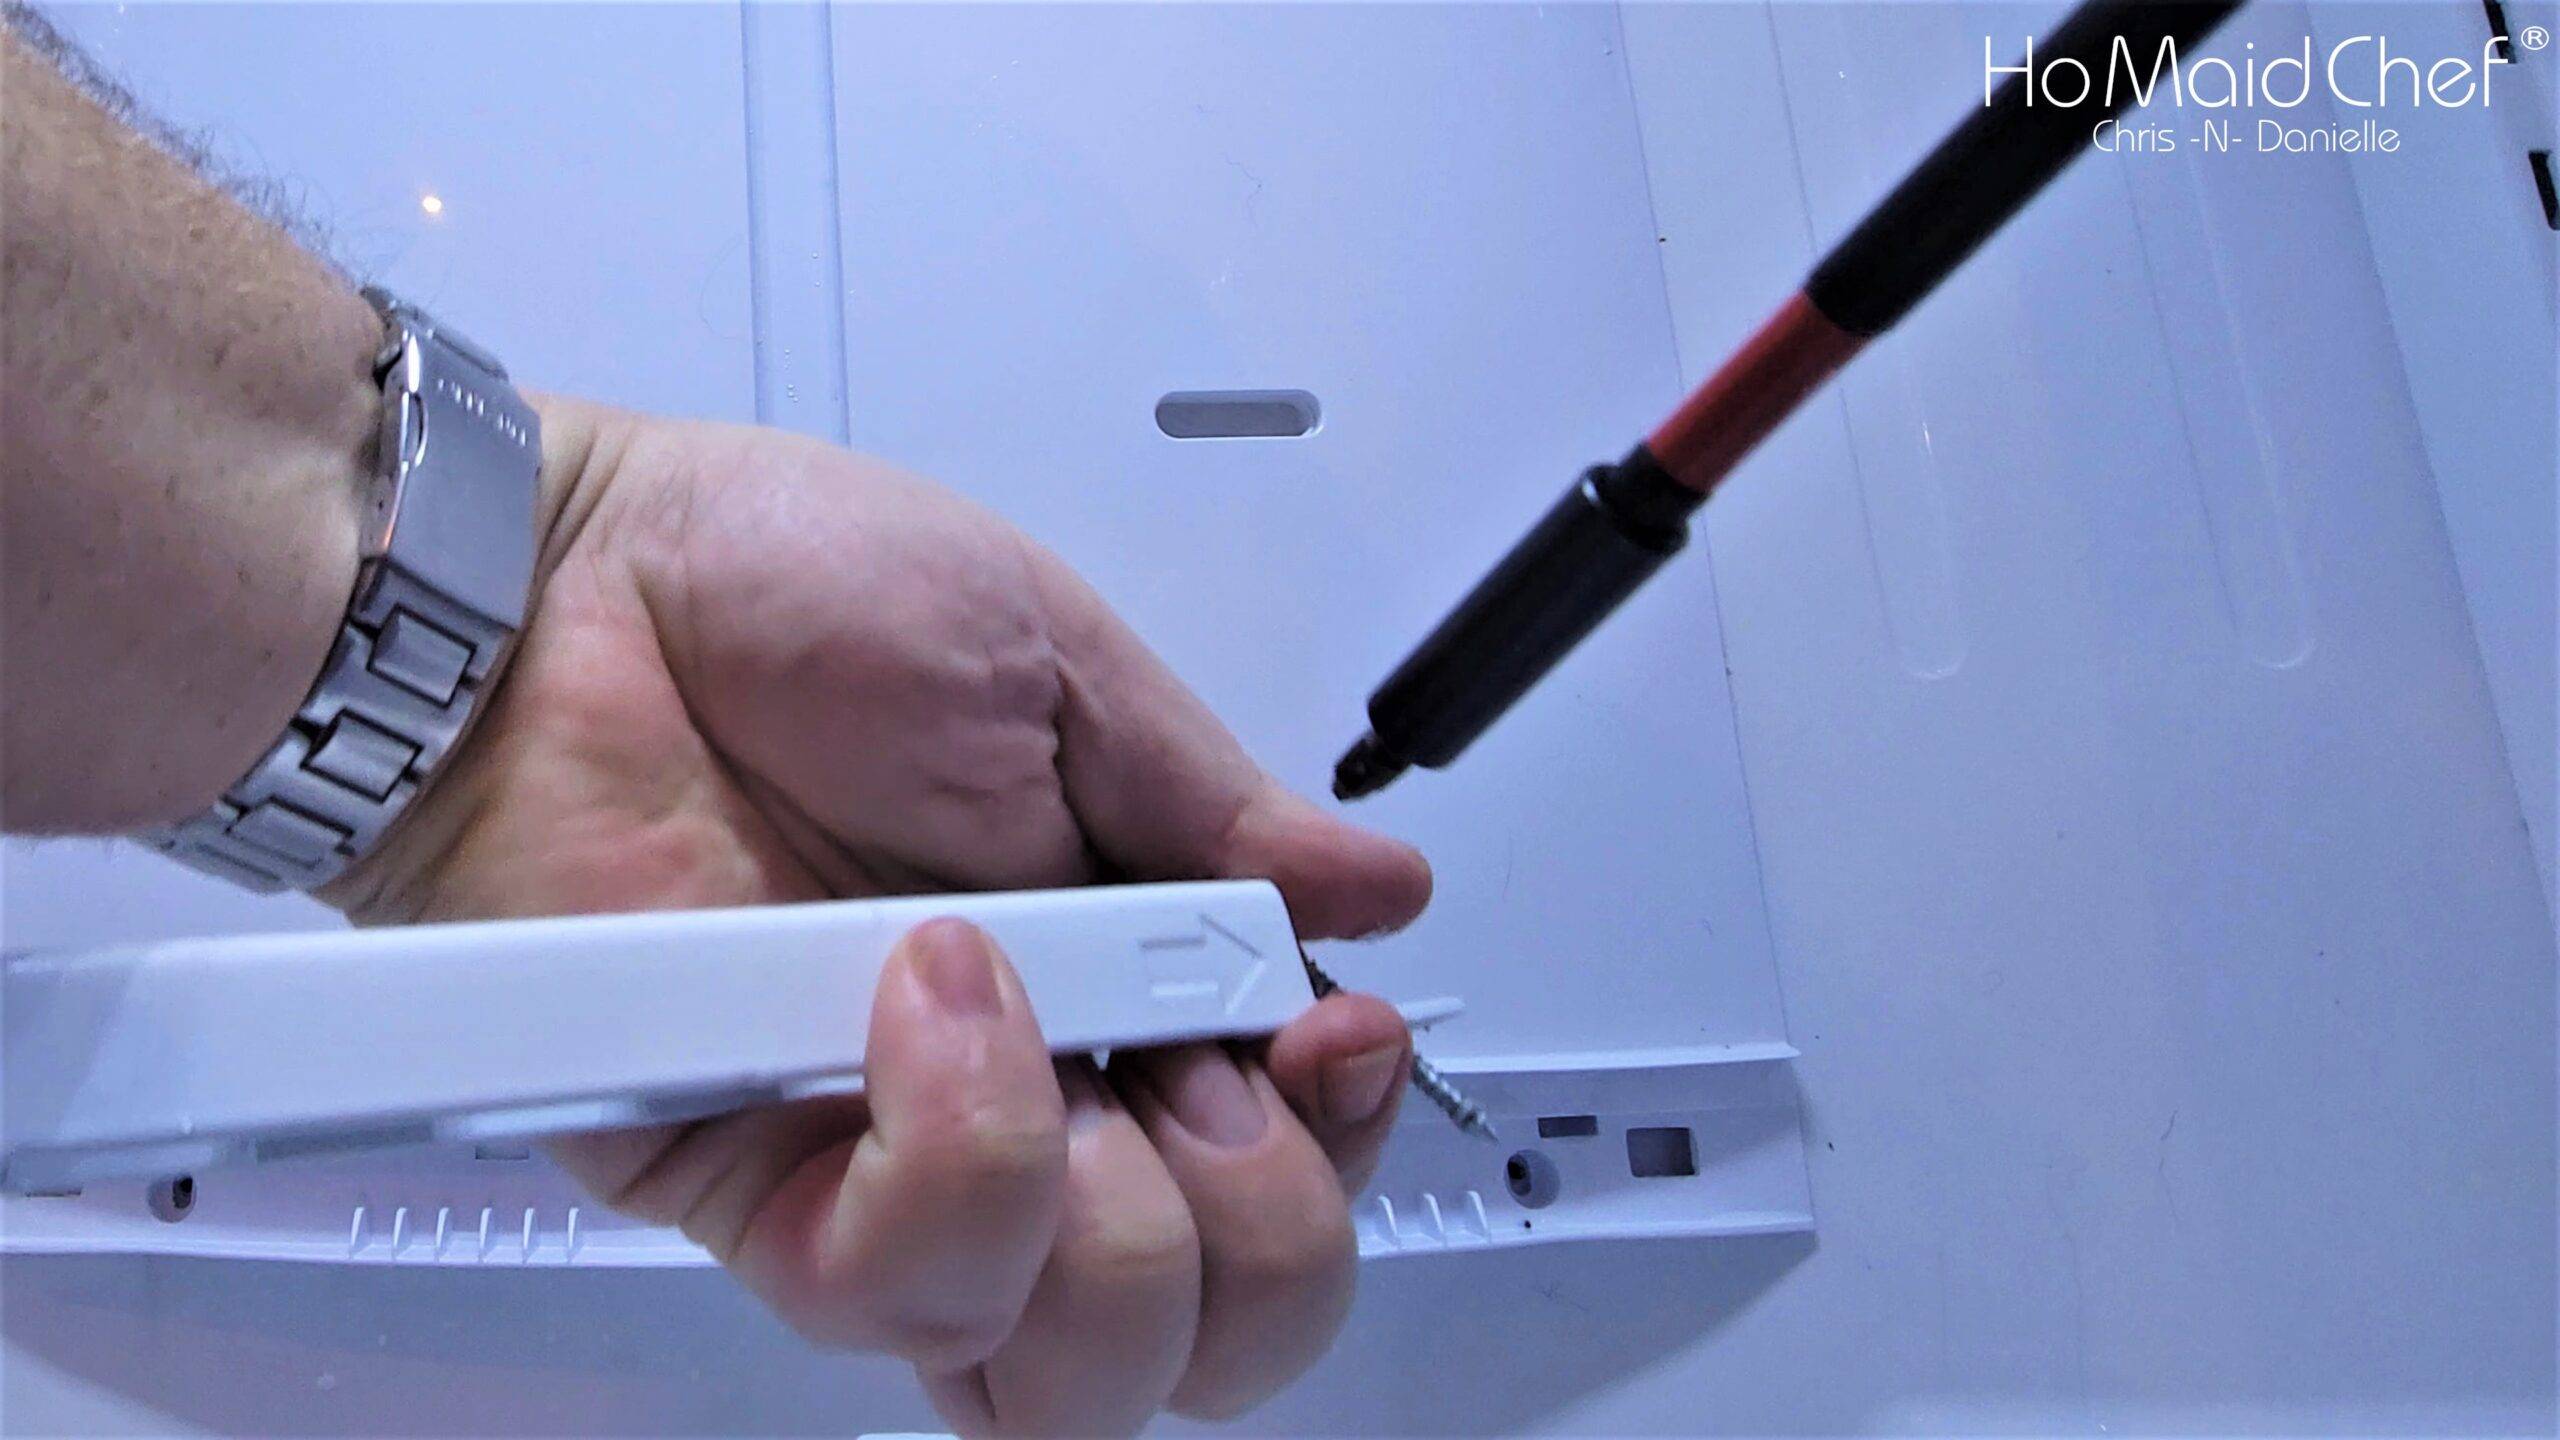
The evaporator cover will just snap in place, putting the top in first, than working your way down it to make sure it has all clipped in. After that grab the center rack bar, there is a arrow on it that has to point up when installed. The long screws on the Samsung fridge are for the rack bar, the short screws for the bottom corners of the evaporator cover. Don’t forget the screw cover at the top of the center rack, or it will annoy you every time the fridge is open.
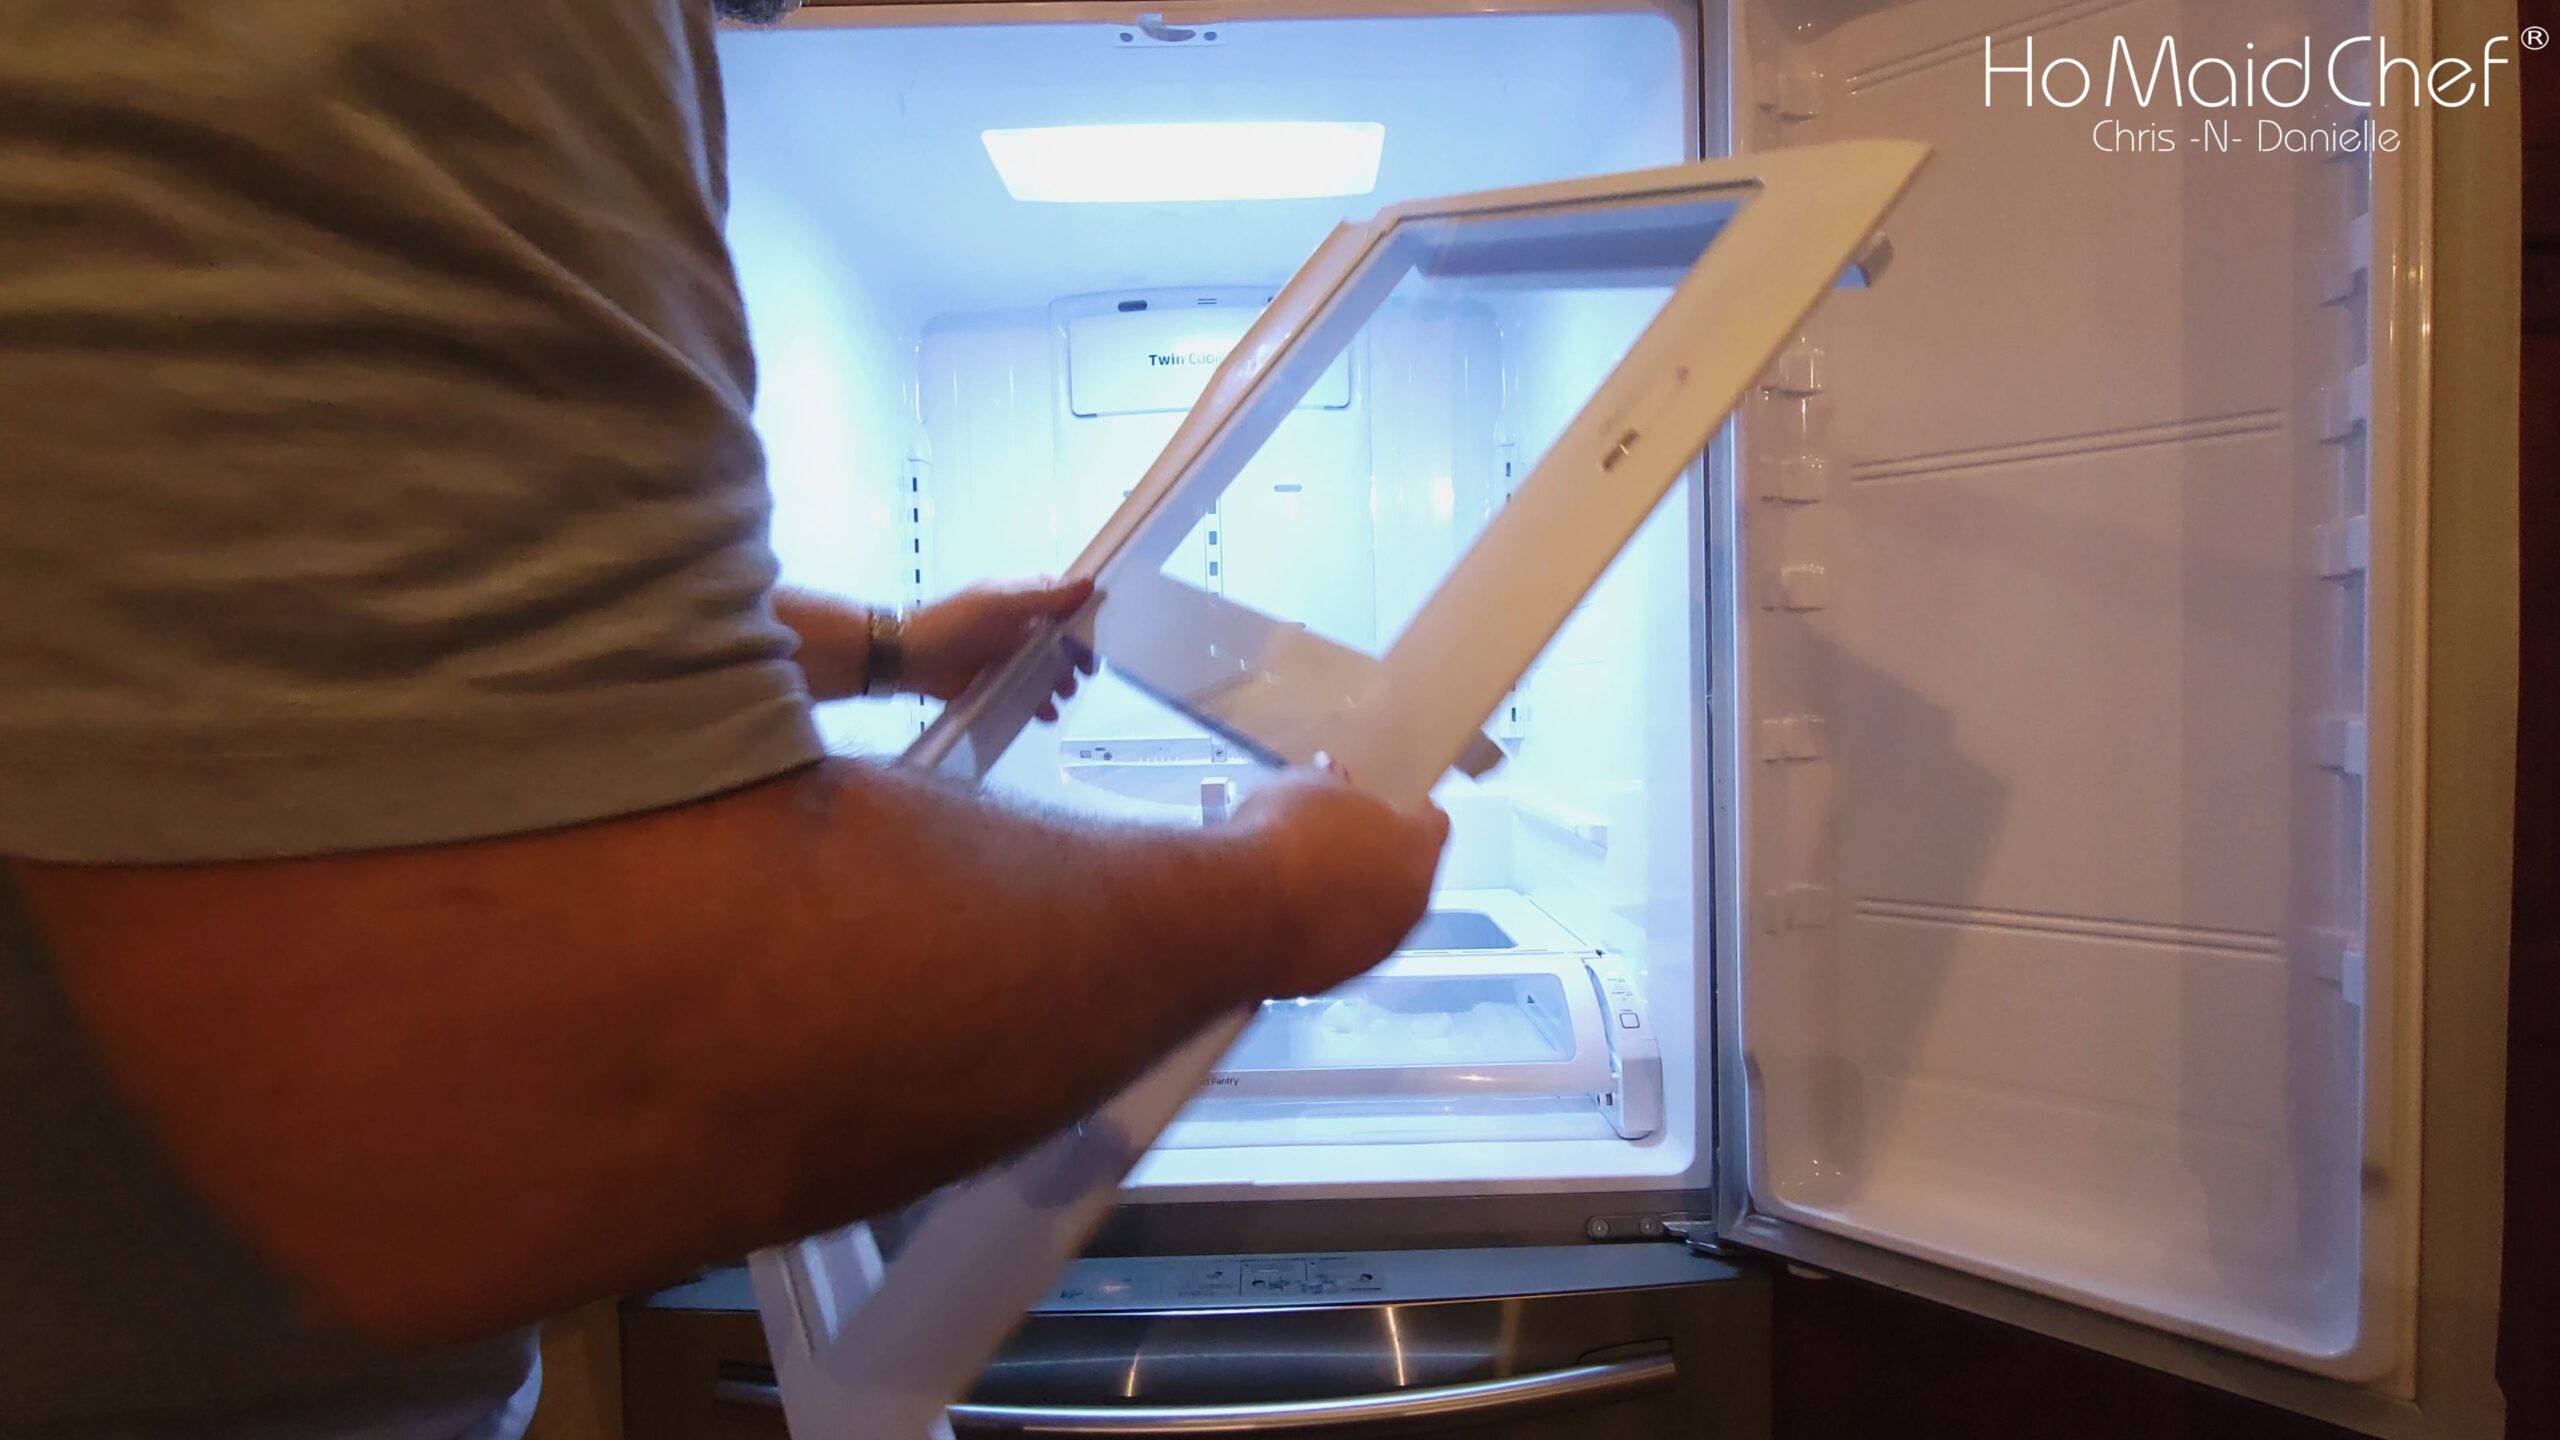
Finally you install the dryer bin shelve in place. slide the back in first to the back of the wall and then gently snap the front in. There will be a click once it snaps in, after the click check to make sure it doesn’t lift up. Then install the filter if removed and shelves. I should have taken a picture before removing the shelves, I didn’t get them in the right spots.
How To Clean The Drain Tubes On Samsung Fridge
To access the drain tubes that remove the condensation from the fridge you first have to pull it away from the wall. Unplug the fridge before removing the back panel. Once pulled away there is a panel at the bottom that must be removed to access the drain pipes. There are 6 screws that secure the panel marked with arrows, don’t remove the ground marked below.
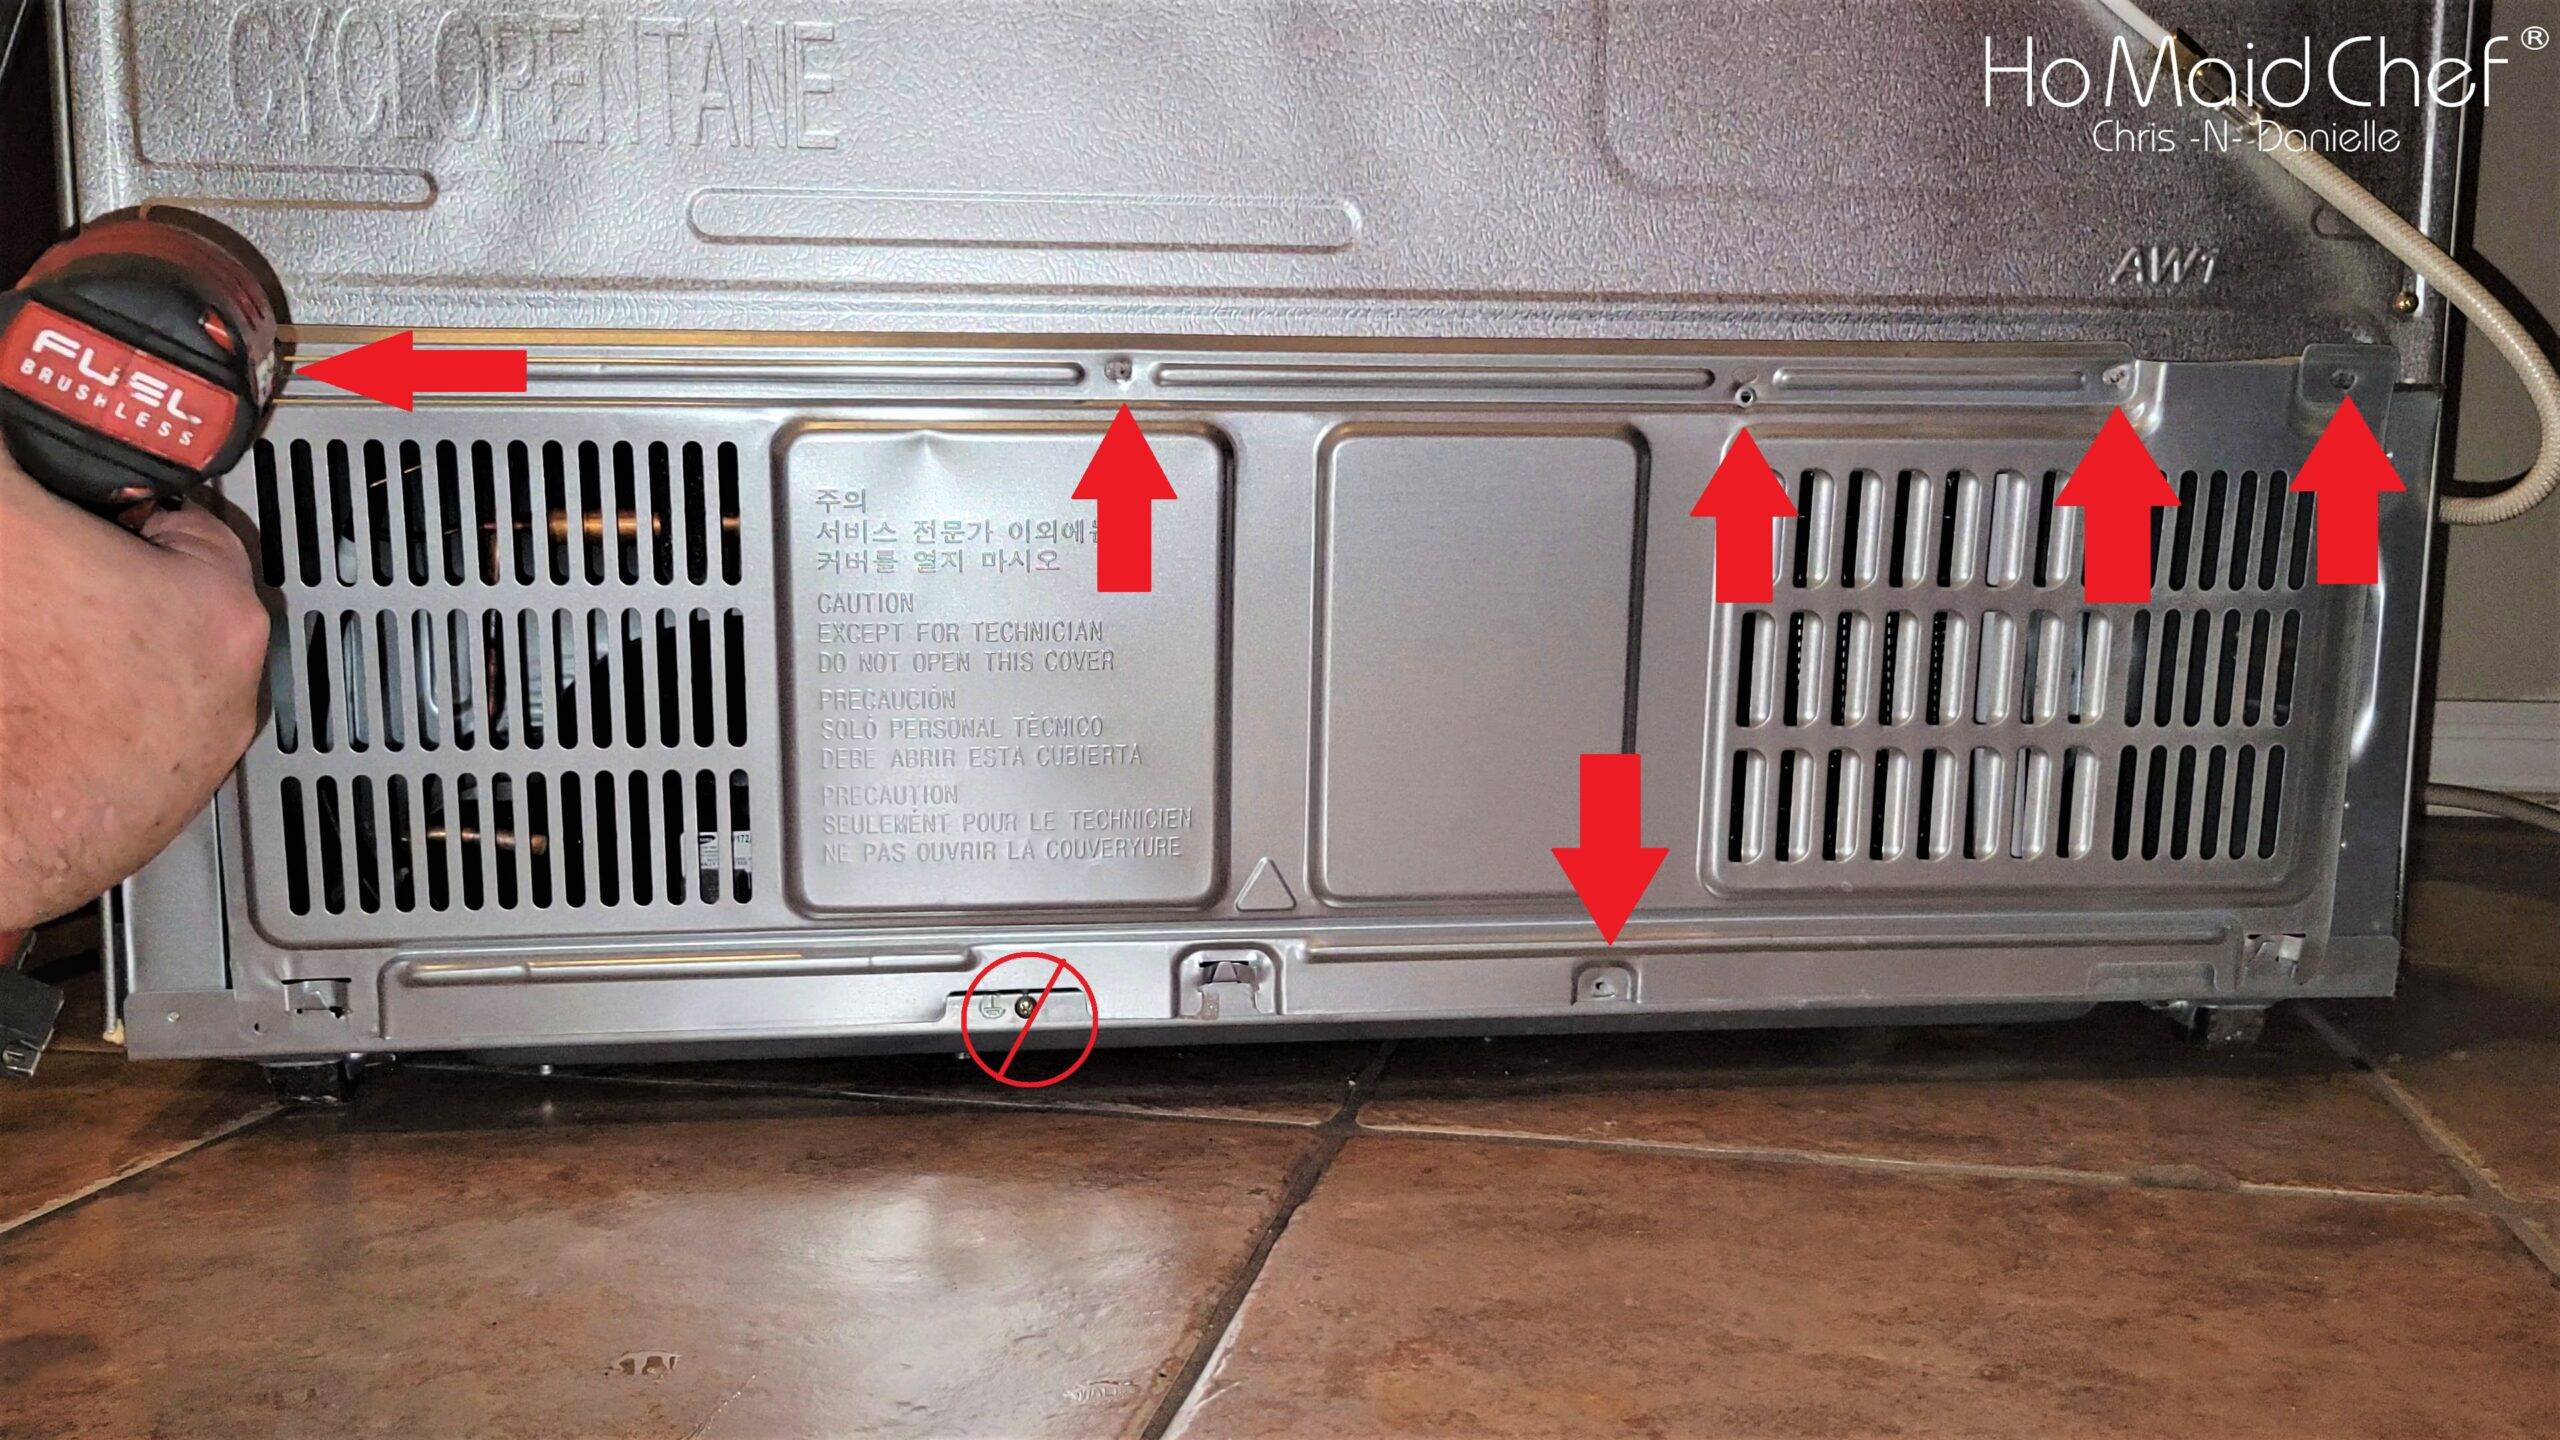
With the back panel of the fridge removed, you will clearly see the two drain hoses on either side of the condenser coils. The two hoses will pull off, they are different so you can’t mix and match when putting them back. The drain hose furthest from the fan has a hole at the bottom of the drain pan. When installing it back be sure the hose is back in the hole. Also this is a great time to clean out the dust, it will also help the fridge efficiency.
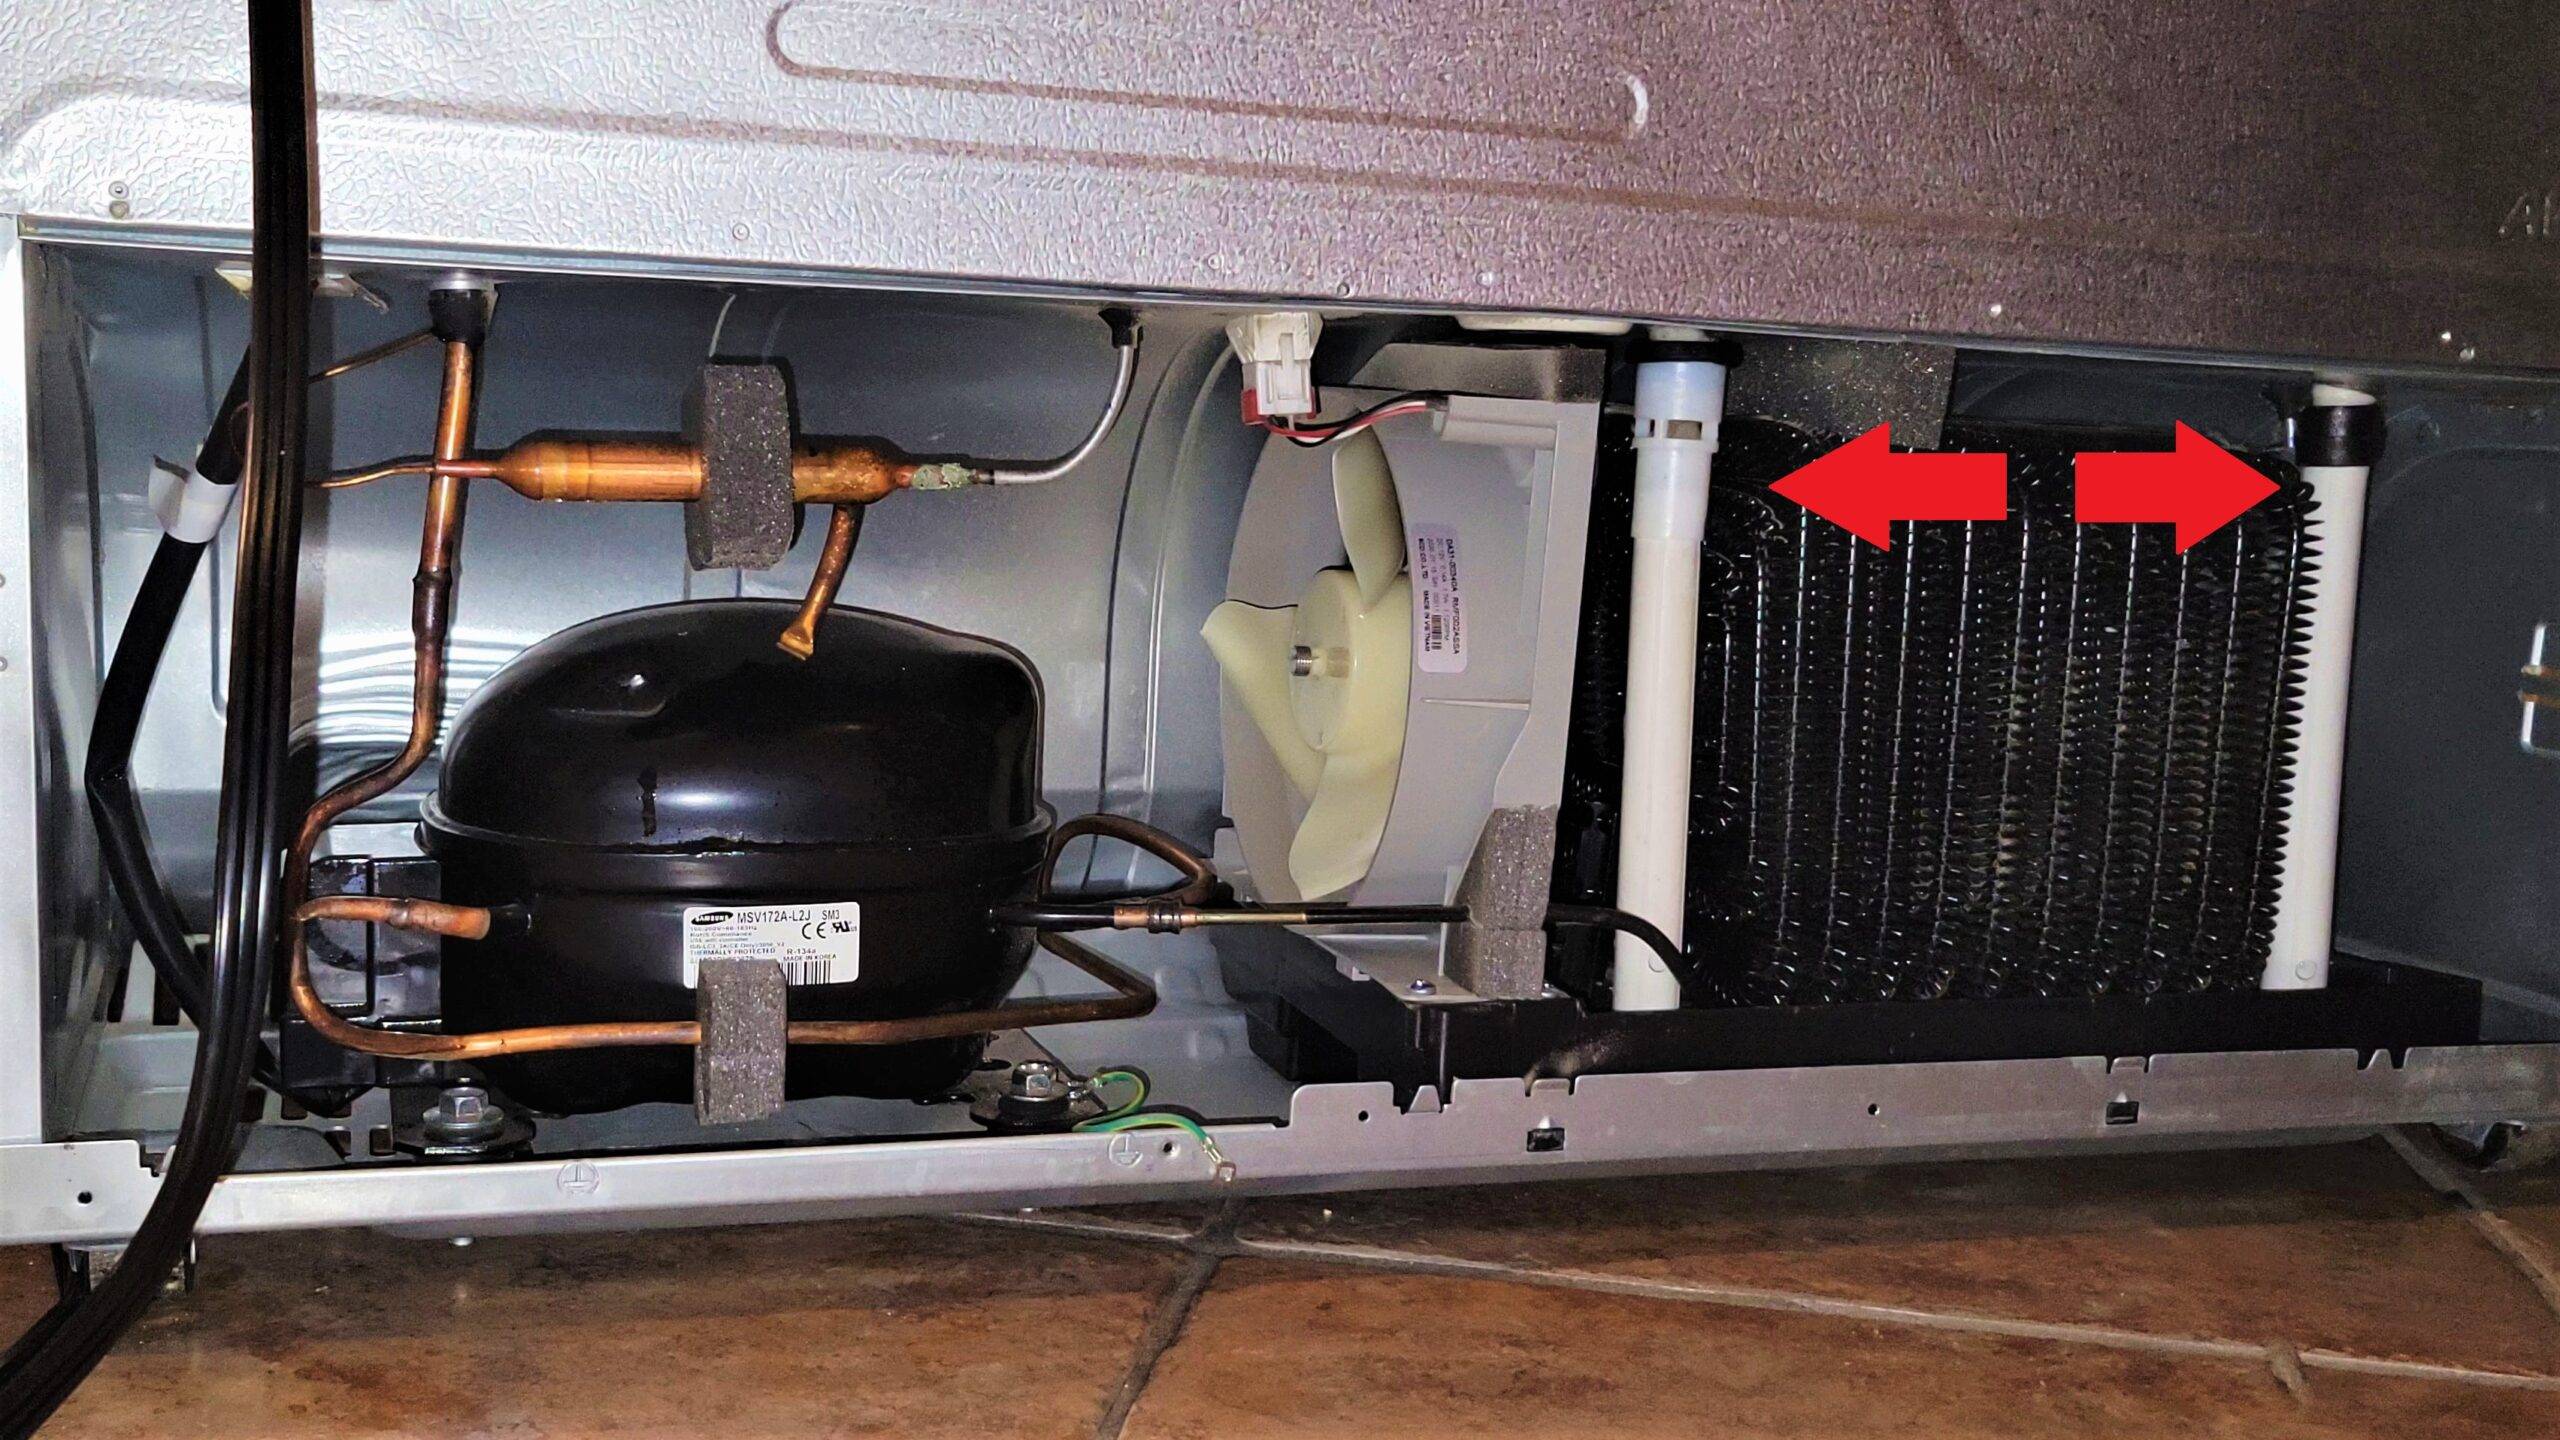
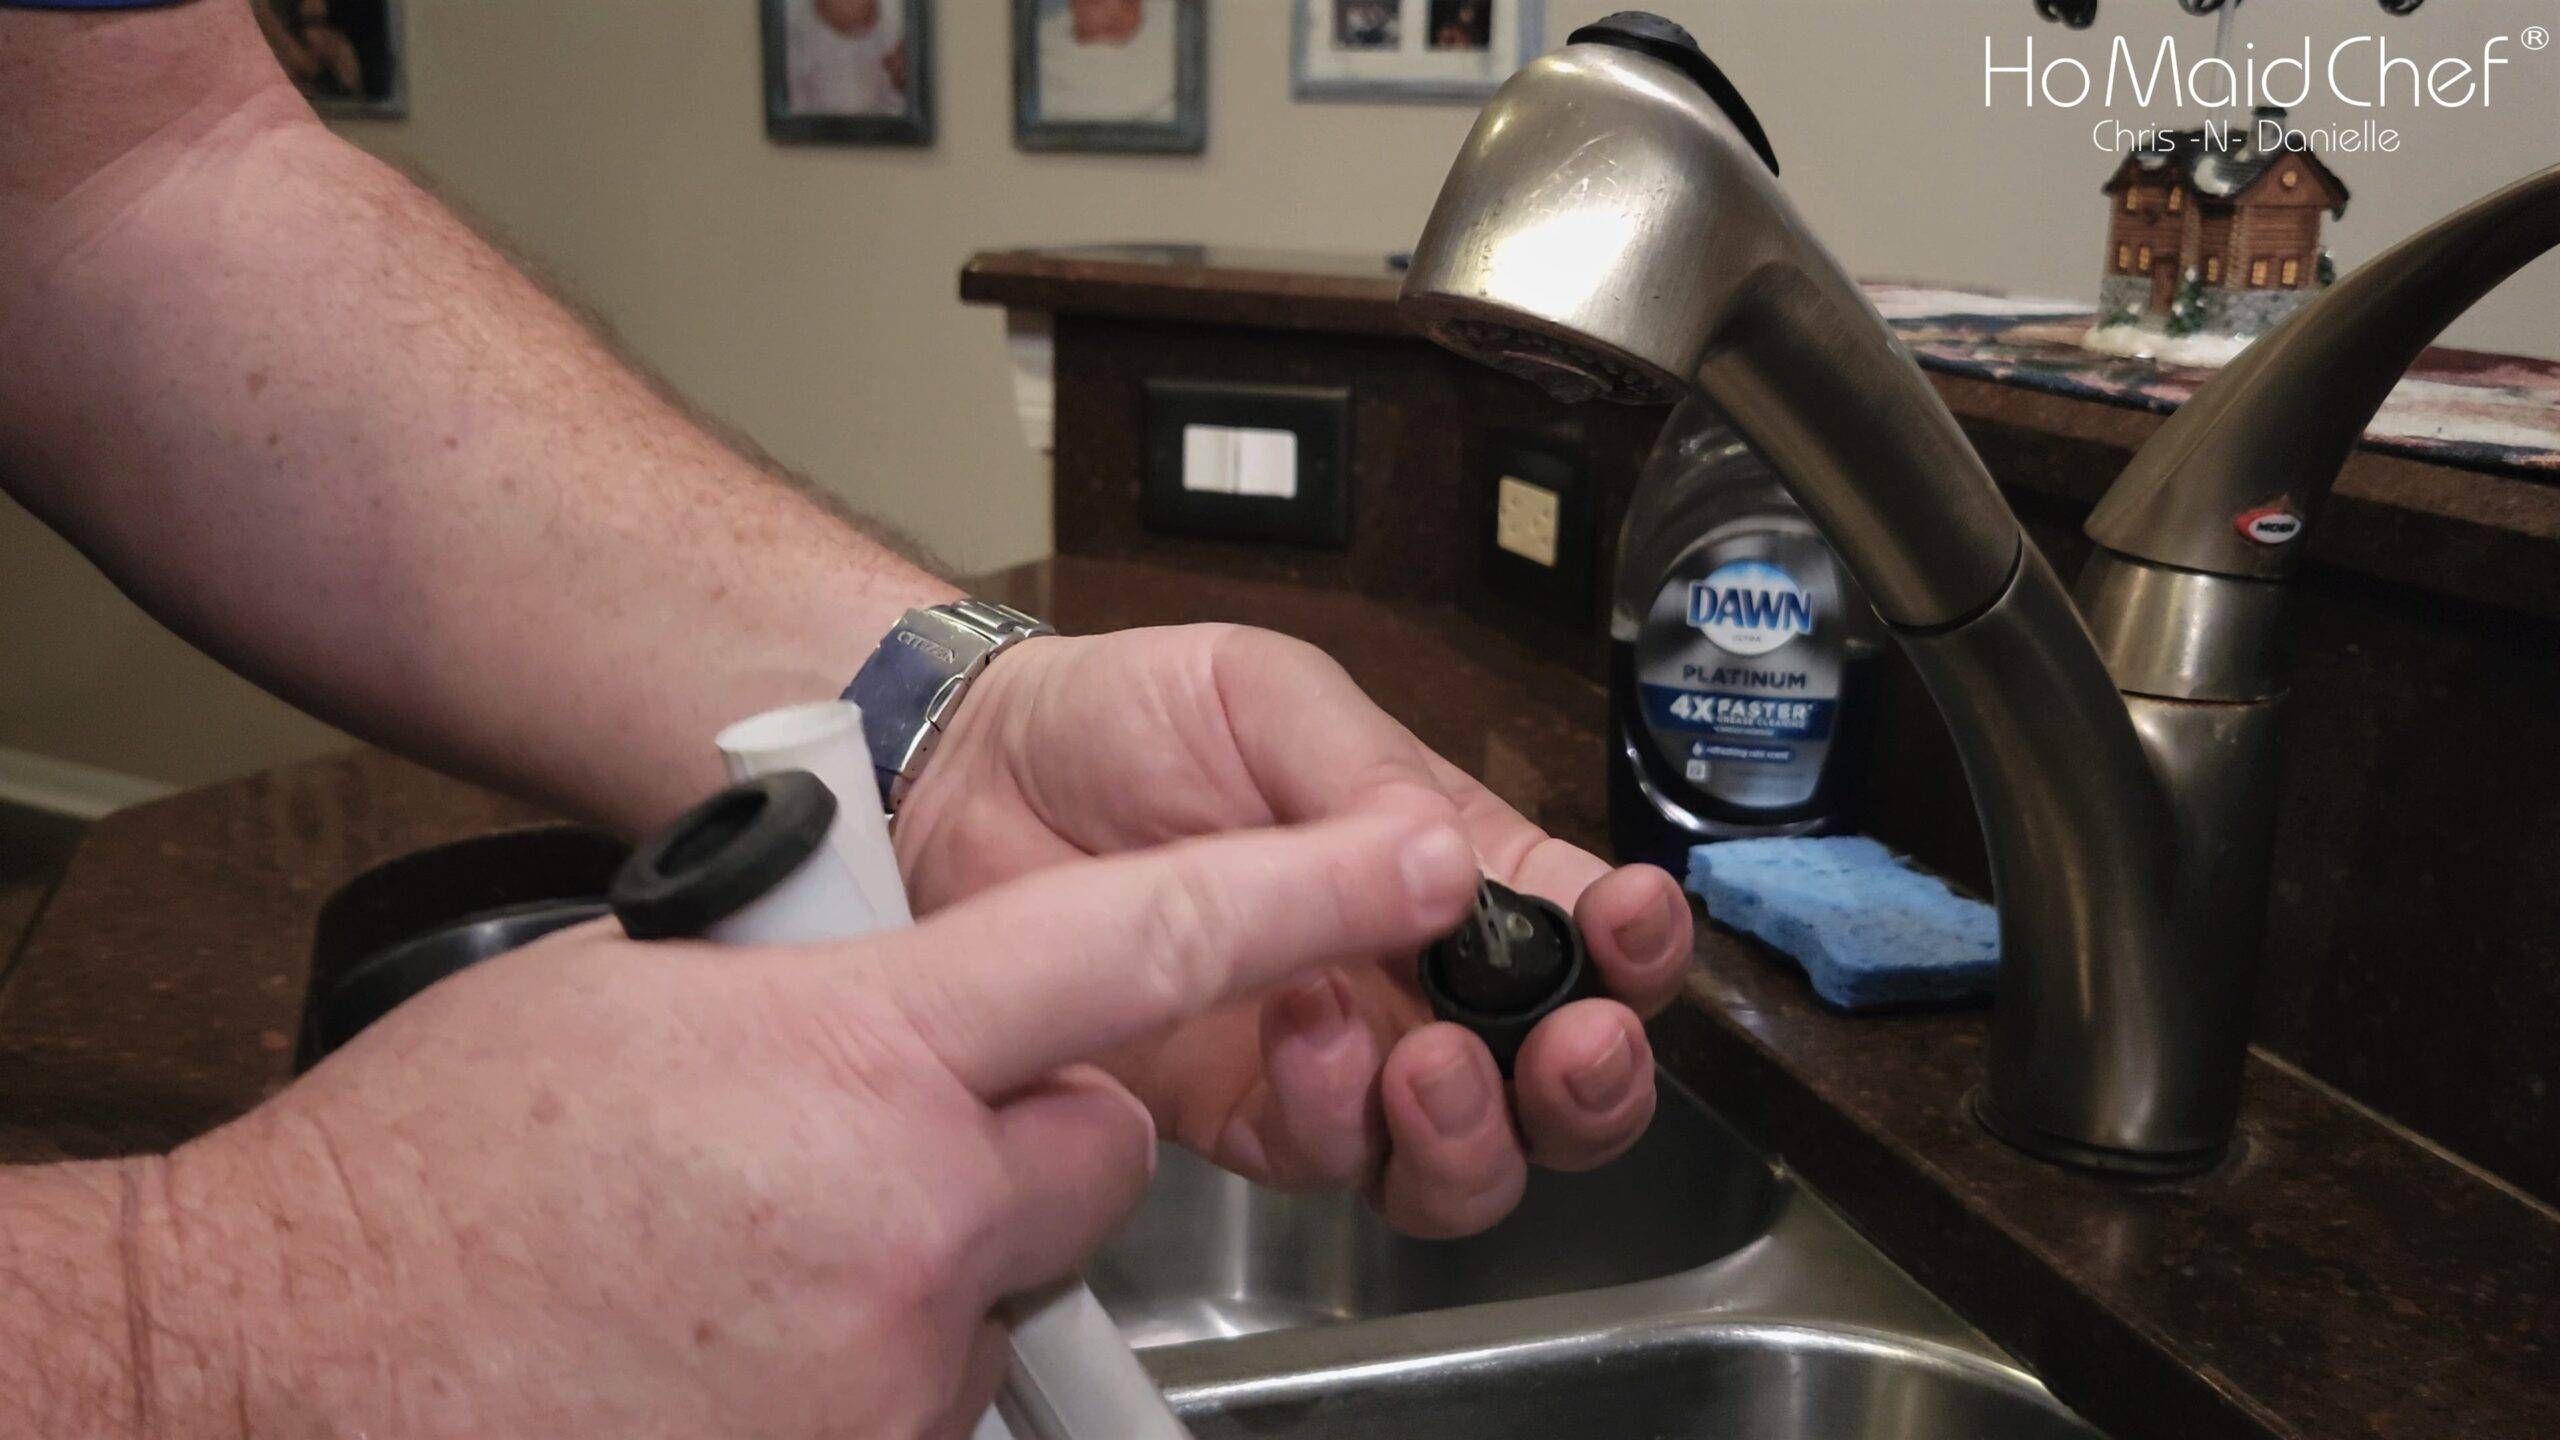
Cleaning the drain tubes is pretty straight forward, I just washed them out and made sure that water flowed through them. You may want to use soap if you have a mildew buildup. After clean, just put the condenser drain hoses back on, reference above picture.
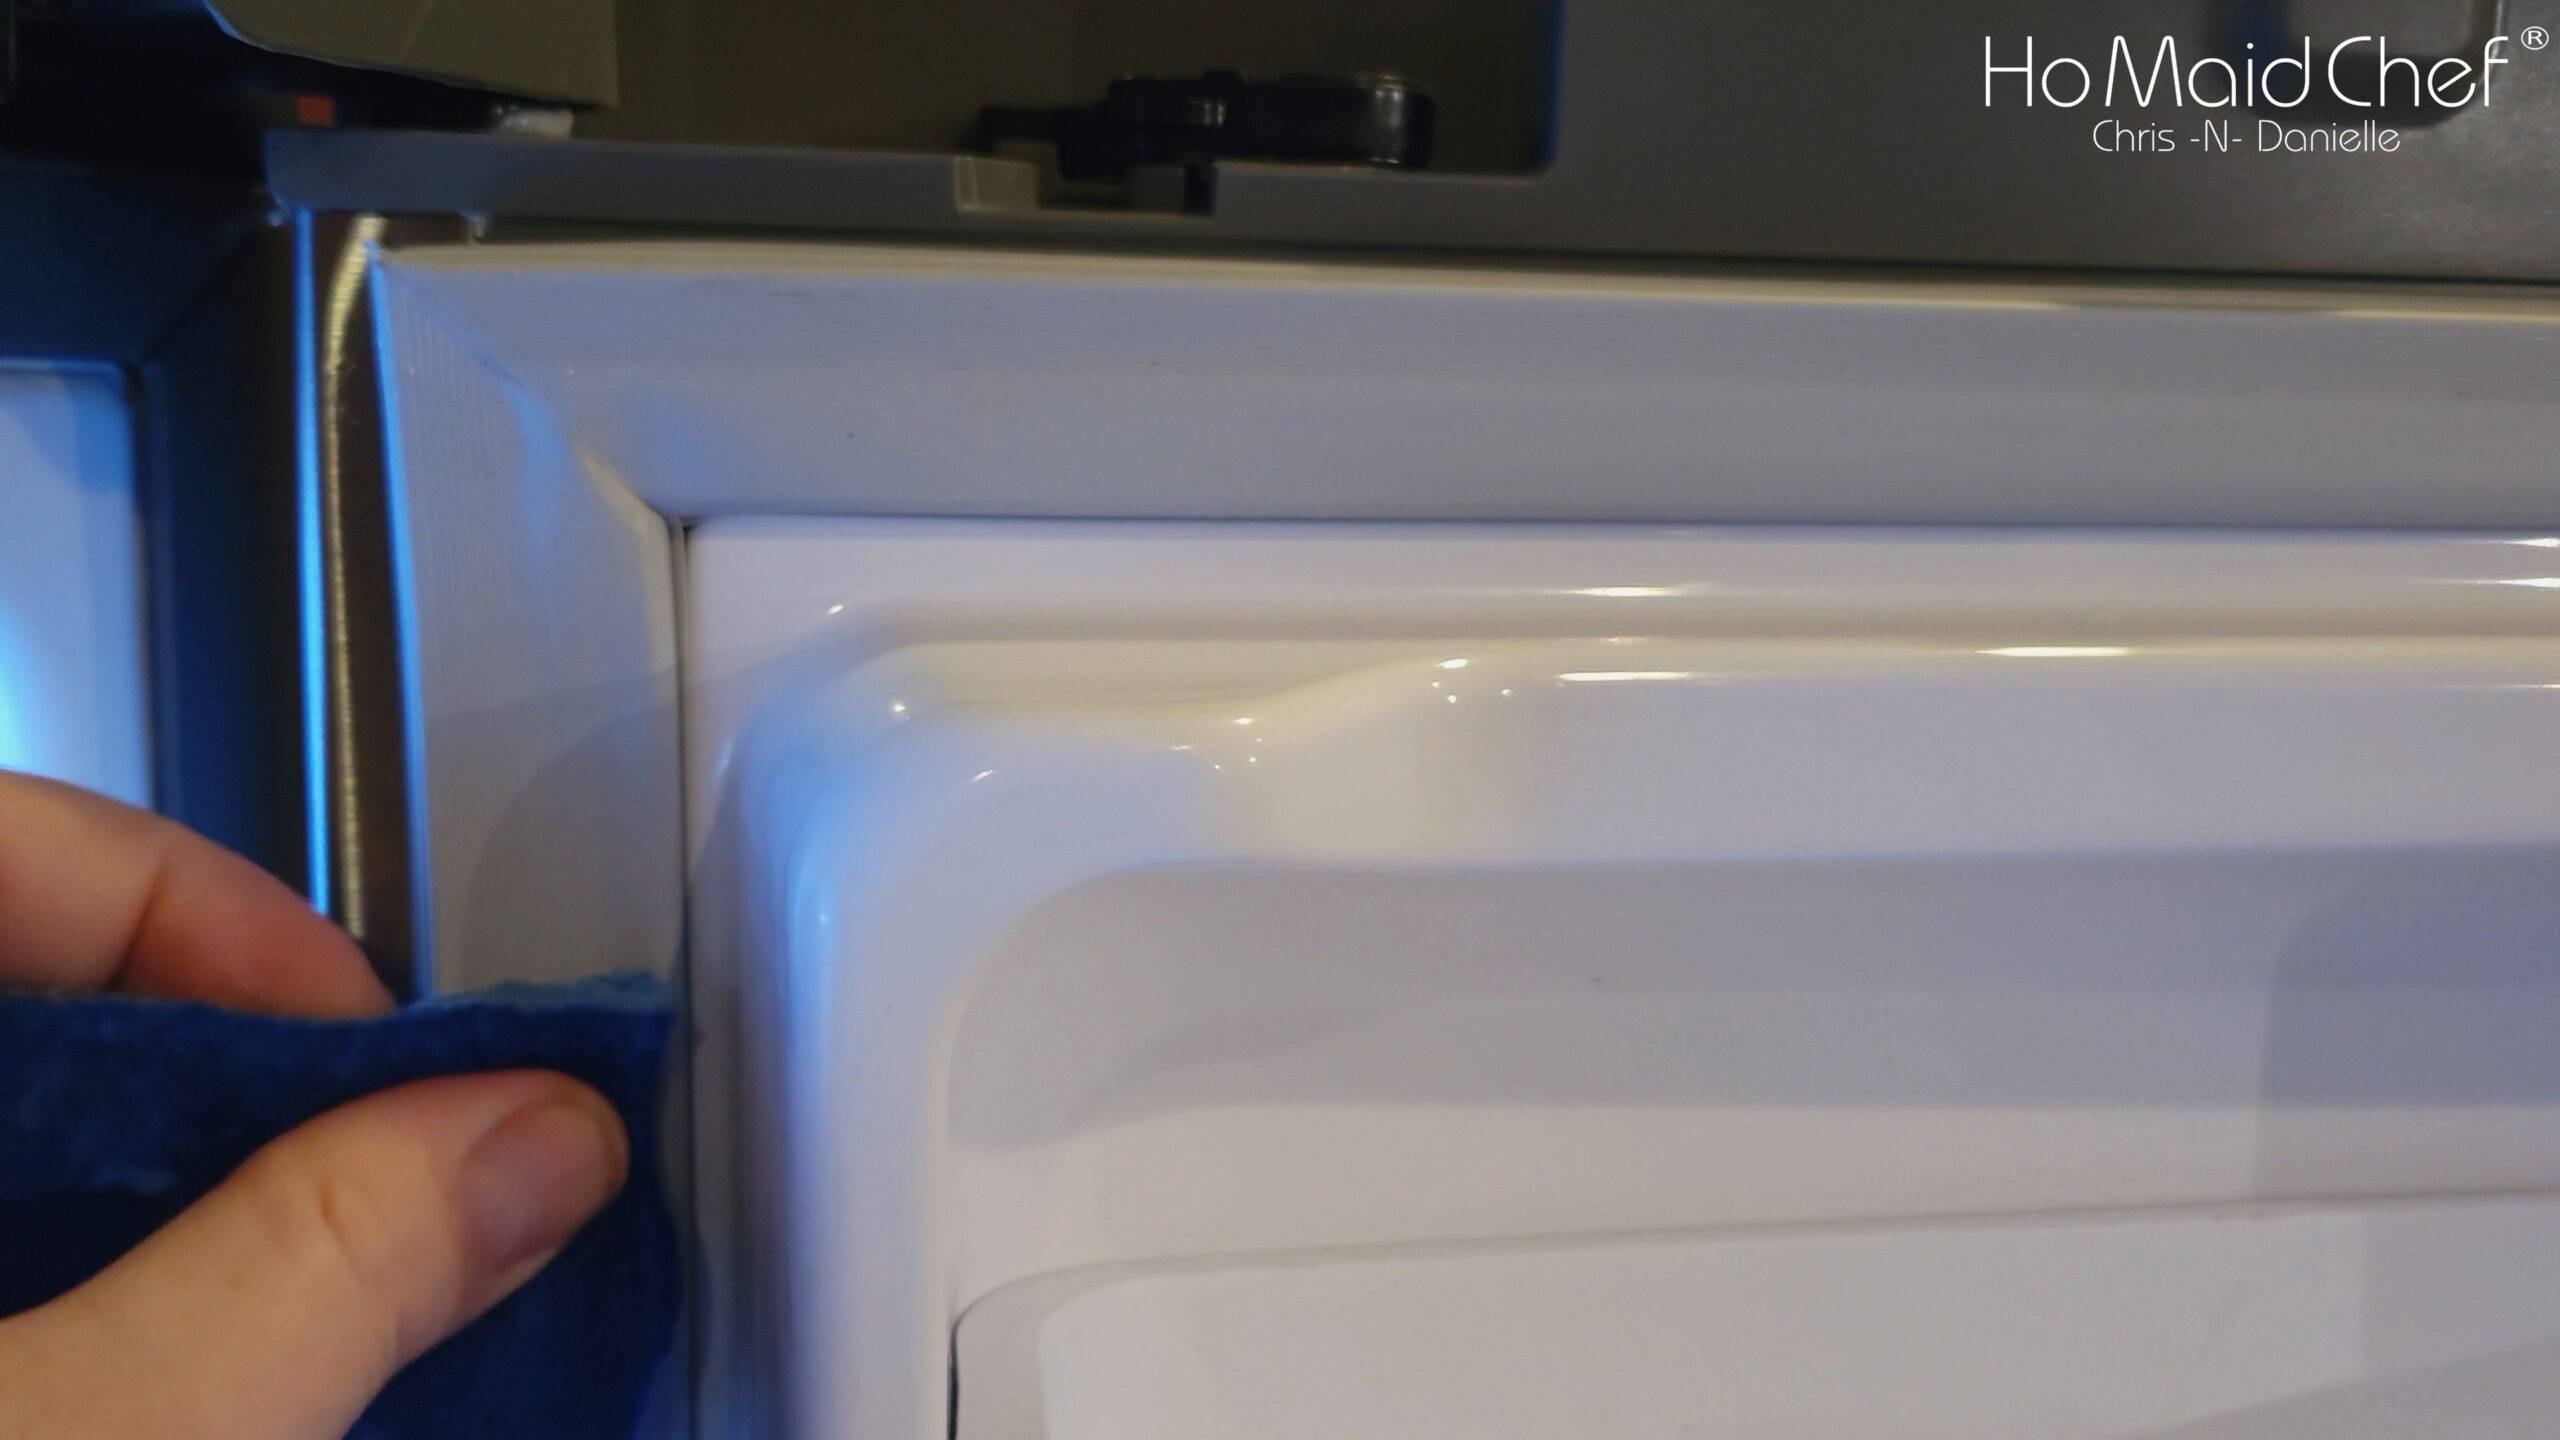
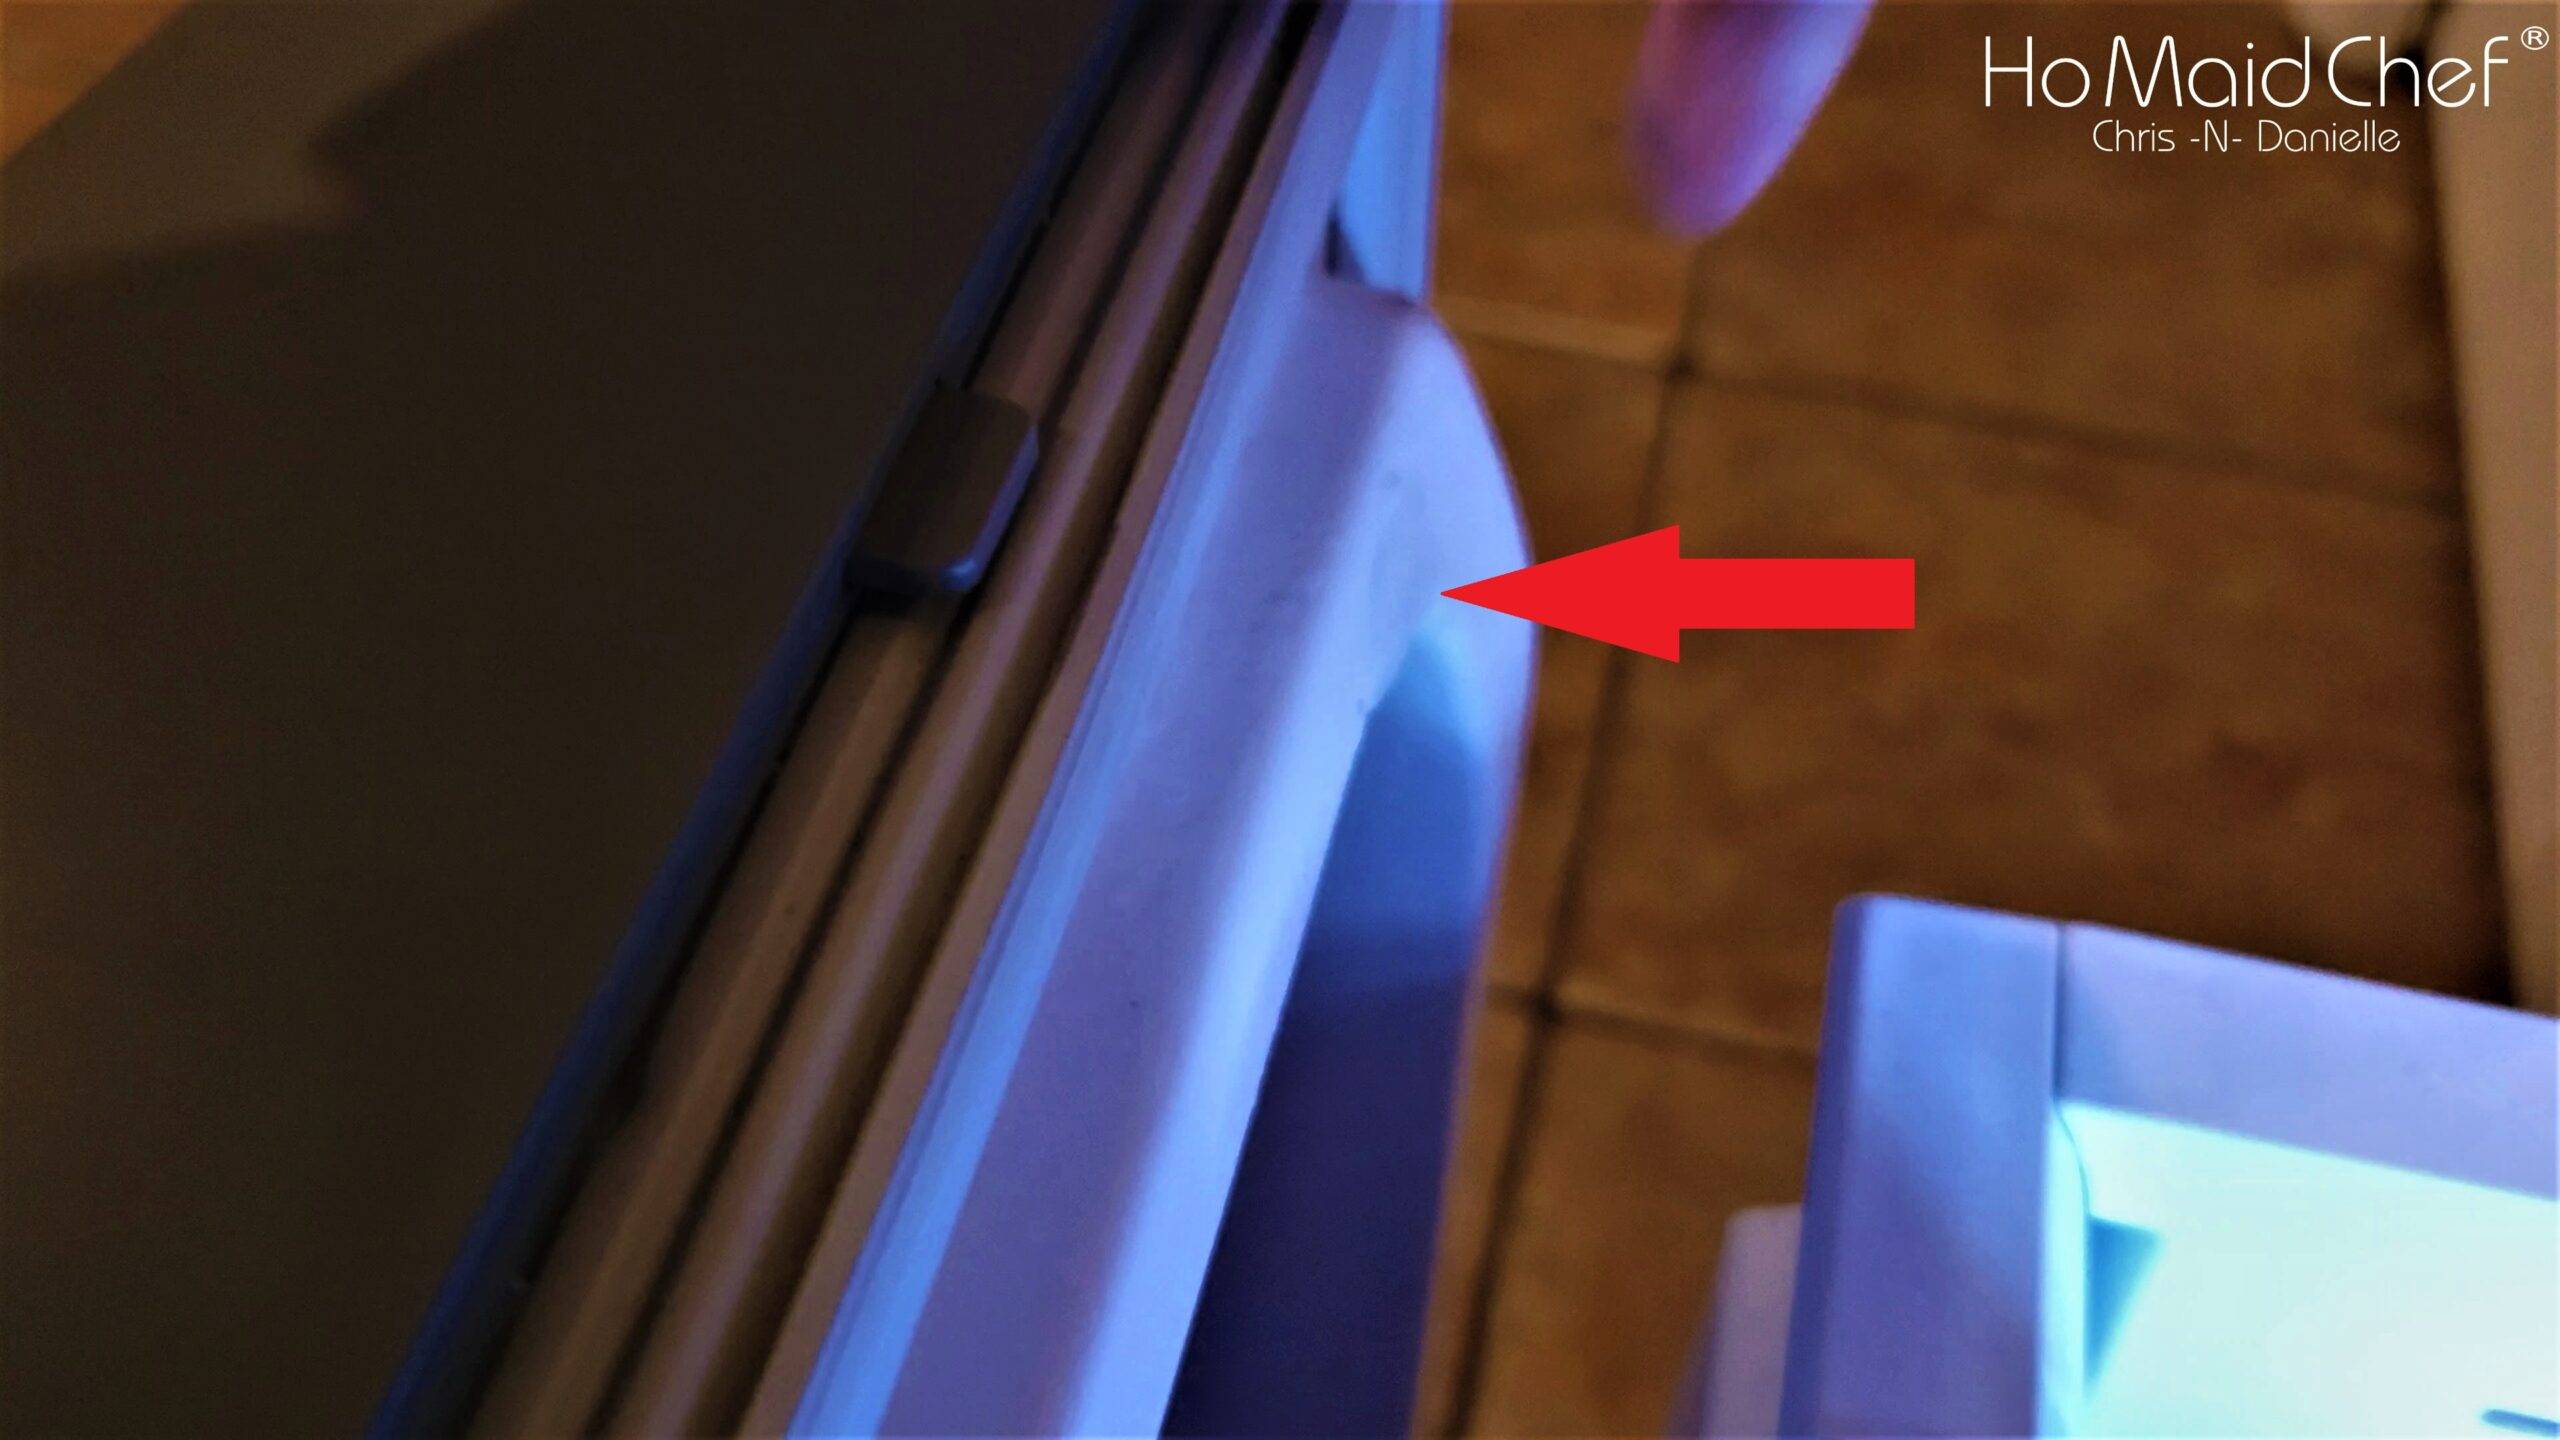
As you saw our hose was pretty clean, so there is a another issue causing our fridge to freeze up. When we open the fridge there is humidity on the glass and ice build up a seal on areas for the draw of the freezer. This means the door is not sealing correctly, most of the time cleaning is the issue, but sometimes seals do fail and need to be replaced.
Freezer ice build up on the corner of our freezer drawer.
We hoped this helped when your fridge issues. After fixing your fridge and your feeling hungry, checkout our recipe selection above. Also make sure to check us out on YouTube!
Video Index:
- 00:00 Intro
- 02:23 Tools Needed To Defrost A Samsung Refrigerator
- 03:26 How To Do A Force Defrost On A Samsung Refrigerator
- 04:41 How To Remove The Humidity Control Cover For Samsung Fridge
- 05:07 How To Remove The Evaporator Cover On Samsung Fridge
- 06:46 How To Defrost Samsung Fridge With Heat Gun or Hair Dryer
- 07:18 How To Test Samsung Fridge And Fan With Door Open
- 07:37 How To Put The Evaporator Cover Back On a Samsung Fridge
- 09:27 How To install The Dryer Bin Cover in A Samsung Fridge
- 10:04 How To Clean Drain Tubes On Samsung Fridge
- 13:55 Cleaning The Condenser On A Samsung Fridge
- 15:43 How To Prevent Your Samsung Fridge From Freezing Up
- 17:01 Our 2 Cents On The Samsung French Door Fridge
Tools We Love:
- Milwaukee 18-Volt Drill and Impact Driver Kit: https://amzn.to/366BwxM
- Husky Mechanics Tool Set: https://amzn.to/3kuGUzD
- Angle Grinder https://amzn.to/36FaC09
- Forney Easy Weld Welder https://amzn.to/3romDR1
- Welding Helmet https://amzn.to/3wOq58z


